
Are you planning to upgrade your bathroom or kitchen and facing the daunting task of drilling through porcelain tile? You’re not alone.
Many homeowners find themselves puzzled by the challenge. The fear of cracking or damaging those expensive tiles can be overwhelming. But don’t worry, with the right tools and techniques, you can confidently drill a hole in porcelain tile without any mishaps.
Imagine the satisfaction of completing your project with perfection, knowing that you’ve not only saved money but also gained a valuable skill. In this guide, you’ll discover the step-by-step process that will make you feel like a pro, ensuring your project’s success and turning your vision into reality. Keep reading to unlock the secrets of flawless tile drilling.
Choosing The Right Tools
Drilling a hole in porcelain tile requires precision and the right tools. Porcelain tiles are tough and can crack easily if not handled correctly. Selecting the proper equipment is crucial for a smooth and successful drilling process.
Drill Types Suitable For Porcelain
Using the right drill is essential for working with porcelain tiles. A regular drill can cause the tile to break or chip. Opt for a variable-speed power drill. This type gives you control over the speed, reducing the risk of damage. A cordless drill is also a good choice. It offers flexibility and ease of use.
Selecting The Appropriate Drill Bit
The drill bit plays a vital role in creating clean holes. Not all drill bits are suitable for porcelain tiles. Choose a diamond-tipped drill bit. It is specifically designed for hard surfaces like porcelain. This type ensures a smooth and precise hole without cracking the tile.
A carbide-tipped bit can work too. It is effective on porcelain but may require more care during drilling. Always ensure the drill bit is sharp and clean. A dull bit can lead to uneven holes and tile damage.
Preparation Steps
Drilling into porcelain tile might seem daunting. But with careful preparation, it’s manageable. Proper preparation prevents tile damage and ensures a clean hole. Follow these steps to make your task easier.
Marking The Drilling Spot
Start with a pencil or marker. Make a clear mark where you need the hole. Use a ruler for accuracy. Ensure the spot is away from tile edges. Avoid tile corners to prevent cracking. A marked spot helps guide your drill.
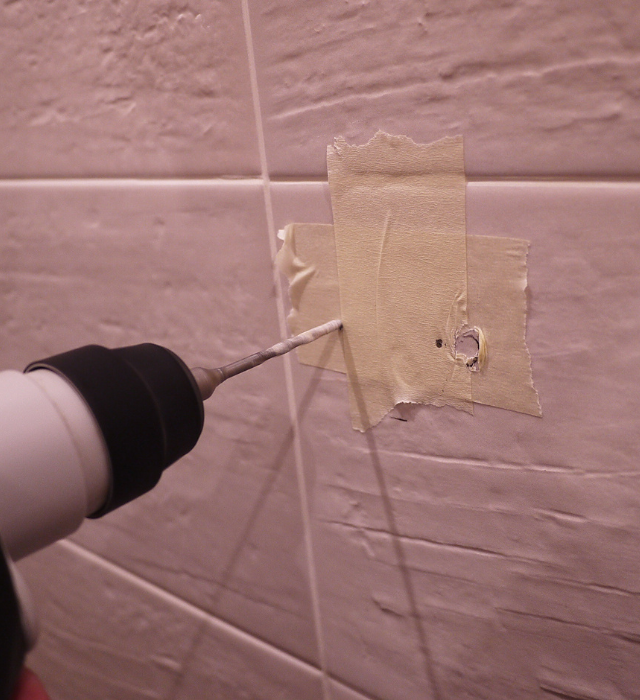
Securing The Tile Surface
Use masking tape over the marked area. Tape reduces drill slipping. It also minimizes chipping. Press tape firmly for a secure hold. Consider using a small piece of wood. Place it behind the tile for support. This helps prevent breaking. Ensure the tile is stable before drilling.
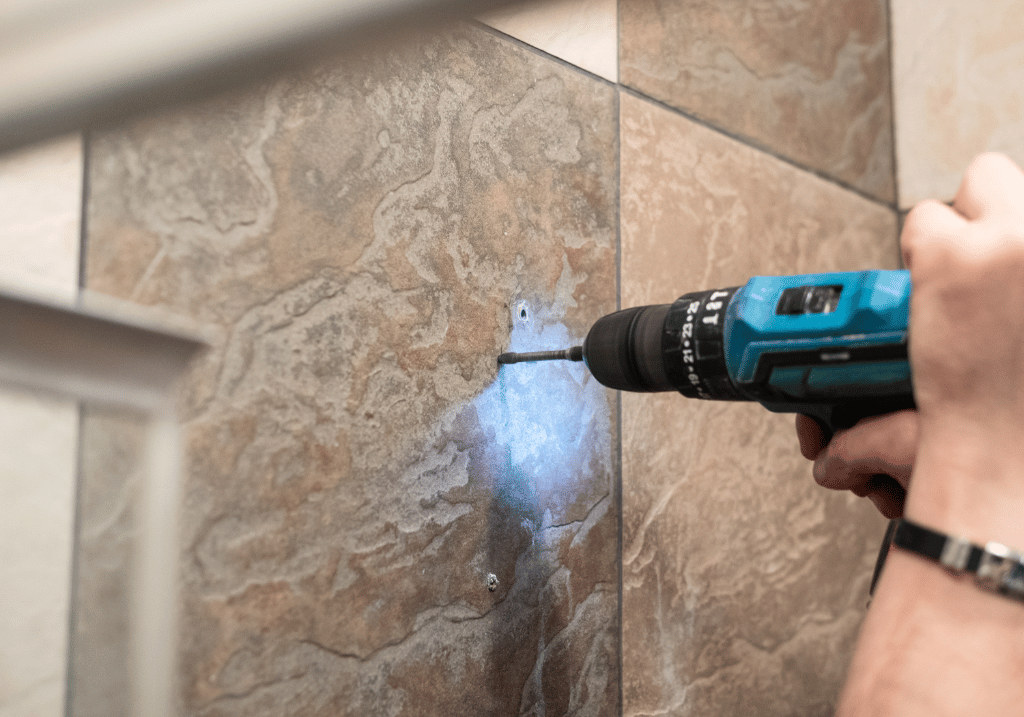
Drilling Techniques
Drilling a hole in porcelain tile requires patience and specific tools. Start with a carbide-tipped drill bit. Apply gentle pressure and keep the drill steady to avoid cracks.
Drilling through porcelain tile requires precision. The right technique ensures clean results. Porcelain is tough. It can easily crack without care. Understanding specific drilling methods can help achieve success. The following techniques will guide you through this process.Starting With A Pilot Hole
Begin with a pilot hole. This step reduces the risk of cracking. Use a smaller drill bit first. This creates a guide for your main hole. Ensure the drill bit is designed for tile. Diamond-tipped bits work best. The pilot hole gives you control. It prevents the drill from slipping. This technique helps maintain accuracy.Maintaining Steady Pressure
Apply steady pressure on the drill. Gentle force is key. Don’t push too hard. Excessive pressure can break the tile. Let the drill do the work. Keep the speed slow. Fast drilling generates heat. Heat causes cracks. Patience ensures a clean hole. Use water to cool the drill bit. It keeps the temperature down. Wet drilling also reduces dust. Safety and precision go hand in hand.
Credit: www.instructables.com
Cooling Methods
Drilling holes in porcelain tile requires cooling methods to prevent cracking. Use water or a special cooling lubricant. This keeps the drill bit and tile cool, ensuring a clean, smooth hole.
Drilling through porcelain tile can be a tricky task. These tiles are tough and durable. They require special care to prevent damage. Cooling methods play a crucial role in this process. Keeping the drill bit cool ensures smooth drilling. It also prevents the tile from cracking. Below, we’ll explore various cooling techniques. Each method has its unique benefits.Using Water For Cooling
Water is the most common cooling method. It reduces heat from the drill bit effectively. A steady stream keeps the temperature down. You can use a spray bottle for this. Spray water on the tile during drilling. It ensures the tile remains cool. This minimizes the risk of damage. Water also acts as a lubricant. It helps the drill bit move smoothly.Alternative Cooling Techniques
Sometimes, water isn’t an option. Alternative techniques can be useful. Some people use cooling gels. These gels are designed to reduce heat. They are applied directly to the tile. Another option is using a wet sponge. Keep the sponge damp and press it against the tile. This method provides consistent cooling. It can be handy for small projects. You can also try ice packs. Place the ice pack near the drilling area. It absorbs excess heat efficiently.Safety Precautions
Drilling a hole in porcelain tile requires precision and care. Safety is crucial. Handling tools incorrectly can lead to accidents or damage. Protect yourself by following essential safety precautions. This ensures both your safety and a successful drilling process.
Protective Gear Essentials
Wear safety goggles to shield your eyes from debris. Use gloves to protect your hands from sharp edges. A dust mask can prevent inhaling tile dust. Appropriate footwear reduces the risk of injury. Ensure your clothing is snug to avoid getting caught in tools.
Handling Tools Safely
Inspect tools before use for any damage. Ensure they are in good working condition. Use tools according to their instructions. Hold drills firmly and maintain control at all times. Keep fingers away from moving parts. Disconnect tools when not in use. This prevents accidental start-up.
Credit: ceramiccity.ie
Post-drilling Care
Drilling holes in porcelain tile requires care to avoid damage. After drilling, clean the area gently to remove debris. Use a damp cloth to wipe the tile and ensure the hole is smooth and ready for use.
Drilling a hole in porcelain tile can be a delicate process, but your job doesn’t end once the drill is put away. Post-drilling care is crucial to ensure the longevity and appearance of your tiles. Paying attention to the small details after drilling can prevent bigger issues down the line. Here’s how you can maintain the integrity of your tiles with some simple steps.Cleaning The Drilled Area
Once you’ve successfully drilled your hole, it’s important to clean the area thoroughly. Dust and debris can accumulate around the hole, potentially causing scratches if left unattended. Use a soft, damp cloth to wipe away any residue gently. Consider using a vacuum with a brush attachment to remove finer particles. Avoid harsh chemicals; they can damage the tile’s finish. A mild soap and water solution usually does the trick.Checking For Damage
After cleaning, inspect the drilled area for any signs of damage. Even a small chip or crack can develop into a larger problem if not addressed. Check the edges of the hole and surrounding tiles for any imperfections. If you notice any minor chips, a tile repair kit can be a handy solution. These kits usually contain filler material that can mask small damages effectively. Would you feel comfortable leaving a small crack untreated, knowing it might worsen over time? A thorough inspection might also reveal that everything went smoothly. In that case, take a moment to appreciate your handiwork! Proper post-drilling care not only preserves your tiles but also enhances their appearance.Common Mistakes To Avoid
Drilling into porcelain tile can be tricky. Many make mistakes that lead to damage. Understanding these mistakes can save time and effort. Avoid these common errors for a smoother drilling process.
Forgetting To Cool The Bit
Heat builds up quickly when drilling porcelain. This can damage the drill bit. Always cool the bit frequently with water. Without cooling, the bit may wear out or break. Water also reduces tile cracking risk. Keep a spray bottle handy during drilling.
Applying Excessive Pressure
Too much pressure can crack the tile. Porcelain is hard, but not unbreakable. Let the drill do the work. Gentle pressure ensures a clean hole. Slow, steady drilling is key. This reduces the chance of damaging the tile. Patience pays off with a perfect finish.
Credit: ceramiccity.ie
Expert Tips For Best Results
Drilling into porcelain tile requires precision and the right tools. Start with a diamond-tipped drill bit. Apply gentle, consistent pressure to avoid cracks.
Drilling a hole in porcelain tile can be a daunting task. The risk of cracking or damaging the tile is high, but with some expert tips, you can achieve perfect results. Whether you’re mounting fixtures in your bathroom or adding a sleek new backsplash in your kitchen, attention to detail is key. Let’s dive into some practical advice that will ensure your project goes smoothly.Choosing Quality Equipment
Investing in high-quality equipment is crucial. A diamond-tipped drill bit is your best friend for this task. These bits are designed to cut through hard surfaces like porcelain with minimal risk of chipping. Consider using a variable-speed drill. This gives you more control, allowing you to start slow and increase speed as needed. A steady hand and a reliable tool make all the difference. Do you want to avoid the frustration of broken tiles? Ensure your drill is fully charged or plugged in to maintain consistent power throughout the job.Practicing Patience And Precision
Rushing through the process can lead to mistakes. Start drilling at a low speed to create a small indentation. This will guide the bit and prevent it from slipping. Apply gentle pressure. Let the drill bit do the work instead of forcing it. This reduces the risk of cracking the tile and helps achieve a cleaner hole. Have you ever noticed how taking your time can improve results in various tasks? The same principle applies here. Check your progress frequently and adjust as needed to maintain precision. By following these tips, you can successfully drill holes in porcelain tile without stress. Remember, the right tools and a patient approach are your best allies in this project.Frequently Asked Questions
What Is The Best Drill Bit For Porcelain Tile?
Diamond-tipped drill bits are ideal for porcelain tiles. They offer precision and durability. Wet drilling reduces heat and prevents cracking. Ensure steady pressure for clean cuts.
How To Drill Through Porcelain Tile Without Cracking?
Use a diamond drill bit for porcelain tiles. Start with low speed and apply light pressure. Keep the drill bit cool using water. Secure the tile with masking tape to prevent slipping. Avoid hammer drills; they can crack tiles.
Can I Use A Regular Drill Bit On Porcelain Tile?
Using a regular drill bit on porcelain tile isn’t recommended. Porcelain is hard and can crack easily. Use a diamond-tipped drill bit designed for tiles. It ensures precision and reduces the risk of damage. Always use water for cooling and drill slowly for best results.
Should You Drill Porcelain Tile Fast Or Slow?
Drill porcelain tiles slowly to prevent cracking or chipping. Use a diamond-tipped bit for best results. Apply steady pressure and keep the drill cool with water. This ensures a clean and precise hole without damaging the tile.
Conclusion
Drilling a hole in porcelain tile is easier than you think. Start with the right tools. Use a carbide-tipped drill bit. Maintain a steady hand. Apply light pressure to avoid cracks. Wet the tile to reduce heat and dust. Patience is key.
Take your time, and don’t rush. Follow these steps for a clean hole. Your DIY project will look professional. Now, you can confidently tackle this task. Enjoy your newly installed fixtures. Feel proud of your handiwork. Happy drilling!


