
Ever found yourself staring at a rock, wondering how to drill a hole through it? You’re not alone.
Whether you’re crafting a unique piece of jewelry, creating a garden decoration, or working on a DIY project, drilling into rock can seem daunting. But here’s the good news: it’s easier than you think. By understanding the right tools and techniques, you can transform a seemingly impossible task into a simple one.
Imagine the satisfaction of holding that perfectly drilled rock, knowing you did it yourself. Ready to get started and turn your vision into reality? Let’s dive in and uncover the secrets that will empower you to drill with confidence.
Credit: eternaltools.com
Essential Tools And Equipment
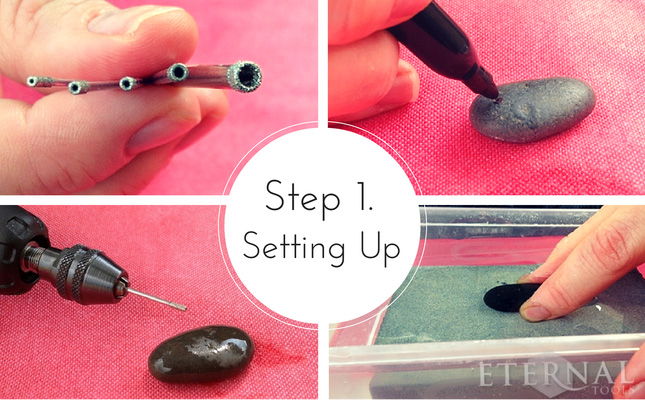
Drilling a hole in a rock requires the right tools. Use a sturdy drill and a carbide-tipped masonry bit. Secure the rock and apply steady pressure while drilling to ensure a clean hole. Safety gear is essential to protect yourself during the process.
Drilling a hole in a rock might sound like a challenging task, but with the right tools and equipment, it becomes a rewarding DIY project. Whether you’re crafting jewelry, creating a water feature, or anchoring garden sculptures, the precision and power of the tools you choose will make all the difference. Let’s explore the essential tools and equipment you’ll need to turn your rocky aspirations into reality.Drill Types For Rock
When drilling into rock, not just any drill will do. Hammer drills and rotary hammer drills are your best bets. A hammer drill provides a pounding motion that helps break up the rock surface, while the rotary hammer drill offers more power for tougher jobs. If you’ve ever tried using a regular drill, you probably noticed it struggled or stalled. Do you need to drill through granite or marble? A rotary hammer drill can handle these hard surfaces with ease. Always ensure your drill has a variable speed option, so you can adjust as needed.Choosing The Right Drill Bits
The right drill bit is crucial for cutting through rock efficiently. Masonry bits, specifically those tipped with carbide, are ideal for most rock types. Diamond core bits provide the precision needed for delicate tasks like jewelry-making or when a smooth finish is essential. Have you ever tried using a wood drill bit on rock? It’s like trying to cut a steak with a butter knife. Always check the bit for wear and tear before starting your project.Safety Gear And Accessories
Safety should never be an afterthought. Protect your eyes with safety goggles and your hands with sturdy gloves. Flying rock chips can cause injuries if you’re not prepared. Ear protection is also vital, especially if you’re using a hammer drill for an extended period. Consider using a dust mask to avoid inhaling fine particles. Have you ever thought about how much dust drilling can produce? Using a vacuum attachment can help minimize the mess and keep your workspace clean. With the right tools and equipment, drilling a hole in a rock is not just feasible—it’s an exciting endeavor. What project will you tackle next with your newfound knowledge?
Credit: www.pinterest.com
Preparing The Rock Surface
Start by cleaning the rock surface to remove dirt and debris. Ensure stability by placing the rock securely on a flat surface. This preparation helps achieve precise drilling and prevents drill bit damage.
Drilling a hole in a rock might sound like a daunting task, but with the right preparation, it can be manageable and even rewarding. Before you start drilling, it’s essential to prepare the rock surface properly. A well-prepared surface ensures that your drill bit can penetrate smoothly and reduces the risk of damaging your tools or the rock itself. Let’s dive into the steps you should take to prepare your rock for drilling.Cleaning The Rock
Start by thoroughly cleaning the rock surface. Dust and dirt can hinder the drilling process, causing unnecessary friction and wear on your drill bit. Use a stiff brush to remove loose debris. If the rock is particularly grimy, a little water and soap can help wash away stubborn dirt. Ensure the rock is completely dry before proceeding to the next steps. Clean surfaces not only help in drilling but also reveal the rock’s natural patterns and colors.Marking The Drilling Spot
Once the rock is clean, it’s time to mark the drilling spot. Decide where you want the hole and make a clear mark using a pencil or chalk. This mark will guide your drill and help you maintain precision. Think about the reason for drilling and how the final result will look. Would you like a hole for hanging, for decoration, or for utility? Marking accurately can save you from costly mistakes and ensure your project turns out as planned.Securing The Rock
Before you start drilling, it’s vital to secure the rock to prevent it from moving. A stable rock is crucial for safety and precision. Use a clamp or a vise to hold the rock firmly in place. Imagine trying to drill into a rock that keeps shifting—it’s frustrating and potentially dangerous. If you don’t have professional tools, improvise with materials like towels or rubber mats to grip the rock securely. This step might seem tedious, but remember, a steady rock can make all the difference between a successful project and a failed attempt. Have you ever tried drilling without securing your material first? It’s like trying to ride a bike without stabilizers—it might work, but you’re bound to have a wobble. Securing your rock paves the way for a smoother drilling experience and gives you more control over the outcome. By taking these preparatory steps seriously, you’re setting yourself up for drilling success. How do you ensure your projects go smoothly?Drilling Techniques
Drilling a hole in a rock requires the right tools and technique. Start by choosing a carbide-tipped masonry drill bit. Secure the rock on a stable surface, ensuring it won’t move. Apply steady pressure and drill slowly to avoid overheating or cracking.
Drilling into a rock is not as intimidating as it might sound. With the right techniques and tools, you can achieve it efficiently. Whether you’re working on a DIY project or just curious, understanding the correct drilling techniques is crucial. Let’s dive into the methods that can help you conquer the rock drilling challenge.Drilling With A Hammer Drill
A hammer drill is one of the most effective tools for drilling into rock. It uses a rapid hammering motion combined with rotation to break and drill into hard surfaces. Picture it like a mini jackhammer in your hand. When using a hammer drill, ensure you have the right drill bit, typically a carbide-tipped masonry bit. This bit is specifically designed to withstand the impact and friction produced during the drilling process. Safety is paramount. Always wear protective eyewear and gloves to protect against flying debris. You don’t want a stray rock chip heading towards your eyes.Using A Rotary Drill
A rotary drill is another option, especially if you’re dealing with softer rocks. It doesn’t have the hammering action, but it rotates at high speeds to penetrate the rock. The key here is patience. Without the hammer action, the process might take a bit longer. But, with steady pressure and a sharp drill bit, you’ll make progress. Consider starting with a pilot hole. This small initial hole can guide the larger drill bit, making it easier to drill through the rock without slipping.Wet Vs. Dry Drilling Methods
Wet and dry drilling methods each have their advantages. Wet drilling involves using water to cool the drill bit and minimize dust. It’s particularly useful when working indoors or in confined spaces. Think about the mess that drilling can create. Wet drilling significantly reduces airborne dust, making cleanup easier. Plus, it prolongs the life of your drill bit by preventing overheating. Dry drilling, on the other hand, is simpler and requires less preparation. It’s suitable for outdoor projects where dust is less of a concern. However, be prepared for more dust and potentially higher wear on your drill bit. Have you ever tried drilling into a rock before? Which technique worked best for you? If you’ve been hesitant, now’s the perfect time to give it a shot. With the right approach, you’ll find it’s more doable than you initially thought.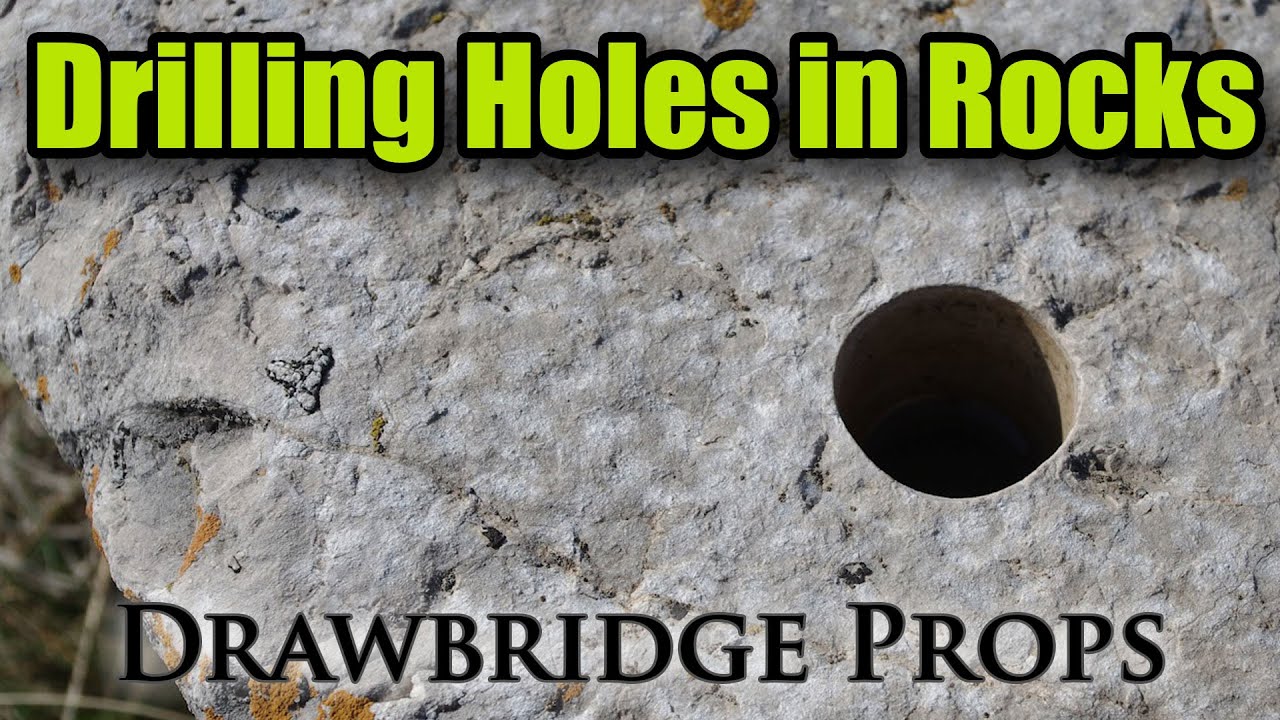
Credit: www.youtube.com
Managing Drill Speed And Pressure
Drilling a hole in a rock requires careful control of drill speed and pressure. Fast speeds can cause overheating, while too much pressure can lead to breakage. Balancing these elements ensures a smooth and efficient drilling process without damaging the tool or the rock.
Drilling a hole in a rock might seem like a straightforward task, but the secret to a clean cut lies in how you manage the drill’s speed and pressure. It’s a bit like learning to play an instrument; you need to develop a feel for it. Understanding how to adjust the speed and apply the right pressure can make all the difference in your drilling experience. Let’s dive into these critical aspects to ensure you drill like a pro.Adjusting Drill Speed
Finding the right drill speed is crucial. Too fast, and you might wear out your bit prematurely; too slow, and you could overheat the drill. Begin with a moderate speed setting and adjust based on the rock’s resistance. Imagine you’re driving a car: you wouldn’t floor it in a residential area. The same principle applies here. Listen to the sound of the drill and feel the vibration. These cues can help you gauge if you’re going too fast or too slow.Applying Correct Pressure
Pressure is another key player in drilling rocks. You want to apply enough force to make progress but not so much that you risk breaking the bit or the rock. Let the drill do the work. Think about when you last used a manual screwdriver. Remember how much pressure you applied to turn the screw without stripping it? Use that experience to guide your hand. It’s a balance of gentle persistence.Avoiding Overheating
Overheating is a common issue when drilling rocks. It can damage both the drill and the rock, leading to a failed project. To prevent this, periodically withdraw the bit to allow it to cool down. Consider using a little water as a coolant. Dampen the area around the hole. This technique can be a game-changer, especially for beginners. Have you ever felt the frustration of a drill bit that just won’t cut anymore? Avoiding overheating will save you from that headache. Mastering drill speed and pressure is about learning and adjusting as you go. What challenges have you faced when drilling rocks? Feel free to share your experiences or ask questions in the comments. Your insights could help others tackle their projects with confidence.Handling Common Challenges
Drilling a hole in a rock poses unique challenges. Rocks vary in hardness, and handling these challenges requires careful planning. Learn how to tackle common obstacles efficiently. This guide provides practical tips to overcome difficulties like hard rock, drill bit breakage, and dust management. Equip yourself with the right knowledge to ensure a smoother drilling process.
Dealing With Hard Rock
Hard rocks can resist drilling efforts. Use diamond-tipped drill bits for effective penetration. Apply steady pressure to avoid overheating. Consider using a rotary drill for tough rocks. Maintain a constant drilling speed for better results. Be patient; hard rock requires time and effort.
Preventing Drill Bit Breakage
Drill bits can break easily. Ensure the drill bit is sharp and suitable for rock. Regularly check for signs of wear and tear. Avoid applying excessive force while drilling. Use lubrication to reduce friction. Maintain proper alignment between drill bit and rock surface.
Mitigating Dust And Debris
Drilling generates dust and debris. Wear protective gear to shield eyes and lungs. Use water to minimize dust creation. Consider using a vacuum to collect debris. Clean the area regularly to avoid buildup. Keep your workspace tidy for safe drilling.
Post-drilling Steps
After drilling a hole in a rock, clean the area to remove debris. Inspect the drilled hole for any imperfections. Secure the drilled rock in its intended location using appropriate materials.
After successfully drilling a hole in a rock, your work isn’t over. The post-drilling steps ensure your project remains safe and clean. These steps also prolong the life of your tools. Let’s explore the essential actions you should take after drilling.Cleaning The Drilled Hole
Remove any dust or debris from the hole. Use a soft brush for gentle cleaning. This ensures the hole is clear and ready for use. A clean hole prevents future problems.Inspecting The Drill Bit
Check the drill bit for any signs of wear or damage. A damaged bit can cause issues in future projects. Replace the bit if you notice cracks or dullness. Proper inspection saves time and money.Storing Equipment Safely
Store your equipment in a dry, safe place. Moisture can damage your tools over time. Keep them organized to avoid accidents. Proper storage extends the life of your equipment.Frequently Asked Questions
How To Drill A Hole In A Rock Without Breaking It?
Use a carbide-tipped masonry bit and a variable-speed drill. Start with a slow speed and apply steady pressure. Keep the drill bit cool by frequently withdrawing and adding water. Gradually increase the drill size if needed. Ensure stability to prevent cracking.
Can You Drill Into Rock With A Regular Drill?
A regular drill can struggle with rock. Use a hammer drill for better efficiency. Ensure you have the correct drill bit. Diamond or carbide-tipped bits work best for rock drilling. Always prioritize safety and wear protective gear.
What Is The Best Drill Bit For Drilling Into Rocks?
The best drill bit for rocks is a carbide-tipped or diamond drill bit. These materials ensure durability and precision. Diamond bits are ideal for hard rocks, while carbide is suitable for softer types. Always use a drill with variable speed control for optimal results.
Can You Drill A Hole In A Rock?
Yes, you can drill a hole in a rock. Use a masonry drill bit and a hammer drill. Ensure to wear safety gear and secure the rock. Apply steady pressure while drilling. Lubricate the drill bit with water to reduce heat.
Take breaks to prevent overheating and ensure precision.
Conclusion
Drilling a hole in a rock seems challenging at first. But, with patience and the right tools, anyone can do it. Remember to choose the correct drill bit for rock. Always wear safety gear to protect yourself. Start drilling slowly to avoid mistakes.
Keep the drill steady for precision. Practice makes perfect, so don’t worry if it takes time. Soon, you’ll confidently drill holes in rocks for various projects. Stay safe and enjoy the process!


