Are you struggling with removing the chuck from your Dewalt drill? You’re not alone.
Many DIY enthusiasts and professionals face this challenge. Whether you’re looking to replace a worn-out chuck or simply need to clean and maintain your trusty tool, knowing how to do it correctly can save you time and frustration. Imagine the satisfaction of mastering this task and the confidence it brings to your DIY projects.
In this guide, you’ll discover straightforward steps to remove the chuck with ease, ensuring your Dewalt drill is always in top-notch condition. Stick around to learn a skill that will empower your DIY journey, enhance your tool’s performance, and ultimately, make your life easier.

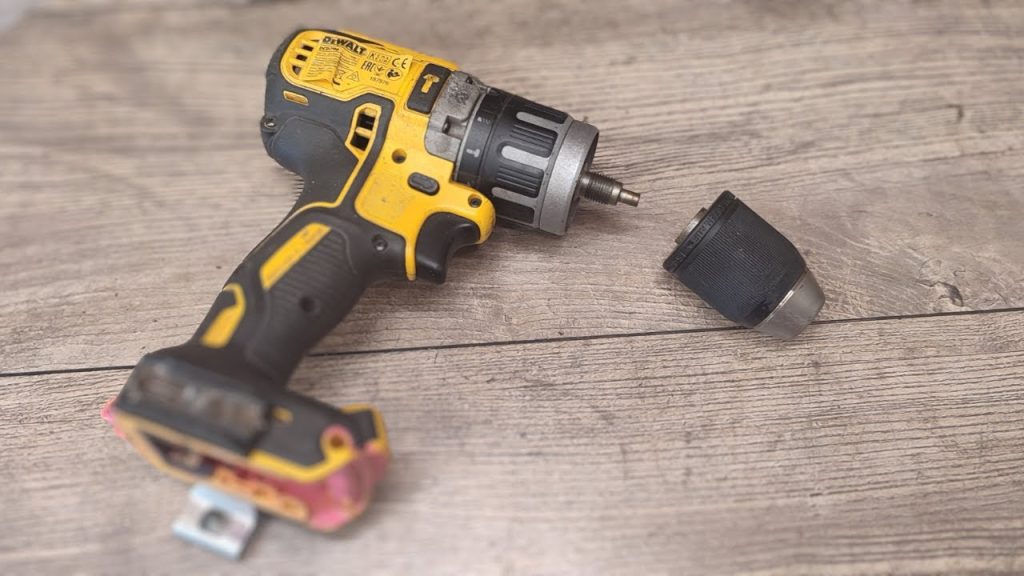
Credit: www.ifixit.com
Tools Needed
Essential tools for removing the chuck from a Dewalt drill include a flat-head screwdriver, a hex key, and a rubber mallet. These tools ensure safe and efficient chuck removal, helping you maintain your drill in top condition.
When you’re about to remove the chuck from a Dewalt drill, having the right tools on hand is crucial. Without them, you might find yourself stuck halfway through the task, which can be frustrating. Let’s break down the essentials you need to complete this task smoothly.Essential Equipment
The first tool you’ll need is a hex key (Allen wrench). This tool is pivotal in loosening the screw that holds the chuck in place. Make sure it fits snugly into the screw to avoid stripping it. A screwdriver is another must-have, specifically a Phillips head. It’s used to unscrew the internal screw that secures the chuck. If your drill has a reverse thread, you’ll need to remember to turn the screwdriver clockwise to loosen it. Lastly, a rubber mallet is beneficial for gently tapping the chuck off the drill once the screw is removed. It helps provide the needed force without damaging your tool.Safety Gear
Safety should always be your top priority. First, ensure you have a pair of safety goggles. They protect your eyes from any metal shavings or debris that might fly off during the removal process. Work gloves are also important. They provide a firm grip and shield your hands from sharp edges or slipping tools. Remember, a firm grip can make all the difference in preventing accidents. Lastly, keep a dust mask handy if you’re sensitive to dust or small particles. While this task isn’t particularly dusty, it’s always better to err on the side of caution. Have you ever found yourself halfway through a DIY project only to discover you’re missing a crucial tool? It’s frustrating, right? Preparing your tools and safety gear ahead of time helps you avoid such hiccups. What tools have you found indispensable when working with power tools? Share your experiences and let’s make our toolkits even better together.Preparing The Drill
Removing the chuck from a Dewalt drill requires a few simple steps. Start by loosening the chuck using a key or hand. Once loose, twist it counterclockwise until it detaches from the drill.
Preparing to remove the chuck from your Dewalt drill is crucial. Follow these steps to ensure safety and efficiency. Proper preparation minimizes risk and enhances the process. Let’s dive into the initial steps required.Powering Off
First, turn off the drill completely. Unplug it from the power source. This prevents accidental starts. Check the battery if it’s cordless. Remove the battery to ensure complete power off. Confirm that no light indicators are on. Safety is paramount.Securing The Drill
Once powered off, secure the drill firmly. Use a vise or a clamp for stability. This prevents any movement during the removal. Ensure the drill is stable and won’t tip over. A steady drill makes the process smoother. Check the grip, ensuring tightness. This helps in easy chuck removal.Identifying Chuck Type
Understanding the type of chuck on your Dewalt drill is crucial. It helps you know how to remove it properly. Chucks hold the drill bit in place, and they come in two main types: keyed and keyless. Identifying the chuck type ensures you use the right method for removal. Below, we explore the characteristics of these chuck types.
Keyed Chuck
A keyed chuck requires a special tool called a chuck key. This key loosens or tightens the chuck. Look for a small hole on the side of the chuck. That hole fits the chuck key. Turn the key to open or close the chuck. Keyed chucks are secure and firm. They are less common in modern drills. Ensure you have the chuck key handy for removal.
Keyless Chuck
Keyless chucks are user-friendly and simple. No tools are needed to adjust them. Twist the chuck by hand to loosen or tighten it. This type is common in many modern drills. It allows quick bit changes with ease. Feel for a textured grip on the chuck. That grip assists in turning it by hand. Keyless chucks offer convenience and speed.
Credit: www.reddit.com
Removing A Keyed Chuck
Removing a keyed chuck from a Dewalt drill might seem tricky. But with the right steps, it’s quite easy. Keyed chucks are common in older models. They need a special key to loosen or tighten the drill bit. Let’s explore the steps to remove it.
Loosening The Chuck
Start by inserting the chuck key into the chuck. Locate the keyhole on the side of the chuck. Turn the key counterclockwise. This will loosen the grip on the drill bit. Keep turning until the bit is free.
Remove the drill bit. Ensure you have a firm grip on the drill. This helps prevent slipping. Once the bit is free, you can move to the next step.
Detaching The Chuck
First, set the drill on a stable surface. Use a screwdriver to lock the drill’s spindle. Insert the screwdriver into the chuck’s back opening. This will keep the spindle from moving.
Turn the chuck counterclockwise by hand. It may take a bit of force. If it’s stuck, use a wrench for extra grip. Once loose, unscrew the chuck completely.
Now, the chuck is detached. You can replace it or inspect it for wear. Remember to keep all parts handy for reassembly.
Removing A Keyless Chuck
The keyless chuck is a vital part of a Dewalt drill. It holds the drill bit securely in place during use. Removing it may seem daunting. It’s straightforward with the right steps. Follow this guide to effortlessly detach the keyless chuck. Enjoy a smoother drill maintenance experience.
Twisting Off The Chuck
Ensure the drill is unplugged for safety. Grasp the chuck firmly with one hand. Turn it counterclockwise to loosen it. Use a wrench if it’s tight. The chuck should start twisting off gradually. Keep turning until it detaches completely. You can now replace or clean it as needed.
Handling Stubborn Chucks
Sometimes, the chuck refuses to budge. Don’t worry. Insert an Allen wrench into the chuck and tighten it. Use a rubber mallet to tap the Allen wrench gently. This helps loosen stubborn chucks. Apply penetrating oil if necessary. Let it sit for a while. Try again. Eventually, the chuck will release its grip.

Credit: m.youtube.com
Troubleshooting Tips
Removing the chuck from a Dewalt drill can be tricky. Various issues may arise during the process. Knowing how to troubleshoot these problems is essential. Let’s explore some effective troubleshooting tips to tackle common issues.
Dealing With Rust
Rust can make removing the chuck difficult. First, check for visible rust on the drill. Use a wire brush to remove loose rust particles. Apply penetrating oil to the rusted area. Let it sit for a few minutes. This helps loosen the rust. Use a rubber mallet to gently tap the chuck. This can break the rust bond. Repeat the process if the chuck remains stuck.
Addressing Tight Fittings
A tight fitting can also hinder chuck removal. Start by securing the drill in a vice. Ensure it’s stable and won’t move. Use a wrench to grip the chuck. Turn it counterclockwise with steady pressure. If it doesn’t budge, apply some lubricant. This can ease the movement. Avoid using excessive force. It might damage the drill or chuck. Patience is key to loosening tight fittings.
Reinstalling The Chuck
Reinstalling the chuck on your Dewalt drill is crucial. Whether you are securing a keyed or keyless chuck, follow these steps. This ensures your drill operates smoothly and efficiently. Let’s dive into the process of reinstalling both types of chucks.
Securing A Keyed Chuck
Start by aligning the chuck’s threads with the drill spindle. Gently rotate it clockwise to engage the threads. Use the chuck key to tighten the chuck securely. Insert the key into the chuck’s side hole. Turn it clockwise to ensure a firm grip. Check that the chuck is tight before use.
Attaching A Keyless Chuck
First, align the keyless chuck with the drill’s spindle. Rotate the chuck clockwise to thread it onto the spindle. Hand-tighten the chuck until it feels secure. Hold the chuck and activate the drill briefly. This ensures the chuck is firmly attached. Test the chuck by inserting a bit and tightening it. Ensure it holds the bit securely before using the drill.
Maintaining Your Drill
Proper maintenance keeps your Dewalt drill in top condition. It helps ensure optimal performance and extends its lifespan. Regular care prevents common issues and enhances efficiency. Here’s how to maintain your drill effectively.
Regular Cleaning
Clean your drill after each use. Dust and debris accumulate quickly. Use a soft brush to remove dirt. Wipe with a damp cloth for stubborn spots. Avoid using harsh chemicals. They can damage the surface. Regular cleaning prevents clogging and keeps parts moving smoothly.
Lubrication Practices
Lubricate moving parts regularly. Use oil designed for drills. Apply a few drops to the chuck and motor. Lubrication reduces friction and wear. It enhances the drill’s efficiency. Ensure oil does not reach electrical components. Proper lubrication keeps your drill running quietly and efficiently.
Frequently Asked Questions
How To Remove Dewalt Drill Chuck?
To remove a DeWalt drill chuck, loosen the chuck jaws completely. Insert an Allen wrench into the chuck, then tap it with a hammer counter-clockwise to loosen. Unscrew the chuck by hand, ensuring it’s fully detached. Always unplug the drill before performing maintenance for safety.
How Do You Unlock A Drill Chuck?
To unlock a drill chuck, turn the chuck key counterclockwise. If keyless, hold the chuck and rotate it counterclockwise. Ensure the drill is off and unplugged for safety.
How To Take Drill Piece Out Of Dewalt Drill?
To remove the drill bit from a DeWalt drill, first ensure it’s powered off. Rotate the chuck counterclockwise to loosen it. Pull the drill bit out gently once the chuck is open. Tighten the chuck again before storing the drill.
Always handle with care to avoid injury.
How Do I Change The Head Of A Dewalt Drill?
To change the head of a DeWalt drill, first unscrew the chuck by rotating it counterclockwise. Remove the old head and insert the new one. Secure by tightening the chuck clockwise until firmly attached. Ensure the drill is turned off and unplugged during the process for safety.
Conclusion
Removing the chuck from a Dewalt drill is simple. Follow the steps carefully, and you’ll succeed. First, gather your tools. Then, loosen the chuck by rotating it. Use a screwdriver if needed. Finally, pull the chuck out gently. Remember to keep all parts safe.
Practice makes perfect, so don’t worry if it’s tough at first. Always ensure the drill is unplugged. Safety is important. With patience, you’ll handle this task easily. Share this guide with friends who need help. They’ll appreciate your guidance. Happy drilling!


