Imagine transforming your construction or DIY projects with precision and ease. That’s exactly what you can achieve when you master the art of operating a laser level.
Whether you’re hanging a picture, installing cabinetry, or building a new deck, using this tool can save you time and effort while ensuring perfect results. But how do you get started with a laser level? It might seem daunting at first, but don’t worry.
You’re about to discover the simple steps that will make you feel like a pro in no time. Ready to elevate your projects and impress everyone with your newfound skills? Let’s dive in and explore how you can operate a laser level effortlessly.
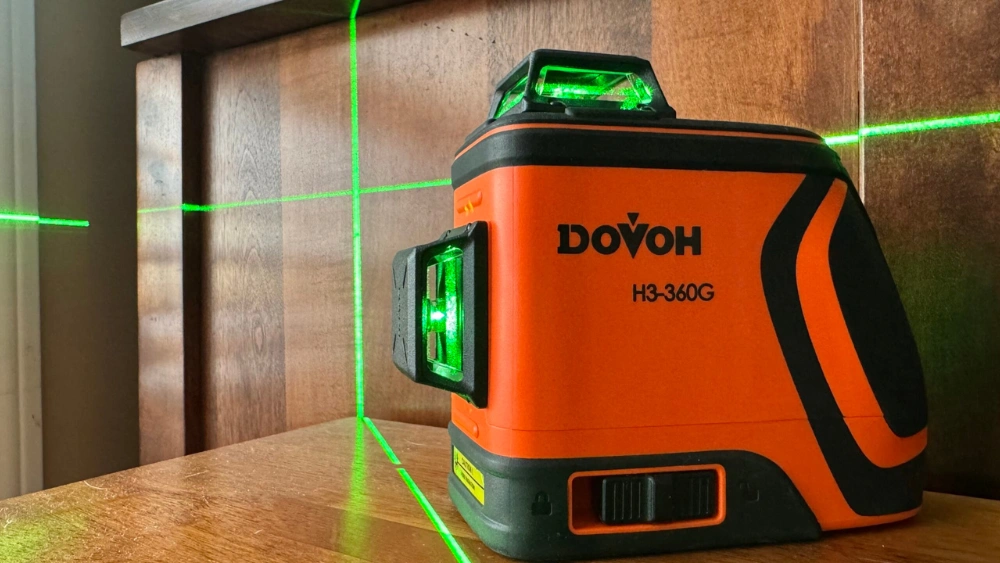
Credit: mileseeytools.com
Choosing The Right Laser Level
Choosing the right laser level is crucial for accurate measurements. Each type serves different purposes, making selection important. Understanding the types and factors helps you make informed decisions.
Types Of Laser Levels
Rotary laser levels emit a 360-degree beam. They are ideal for large projects. Line laser levels project horizontal or vertical lines. They work well for interior tasks. Point laser levels show single points. These are perfect for simple alignments.
Factors To Consider
Accuracy is key. Check the specifications for precision. Range matters for outdoor projects. Ensure the laser level covers the needed distance. Battery life affects usability. Choose models with longer battery life for extended use.
Ease of use is important. Simple controls make operations smoother. Durability impacts longevity. Opt for sturdy materials for long-lasting equipment. Compatibility with other tools can enhance functionality.
Preparation And Setup
Setting up a laser level involves securing it on a stable surface or tripod. Ensure the device is fully charged. Adjust the laser to the desired height and angle. Align the beam with your target points.
Setting up a laser level can seem daunting at first, but with the right preparation, it becomes a straightforward task. Preparation and Setup are crucial steps that determine the accuracy of your laser level. Whether you’re hanging pictures, installing tiles, or setting up a fence, a proper setup ensures a precise outcome. Let’s dive into the essentials that make this process smooth and efficient.Site Assessment
Before you set up your laser level, take a moment to evaluate your site. Look around the area where you’ll be working. Are there obstructions or uneven surfaces? Consider the distance you’ll need to cover. This helps you determine if your laser level has the necessary range. If you’re working outdoors, check for any weather conditions that might affect visibility.Power Source Options
Laser levels come with different power options, each with its advantages. Battery-operated models are convenient for mobility. Keep spare batteries on hand to avoid interruptions. Some models have rechargeable batteries. Check the charge before starting your project. Plug-in options offer consistent power but limit movement, so ensure your cord length accommodates your workspace.Safety Precautions
Safety should be your top priority when using a laser level. Always wear safety goggles. This protects your eyes from potential laser exposure. Keep the laser level out of reach of children. This prevents accidental usage or damage. Be mindful of reflective surfaces that can redirect the laser beam unexpectedly. Preparation is the foundation of successful laser leveling. Have you ever set up a project without proper preparation and faced challenges? Share your experiences or tips in the comments!Basic Operations
Operating a laser level can simplify many tasks in construction and DIY projects. Understanding basic operations is crucial for effective use. This section provides a guide to ensure precision and efficiency. Let’s delve into the key steps involved in using a laser level.
Calibrating The Laser Level
Begin by ensuring the laser level is properly calibrated. This guarantees accurate measurements. Check the user manual for specific calibration instructions. Follow each step carefully to align the device correctly. Use a flat surface for calibration to maintain stability. Regular calibration helps keep the level precise over time.
Setting Up Tripods And Mounts
Secure the laser level on a sturdy tripod. This prevents movement and maintains accuracy. Adjust the tripod legs to ensure the level is at the desired height. Use mounts for additional support if needed. Make sure the device is tightly fixed to avoid slippage. Correct setup ensures reliable operation throughout your project.
Advanced Techniques
Operating a laser level is not just about basic setup. Advanced techniques can enhance your precision and expand your capabilities. These methods allow you to tackle more complex tasks with ease. Let’s explore some advanced techniques that can make your laser level work harder for you.
Using Receiver For Extended Range
A laser receiver is essential for working over long distances. It helps detect the laser beam even when you can’t see it. Attach the receiver to a staff and move it until it picks up the beam. This extends your working range significantly. Many receivers have audio signals that guide you, helping maintain accuracy over extended spans.
Aligning And Leveling Applications
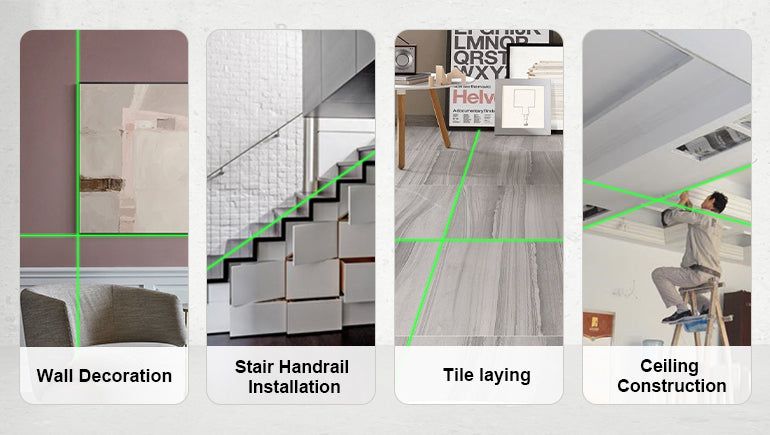
Aligning applications require precision. A laser level is perfect for aligning walls and installing tiles. Place the laser at the desired height. Adjust until the beam is aligned with the reference point. For leveling, position the laser level on a tripod. Ensure it’s stable. Use it to create a level line across your workspace. This technique ensures accuracy in construction tasks.
These advanced techniques will enhance your laser level skills. Practice regularly to become more proficient. Your projects will benefit from the accuracy and efficiency these methods provide.
Troubleshooting Common Issues
Operating a laser level can be straightforward, but like any tool, it might encounter hiccups that require troubleshooting. Understanding common issues can save you time and frustration. This section will guide you through diagnosing misalignment and fixing power issues so your laser level performs flawlessly. Every DIY enthusiast or professional knows that time is money. Let’s ensure your laser level keeps you on track.
Diagnosing Misalignment
Misalignment is a common issue that can throw off your entire project. You might notice uneven lines or inaccurate measurements. Start by checking the mounting surface. Is it stable and level? A shaky base can cause misalignment.
Next, inspect the laser level itself. Is it securely mounted on its tripod or surface? Any loose connections can affect accuracy. Tighten screws and adjust the mounts as needed.
Consider recalibrating the laser level. Refer to the user manual for calibration instructions. It’s a simple step that can make a big difference in precision. Have you ever faced a misaligned laser level mid-project? Taking a few moments to diagnose and correct the issue can prevent headaches later.
Fixing Power Issues
Power issues can halt your progress unexpectedly. If your laser level won’t turn on, first check the battery. Is it charged? Replace or recharge batteries if necessary.
Look at the power connections. Are the wires intact and properly connected? A loose or damaged wire can cause power failures. Secure any loose connections and replace damaged wires.
Examine the power switch. Is it functioning correctly? Sometimes, a faulty switch can prevent the device from turning on. Consider replacing it if needed. Ever been in the middle of a project with a dead laser level? Ensuring your power connections are solid can keep your project moving smoothly.
Laser levels are essential tools for precision work. By understanding and fixing these common issues, you can ensure your projects are accurate and efficient. Have you encountered these problems before? What steps did you take to resolve them? Share your experiences and insights in the comments below!

Credit: huepar.com
Maintenance And Care
Operating a laser level requires proper handling and storage. Keep the device clean and dry to ensure accurate readings. Regularly calibrate the laser level for precision, and check the battery for reliability.
Maintaining and caring for your laser level is crucial to its longevity and performance. Just as you wouldn’t neglect regular oil changes for your car, your laser level requires consistent attention. This ensures that it remains accurate and reliable every time you use it. Simple maintenance can prevent costly repairs and replacements down the line.Cleaning And Storage
After using your laser level, take a moment to clean it. Dust and debris can accumulate, affecting the laser’s functionality. Use a soft, dry cloth to gently wipe it down. Storing your laser level properly is equally important. Keep it in a protective case when not in use. This shields it from potential damage and environmental factors that could harm its precision. Think about where you store it. Avoid damp or excessively hot areas. Temperature fluctuations can impact its components, leading to inaccuracies over time.Regular Calibration Checks
Calibration is key to maintaining accuracy. Over time, even the best laser levels can drift from their original settings. Regular checks ensure that your tool is always ready for precision work. Set a routine to calibrate your laser level. Depending on how often you use it, this could be monthly or after a particularly intense project. Don’t wait until you notice a problem. Proactive calibration can save you from potential mishaps on the job. Have you ever had to redo work because of a miscalculated line? Regular checks can help you avoid this frustration. Taking care of your laser level might seem tedious, but it pays off. You’ll extend its lifespan and ensure it remains a reliable tool in your toolkit. A little effort can make a big difference in performance and accuracy.
Credit: www.youtube.com
Frequently Asked Questions
How Do You Use A Laser Level For Beginners?
Place the laser level on a stable surface. Turn it on and adjust the bubble for accuracy. Align the laser beam with your desired line. Use the laser’s guide to mark points or lines. Double-check measurements with a measuring tape for precision.
How To Operate A Laser Machine Step By Step?
To operate a laser machine, first read the user manual. Connect power and switch on the machine. Secure your material and set the correct parameters. Initiate the laser process by pressing start. Monitor the operation, ensuring safety and quality.
How To Raise And Lower Laser Level?
Adjust the laser level by using its built-in tripod or adjustable mount. Turn the knobs or levers to raise or lower it to the desired height. Ensure the laser is level by checking the bubble level or digital display. Secure the position once adjusted.
Why Won’t My Laser Level Work?
Check battery and power source first. Ensure laser level is properly calibrated. Inspect for dirt or damage. Verify settings and instructions. Consider professional repair if unresolved.
Conclusion
Operating a laser level isn’t hard with practice. Start by understanding its parts. Ensure it’s on a stable surface. Align it carefully for accurate readings. Follow the manual for setup. Safety first; wear protective gear. Regularly check its calibration. Clean it after each use.
Store properly to avoid damage. Practice makes perfect, so use it often. Soon, you’ll be more confident using a laser level. With these tips, your projects will be precise and efficient. Happy leveling!


