
Are you curious about how to test a capacitor with a digital multimeter? Whether you’re a hobbyist, a DIY enthusiast, or someone dealing with electronics repairs, knowing how to test a capacitor can save you time and money.
Imagine being able to diagnose issues with confidence, right from the comfort of your own workspace. This simple skill can empower you to tackle electrical projects with ease and ensure your devices work flawlessly. Stick around to uncover a straightforward, step-by-step guide that will help you master this essential technique.
You’ll find that testing capacitors is easier than you think, and it’s a skill that could transform how you approach electronics forever. Let’s dive in and unlock the secrets of your digital multimeter!
Understanding Capacitors
Understanding capacitors is crucial if you’re interested in electronics or DIY projects. These tiny components play a significant role in circuits, storing and releasing energy as needed. Whether you’re fixing a device or creating something new, knowing how to test a capacitor can save you time and headaches. Have you ever wondered about the different types of capacitors and their functions? Let’s dive into it.
Types Of Capacitors
Capacitors come in various types, each suited for specific tasks. The most common are ceramic capacitors, electrolytic capacitors, and film capacitors. Ceramic capacitors are compact and great for high-frequency applications. Electrolytic capacitors are known for storing large amounts of energy, typically used in power supply circuits.
Film capacitors are reliable and durable, often found in audio equipment. When you’re testing capacitors, knowing the type helps you understand its role in the circuit. Have you ever used a multimeter to check these different types? It’s fascinating to see how each responds differently.
Capacitor Functions
Capacitors serve multiple functions in electronic circuits. They store and release energy, filter signals, and stabilize voltage. In a power supply, they smooth out fluctuations, ensuring your device operates efficiently. Imagine the frustration of a flickering display—often, a faulty capacitor is the culprit.
These components also play a critical role in timing circuits, helping to control the speed of operations. If you’ve ever built a simple timer, you’ve relied on capacitors to keep things running smoothly. Testing capacitors with a digital multimeter reveals whether they’re performing these functions correctly. Have you ever wondered if your device’s erratic behavior was due to a malfunctioning capacitor?
Next time you’re working on a project, consider the capacitors’ types and functions. Testing them not only solves problems but enhances your understanding of how electronics work. Are you ready to pick up a multimeter and explore the hidden world within your devices?
Tools Needed
Testing a capacitor requires a digital multimeter and a basic understanding of its functions. Ensure the multimeter has a capacitance mode. Necessary leads are essential for connecting the capacitor to the multimeter safely.
Testing a capacitor with a digital multimeter can feel like a daunting task if you’re unsure about the tools you’ll need. But don’t worry, you only need a few essential items to get started. Whether you’re a hobbyist or a seasoned technician, having the right tools can make all the difference in ensuring accurate readings and maintaining safety. Let’s dive into the essentials.Choosing A Digital Multimeter
Your first tool is a digital multimeter. It’s the heart of your testing process. But how do you choose the right one? Look for a multimeter that has a capacitance measurement feature. This is crucial for testing capacitors. A multimeter with a clear display is also helpful. It allows you to see readings without straining your eyes. If you’re new to using multimeters, consider one with auto-ranging capabilities. This feature automatically selects the measurement range, simplifying the process for you.Safety Equipment
Safety is paramount when working with electrical components. Before you start, consider what safety equipment you might need. Insulated gloves can protect your hands from electrical shocks. They are especially important if you’re dealing with high-voltage capacitors. Safety goggles are another essential item. They safeguard your eyes from potential sparks or debris. You might think these precautions are unnecessary, but electrical work can be unpredictable. Wouldn’t you rather be safe than sorry? Additionally, a clean workspace free from clutter can prevent accidents. It may seem trivial, but a tidy area ensures you have enough room to maneuver and reduces the risk of knocking over components. Equipped with the right digital multimeter and safety gear, you’re well on your way to testing capacitors effectively. Are you ready to take the plunge into this electrical adventure?Preparation Steps
Testing a capacitor with a digital multimeter requires careful preparation. First, ensure the power is off and the capacitor is discharged. Next, set the multimeter to the capacitance setting to begin the measurement.
Testing a capacitor with a digital multimeter involves careful preparation. Proper steps ensure accuracy and safety. Below are essential preparation steps to follow before testing.Discharge The Capacitor
Discharging the capacitor is crucial for safety. Capacitors store electrical energy. This energy can cause shocks. To discharge, use a resistor. Connect it across the capacitor leads. Hold for several seconds. This safely releases stored charge. Avoid using a screwdriver. It can damage the capacitor.Inspect The Capacitor
Before testing, inspect the capacitor visually. Look for physical damage. Check for leaks or bulges. These indicate a faulty capacitor. Look at the terminals. Ensure they’re clean and corrosion-free. Damaged capacitors can give inaccurate readings. Replace them if necessary.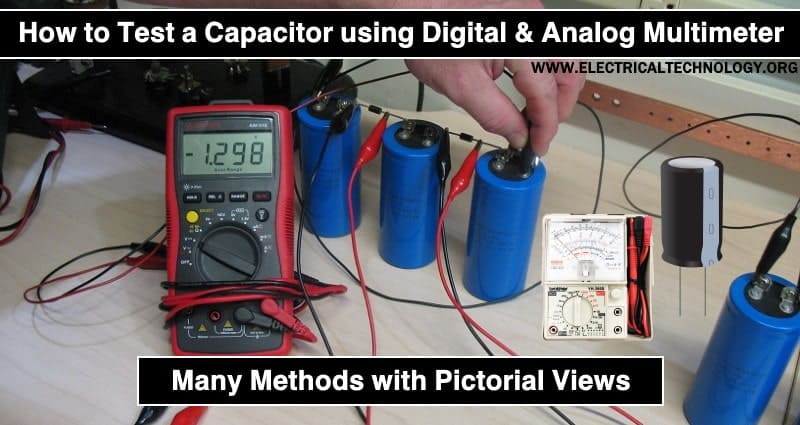
Credit: www.electricaltechnology.org
Testing Procedure
Testing a capacitor with a digital multimeter might sound complex, but it’s quite straightforward once you get the hang of it. Whether you’re fixing a malfunctioning device or just curious about electronics, this procedure empowers you to diagnose capacitors effectively. Let’s dive into the testing process, breaking it down into simple steps.
Setting Up The Multimeter
First things first, you need to ensure your multimeter is ready to measure capacitance. Select the capacitance measurement mode, often symbolized by a small capacitor icon. This setting allows the multimeter to determine the capacitor’s ability to store electrical energy.
Now, connect the multimeter leads correctly. The black lead should go into the common (COM) port, while the red lead should be in the port labeled for capacitance. It’s crucial to get this right to ensure accurate readings.
Have you ever wondered why these connections matter? Just like in life, proper connections lead to correct outcomes. A loose or incorrect lead placement can render your testing futile, leaving you puzzled over incorrect readings.
Measuring Capacitance
With the multimeter set up, it’s time to measure the capacitor’s capacitance. Start by discharging the capacitor completely. You can use a resistor to safely discharge it, preventing damage to your multimeter.
Once discharged, connect the multimeter leads to the capacitor terminals. The red lead should touch the positive terminal, and the black lead should contact the negative terminal. Watch the multimeter display for the capacitance reading.
Does the reading match the expected value? Compare it with the capacitor’s specifications. If it’s significantly off, the capacitor might be faulty. This step is a revelation in itself, unlocking insights into whether your capacitor is working or needs replacement.
Testing a capacitor isn’t just about technical know-how; it’s about understanding the intricacies of electronics. What if the readings are inconsistent? It might be a sign of additional issues or a learning opportunity to deepen your electronics skills.
Have you tested a capacitor before, or are you planning to try? Embrace the process, as it’s a stepping stone to mastering the art of electronics troubleshooting. Each reading tells a story, revealing a glimpse into the world of capacitors and their crucial role in our devices.
Interpreting Results
Understanding how to interpret the results when testing a capacitor with a digital multimeter is crucial. It can be the difference between a successful repair and a frustrating experience. You might wonder, how do you know if the readings you’re seeing are normal or if they indicate a problem? Let’s dive into how you can make sense of the numbers and identify issues with your capacitor.
Normal Capacitance Values
Capacitors come in various shapes, sizes, and capacitance values. These values are usually printed on the capacitor itself. When you test a capacitor, your multimeter should display a value close to what’s marked. For example, if a capacitor is labeled as 10µF (microfarads), your multimeter should read something within a small range around 10µF. This range accounts for manufacturing tolerances, which are typically around ±20%.
Imagine you’re testing a capacitor from an old radio. The label reads 50µF, but your multimeter shows 48µF. Is that normal? Yes, because it falls within the acceptable range. But if it reads 30µF, there’s a potential issue. Recognizing these acceptable variations can save you time and effort when troubleshooting.
Identifying Faulty Capacitors
A faulty capacitor can disrupt an entire circuit. If the capacitance reading is far off from the labeled value, it could indicate failure. For instance, a capacitor marked 100µF displaying 20µF on your multimeter is likely damaged. Such discrepancies often mean the capacitor cannot store energy as intended.
Consider your home air conditioner that suddenly stops working. You test the capacitor, expecting a reading of 40µF, but it shows 0µF. This typically means the capacitor has lost its ability to function and needs replacement. Understanding these readings can help you pinpoint issues swiftly, saving you from costly service calls.
What if your multimeter doesn’t show any reading at all? This might suggest a complete breakdown or even a short circuit inside the capacitor. Keep an eye out for physical signs of damage like bulging or leaking, as they often accompany faulty readings.
Interpreting results is more than just reading numbers—it’s about understanding them. As you test capacitors, ask yourself: Are these values within range? Could there be physical damage? This approach ensures you’re not just seeing the numbers but making informed decisions based on them.
Credit: www.electricaltechnology.org
Troubleshooting Tips
Testing a capacitor with a digital multimeter can solve many electrical issues. But sometimes, things don’t go as planned. Capacitors might show incorrect readings or seem unresponsive. Understanding common issues and advanced techniques can help. These tips can guide you through the troubleshooting process.
Common Issues
Incorrect readings often confuse beginners. Ensure the multimeter is set to the correct mode. The polarity of the capacitor might be reversed. This can cause errors. Check the test leads and connections. Loose connections lead to inaccurate results. Sometimes, the capacitor itself is defective. Look for visible signs of damage. Swelling or leaks indicate a faulty capacitor.
Advanced Testing Techniques
For more complex issues, advanced techniques might be necessary. Use the multimeter’s capacitance mode for precise readings. Discharge the capacitor before testing. This ensures safety and accuracy. Consider testing the capacitor’s resistance. A good capacitor shows infinite resistance. If it doesn’t, it might be shorted. Use an ESR meter for more detailed analysis. It measures the equivalent series resistance. Low ESR values indicate a healthy capacitor.
Safety Precautions
Testing a capacitor with a digital multimeter requires safety precautions. Ensure the device is unplugged and discharged before testing. Wear protective gear to prevent electrical hazards.
Testing a capacitor with a digital multimeter can seem like a straightforward task, but safety should always be your top priority. You might feel eager to dive into the process, but taking a few precautions can prevent accidents and ensure your testing is successful. Let’s explore some essential safety measures you need to consider.Avoiding Electric Shocks
Electric shocks are a real hazard when working with capacitors. Always ensure that the capacitor is fully discharged before testing. You can use a resistor or a special discharge tool to safely discharge it. Wear insulated gloves as an additional layer of protection. Even if the capacitor appears small, it can still store a dangerous amount of charge. Check your multimeter’s safety rating. Make sure it is suitable for the voltage level of the capacitor you are testing. A mismatched multimeter can lead to inaccurate readings or even an electric shock.Handling Large Capacitors
Large capacitors can be particularly dangerous due to their capacity to hold a larger charge. Treat them with respect and caution. Always handle them with both hands to maintain control and avoid accidental drops. Store large capacitors safely when not in use. Keep them in a non-conductive container to prevent any accidental charging. Think about the environment around you. Is the area dry? Are you using a non-conductive surface? These factors can significantly reduce the risk of electrical hazards when handling large capacitors. Remember, safety is not just a step in the process; it’s a continuous practice. What safety measures do you prioritize when working with electronics?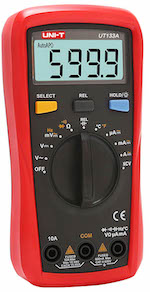
Credit: tameson.com
Frequently Asked Questions
How Do You Tell If A Capacitor Is Bad With A Multimeter?
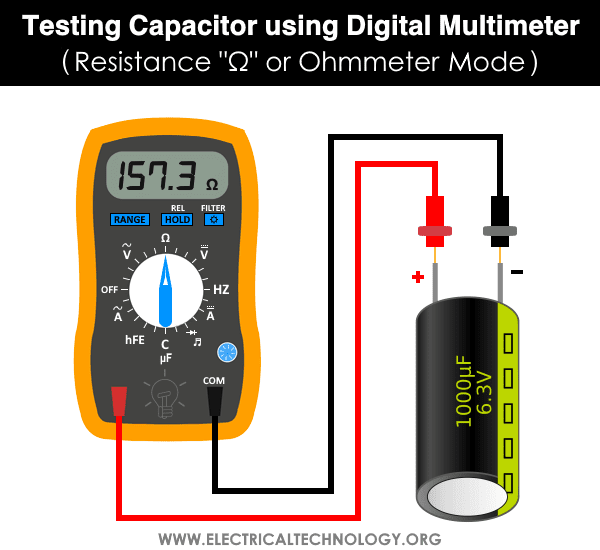
Set the multimeter to capacitance mode. Connect the probes to the capacitor terminals. A significant deviation from the rated capacitance indicates a bad capacitor. Alternatively, use resistance mode to check for infinite resistance, which signals an open capacitor. A near-zero resistance suggests a shorted capacitor.
What Is The Symbol For Capacitor Testing On A Multimeter?
The symbol for capacitor testing on a multimeter is often represented by two parallel lines, one curved. This symbol resembles a capacitor’s schematic. On digital multimeters, it may be labeled with “CAP” or a capacitance symbol. Always consult your multimeter’s manual for specific symbols and instructions.
Should A Capacitor Have Continuity In A Multimeter?
A capacitor should not show continuity on a multimeter. Continuity indicates a short circuit. Check for resistance instead. A healthy capacitor shows increasing resistance as it charges. If the multimeter beeps continuously, the capacitor might be faulty.
What Is The Uf Symbol On A Multimeter?
The uF symbol on a multimeter stands for microfarads. It measures capacitance in electronic components. Capacitors store electrical energy, and microfarads indicate their capacity. Use this setting to test capacitors in circuits.
Conclusion
Testing a capacitor with a digital multimeter is straightforward. First, ensure safety by disconnecting power. Select the appropriate mode on the multimeter. Measure the capacitance by connecting the probes correctly. A steady reading indicates a good capacitor. If not, the capacitor might be faulty.
Repeat the process for confirmation. This simple method helps maintain your electronic devices. Regular checks can prevent future issues. Always handle electronic components with care. Mastering these steps ensures your circuits run smoothly. Understanding capacitor testing boosts your DIY skills.
Stay curious and keep learning about electronics!


