
Are you ready to tackle a tile project but feeling a bit overwhelmed? Whether you’re updating your kitchen backsplash or laying down a new bathroom floor, knowing how to cut tiles with an angle grinder can be a game-changer.
Imagine the satisfaction of achieving professional-level results without hiring a contractor. You might think that cutting tiles is a daunting task, but with the right technique and tools, it can be surprisingly straightforward. In this guide, we’ll walk you through each step, ensuring that you feel confident and capable.
By the end, you’ll not only understand the process but also feel empowered to take on your tiling project with precision and ease. So, grab your angle grinder, and let’s transform those tiles into something extraordinary!
Credit: binictools.com
Choosing The Right Angle Grinder
Choosing the right angle grinder for cutting tiles can make the difference between a smooth, effortless job and a frustrating experience. Whether you’re a DIY enthusiast or tackling a professional project, the right tool ensures precision and efficiency. But how do you make the best choice? Let’s delve into some key aspects you should consider.
Selecting The Right Disc
The disc you choose is crucial for achieving a clean cut. Diamond blades are often recommended for tiles due to their durability and ability to cut through hard surfaces smoothly. If you’re working with ceramic tiles, a continuous rim diamond blade might be your best bet. It provides a smooth cut without chipping the edges.
On the other hand, if you’re dealing with thicker materials, like porcelain, consider a segmented rim diamond blade. This type allows for faster cutting, but be mindful as it can be a bit rougher on the edges. Experiment with different discs to find what works best for your specific project.
Understanding Power Requirements
Power is another key factor when choosing an angle grinder. Think about the size of your project and the thickness of the tiles. A grinder with a power range of 5 to 9 amps typically works well for home projects. These grinders offer enough power to cut through most tile types efficiently.
If you’re handling a larger job or thicker tiles, you might need something more robust, like a grinder with a power rating above 10 amps. Always consider the balance between power and control. More power can mean quicker cuts, but it also requires a steadier hand to maintain precision.
Before you make a purchase, ask yourself: how comfortable are you with handling a more powerful tool? Remember, safety and control are paramount.

Credit: www.youtube.com
Essential Safety Gear
Cutting tiles with an angle grinder can be a gratifying DIY project, but it demands absolute attention to safety. The essential safety gear isn’t just about ticking off a checklist—it’s your shield against accidents. Many DIY enthusiasts tend to overlook this critical aspect in their eagerness to complete the task. Let’s dive into the key elements of safety gear that you should never skip.
Importance Of Eye Protection
Your eyes are vulnerable to flying debris and dust when cutting tiles. Have you ever had a tiny speck cause discomfort? It’s unpleasant, and can lead to serious injury when working with power tools. Always wear safety goggles. They protect against shards that can shoot off in unpredictable directions. Choose goggles that snugly fit your face to avoid gaps where particles could sneak in.
Using Protective Gloves
Handling an angle grinder requires a firm grip and steady hands. Protective gloves not only improve grip but also safeguard your hands from sharp edges and hot surfaces. Imagine accidentally brushing against a freshly cut tile—those edges are sharp! Opt for gloves that are durable yet allow flexibility. They should fit well and not be too bulky, ensuring your fingers have full mobility while maintaining safety.
Wearing Appropriate Clothing
Loose clothing can be a hazard when using an angle grinder. Why risk the chance of fabric getting caught in the tool? Wear fitted clothing to minimize the risk. Consider wearing long sleeves and pants to protect your skin from debris and sparks. Avoid accessories like dangling jewelry or scarves, and tie up long hair securely. Your attire should not only be safe but also comfortable, keeping you focused on the task at hand.
As you gear up for your tile-cutting project, ask yourself: Is safety your priority? Adhering to these guidelines not only ensures a safer working environment but also boosts your confidence to tackle the task efficiently. Remember, safety gear is your silent hero in DIY endeavors.
Preparing Your Workspace
Cutting tiles with an angle grinder requires a well-prepared workspace. A clean, organized area helps ensure precision and safety. Proper preparation prevents mistakes and accidents. Follow these steps to get your workspace ready.
Clearing The Area
Remove any clutter from your workspace. Clear tools and materials that are not needed. A tidy area reduces the risk of tripping or knocking over items. Make sure the floor is clean and dry. A stable surface is essential for accurate tile cutting.
Securing The Tiles
Place tiles on a firm, stable surface. Use clamps to secure tiles if possible. This prevents movement during cutting. It ensures clean, precise cuts. Double-check that each tile is firmly in place before starting.
Ensuring Proper Ventilation
Open windows or doors to let in fresh air. Cutting tiles creates dust and debris. Good ventilation keeps the air clean. Use fans to help circulate air if needed. Proper airflow reduces inhaling dust particles.
Marking The Tiles
Marking tiles before cutting is crucial. Accurate marks ensure clean cuts. Proper marking avoids waste and ensures precision. Different methods can be used for marking.
Using A Pencil For Accuracy
A pencil is ideal for marking tiles. It provides clear lines. Marks are easy to see. Pencils allow for corrections. Erase mistakes and start again. Keep the pencil sharp for thin lines. Thin lines improve accuracy. Use a colored pencil on dark tiles.
Employing A Straight Edge
A straight edge helps with straight lines. It ensures lines are straight. Choose a metal ruler or a level. Both provide stability. Hold the straight edge firmly. Make sure it doesn’t move. Draw along the edge with your pencil. This creates precise marks. Double-check the lines for accuracy.
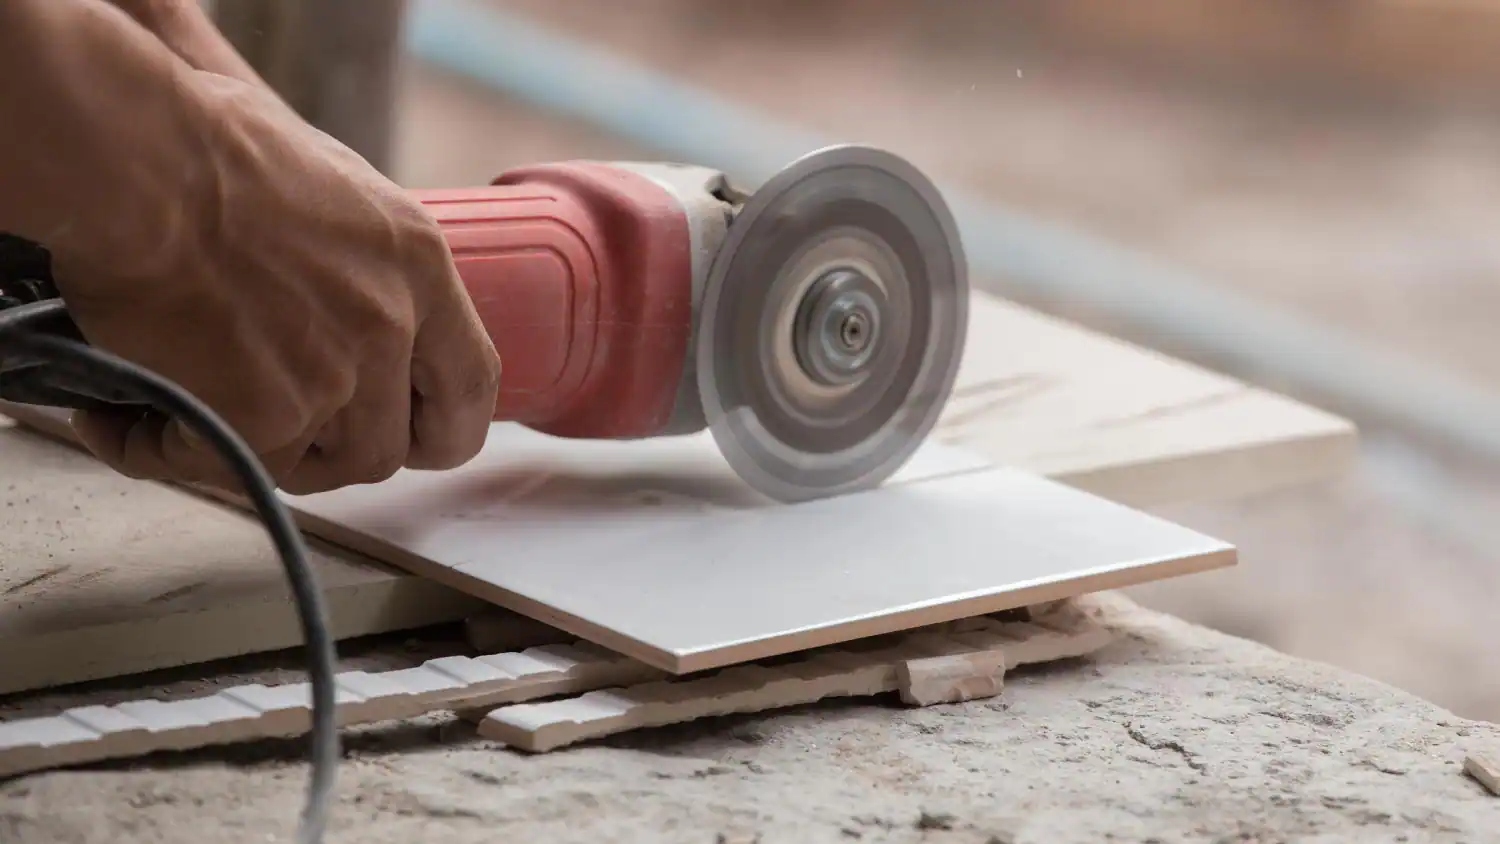
Cutting Techniques
Discover how to cut tiles using an angle grinder. This tool offers precise cuts on ceramic, porcelain, and stone tiles. Ensure a clean finish by using the right blade and safety gear.
Cutting tiles with an angle grinder might sound daunting at first, but mastering a few effective techniques can make this task manageable and even enjoyable. Whether you’re tiling a kitchen backsplash or a bathroom floor, knowing how to make precise cuts can save you time and frustration. Let’s delve into some practical cutting techniques that will help you achieve clean, professional results.Straight Cuts
To make a straight cut with an angle grinder, you need to ensure both stability and precision. Start by marking the cut line clearly on the tile using a pencil or a marker. Use a straight edge to guide your grinder, keeping your hand steady and the blade aligned with the marked line. A tip from my own experience: take your time and avoid rushing. A slower pass often results in a cleaner cut. If you’re cutting several tiles, practice on a spare one to get a feel for the tool’s speed and pressure.Curved Cuts
Curved cuts can be a bit trickier, but they allow you to fit tiles around pipes or corners seamlessly. First, draw the desired curve on your tile. Hold the grinder at an angle and make small, incremental cuts along the line. Imagine sculpting the tile gradually. This prevents cracking and gives you more control over the shape. If the curve is complex, consider using a tile nipper for the final adjustments.Using Water For Dust Reduction
Tile cutting can generate a lot of dust, which is not only messy but can also be hazardous. One effective way to reduce dust is by using water. You can either spray water onto the tile as you cut or use a wet sponge to keep the area damp. This not only minimizes dust but also cools the blade, extending its lifespan. As an added benefit, it gives you a clearer view of the cutting line, helping you stay accurate. Have you ever noticed how a small tweak like this can make the process so much smoother? Remember, safety is key. Always wear safety glasses and a dust mask, especially if you’re working indoors. By applying these techniques, you’ll find that cutting tiles is not just about precision—it’s also about making the process cleaner and safer for you.Handling Difficult Cuts
Cutting tiles precisely with an angle grinder requires care and technique. Start by marking your cut line clearly on the tile. Use the angle grinder to gently score along the line, ensuring smooth edges and avoiding cracks.
Cutting tiles can be a challenging task, especially when you’re dealing with difficult cuts. Whether it’s managing corners and edges or handling small pieces, using an angle grinder requires precision and a steady hand. But don’t worry. With the right techniques, you can achieve clean and professional results. Let’s dive into some tips on handling those tricky cuts.Managing Corners And Edges
Handling corners and edges can often feel like solving a puzzle. You might wonder, “How can I get that perfect fit?” The key is to take it slow and steady. Start by marking the tile with a pencil or marker where the cut needs to be. Use the angle grinder to gently score the line. Once scored, carefully deepen the cut, ensuring that you maintain control of the grinder. Keep the grinder moving along the line to avoid chipping the tile. Remember, practice makes perfect. If you have spare tiles, try a few practice cuts before tackling your final piece.Dealing With Small Pieces
Small pieces can be tricky, especially if they tend to break or fly away. How can you prevent this? Use a clamp to hold the tile securely in place. This will give you more control and prevent accidents. Consider using a diamond blade for these smaller cuts. Its precision can help you get cleaner edges. When cutting, apply gentle pressure and let the tool do the work. If you rush, you risk breaking the piece. Have you ever tried using painter’s tape on tiles? It can help reduce chipping. Simply place it over the area you’re cutting. This small step can make a big difference in the quality of your work. By focusing on technique and preparation, you can handle those difficult cuts with confidence. What other challenges have you faced while cutting tiles? Your insights might be the key to someone else’s success.Post-cutting Processes
After cutting tiles with an angle grinder, there’s more to do. The post-cutting process ensures a professional finish. This involves smoothing the edges and cleaning up the workspace. These steps help in achieving a clean and precise tile appearance. Let’s delve into each of these important tasks.
Smoothing Rough Edges
Tile edges often remain rough after cutting. Use a rubbing stone or diamond pad. Gently smooth out the rough edges. This makes the tile look polished. It also prevents injuries from sharp edges. Move the tool back and forth along the edge. Keep checking the smoothness as you work. Ensure that all edges feel even and smooth to the touch.
Cleaning Up The Workspace
Tile cutting creates a lot of dust and debris. Cleaning up is essential for safety and organization. First, remove large debris pieces by hand. Use a vacuum to clear dust from the floor and surfaces. Wipe down all surfaces with a damp cloth. This helps in removing any fine dust. Keeping your workspace clean extends the life of your tools. It also ensures a safe working environment.
Troubleshooting Common Issues
Cutting tiles with an angle grinder can sometimes present challenges. Even seasoned DIY enthusiasts face issues. Chipped tiles, overheating, and uneven cuts are common problems. Addressing these can ensure smooth tile cutting. Let’s explore some solutions.
Dealing With Chipped Tiles
Chipped tiles can be frustrating. Use a sharp blade for clean cuts. Dull blades cause more chips. Ensure the blade matches the tile material. Porcelain and ceramic need different blades. Apply steady pressure during cutting. Avoid forcing the grinder. Let the blade do the work. Consider using masking tape along the cut line. This can reduce chipping.
Avoiding Overheating
Overheating can damage tiles and tools. Keep the grinder cool for better results. Allow breaks during cutting to prevent overheating. Use a wet saw or spray water to cool the blade. Ensure proper ventilation in the workspace. Overheating can also be reduced by using the right speed. Adjust the grinder’s speed for the tile type.
Maintenance Of Tools
Using an angle grinder to cut tiles requires proper tool maintenance for smooth operation. Regularly check the grinder’s blade for sharpness and cleanliness to ensure precise cuts. Clean and lubricate moving parts to prevent wear and enhance performance.
Maintaining your tools is as crucial as mastering the skill of cutting tiles with an angle grinder. A well-maintained tool not only ensures safety but also enhances efficiency and precision. Neglecting maintenance can lead to inefficient cuts and may even shorten the lifespan of your angle grinder. So, let’s dive into how you can keep your angle grinder in top shape and ready for action.Cleaning The Angle Grinder
Regular cleaning of your angle grinder is a must. Dust and debris can accumulate quickly, especially when cutting tiles. This buildup can affect the tool’s performance and cause overheating. Use a soft brush to gently remove dust from the vents and surfaces. Avoid using water or harsh chemicals that could damage the internal components. Instead, a dry cloth or compressed air can effectively clean the tool. Have you ever noticed the grinder becoming sluggish? It might just need a thorough cleaning. A clean tool runs smoother and lasts longer, saving you time and money in the long run.Replacing Worn Discs
The cutting disc is the heart of your angle grinder when cutting tiles. A worn-out disc not only reduces cutting efficiency but can also be dangerous. Regularly check the disc for signs of wear, such as chipping or thinning edges. Replace the disc if you notice any damage. It’s a simple process that can greatly improve the tool’s performance. Always ensure you have the right disc for the type of tile you’re cutting. Have you ever tried to cut with a dull disc? It can lead to uneven cuts and even damage your tile. Keeping a fresh disc handy ensures your projects are completed smoothly and safely. Remember, your tools are an investment in your craft. Treat them well, and they will serve you effectively for years to come. What maintenance tips do you have for keeping your tools in top condition? Share your experiences and let’s learn from each other!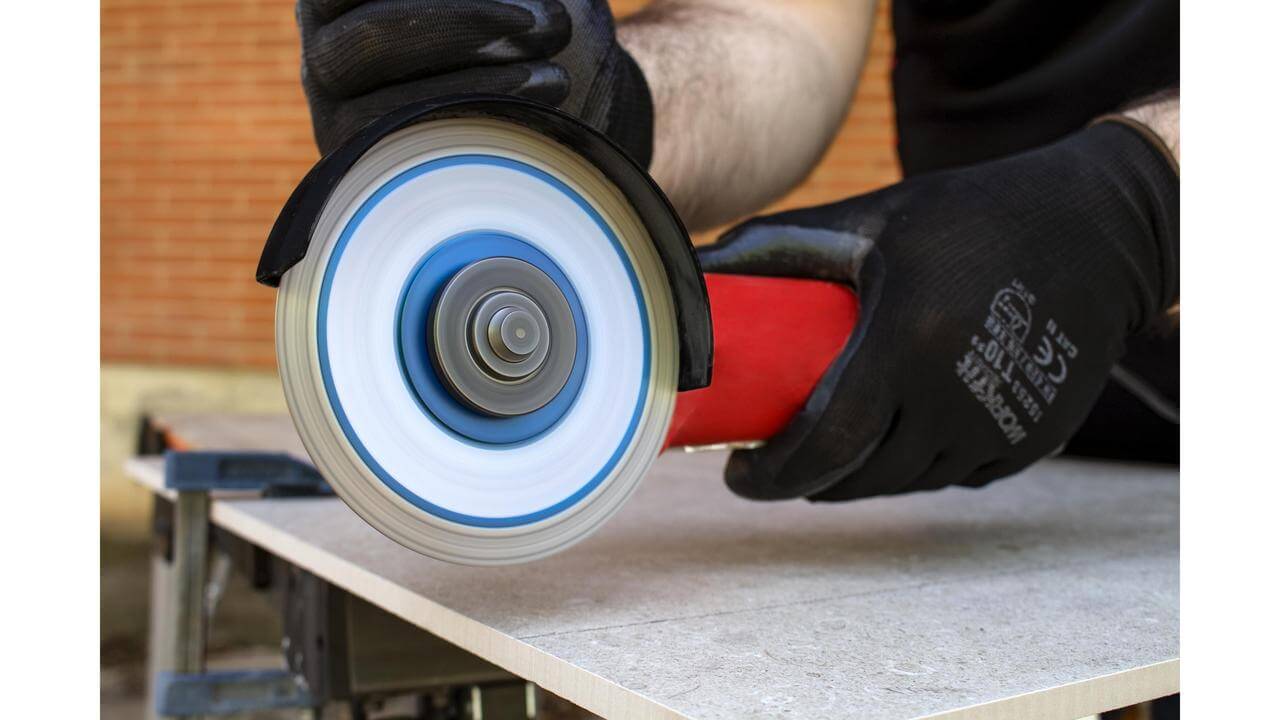
Credit: www.rubi.com
Frequently Asked Questions
Can You Cut Tile With An Angle Grinder?
Yes, you can cut tile with an angle grinder. Use a diamond blade for clean cuts. Ensure proper safety gear and follow guidelines for best results. The tool is versatile for curved or straight cuts on tiles. Always maintain a steady hand to avoid chipping the tile edges.
How To Stop Tile Chipping When Cutting With A Grinder?
Use a diamond blade for smooth cuts. Apply gentle pressure and maintain a steady hand. Wet the tile to reduce friction and dust. Secure the tile firmly to prevent movement. Consider using a tile guide for precision.
What Kind Of Angle Grinder Blade To Cut Tile?
Use a diamond blade for cutting tile with an angle grinder. It offers precision and durability. Ensure the blade is specifically labeled for tile cutting to avoid chipping. Always prioritize safety by wearing protective gear while cutting. Diamond blades efficiently handle ceramic, porcelain, and natural stone tiles.
What Grinder Wheel To Use For Tile?
Use a diamond blade grinder wheel for cutting tile. It ensures precision and minimizes chipping. Choose a continuous rim for wet cutting and a segmented rim for dry cutting. Always prioritize safety by wearing protective gear.
Conclusion
Cutting tiles with an angle grinder is simple with practice. Start by choosing the right blade for your tile. Ensure your workspace is clear and safe. Wear protective gear like goggles and gloves. Mark the tile where you need to cut.
Hold the grinder firmly. Cut slowly along the marked line. Take breaks if needed to avoid mistakes. Clean the cut edges with sandpaper for a smooth finish. With these steps, cutting tiles becomes manageable. Remember, practice makes perfect. Enjoy your tiling project and the satisfaction of doing it yourself!


