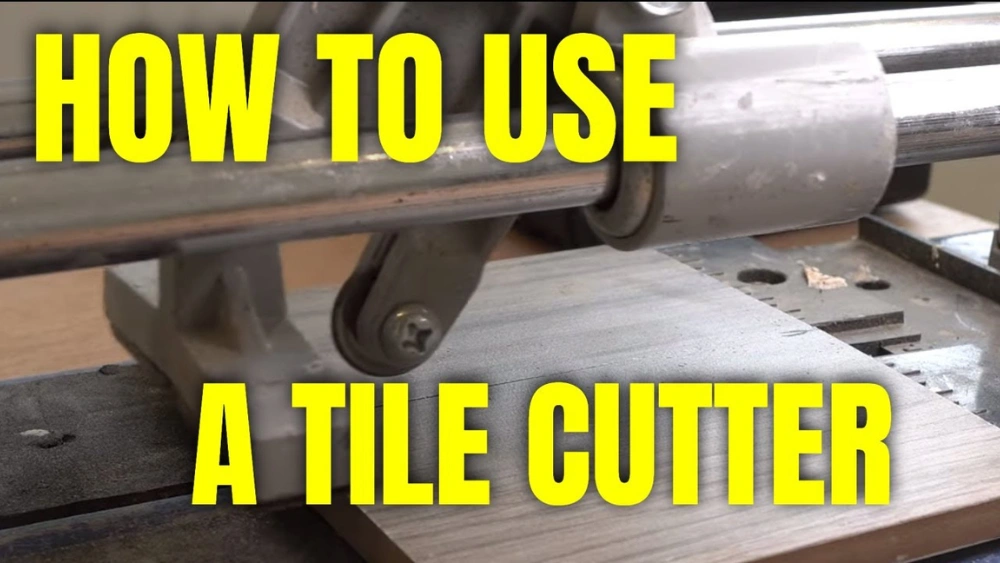
Have you ever stood in the middle of a DIY project, tiles in hand, wondering how to achieve that perfect cut? Whether you’re revamping your kitchen backsplash or laying new tiles in your bathroom, using a tile cutter can seem daunting at first.
But imagine the satisfaction of flawlessly fitting tiles that transform your space. This is where knowing how to use a tile cutter becomes your secret weapon. By mastering this tool, you not only save time and money but also achieve a professional look that elevates your home.
Stick around, and you’ll discover straightforward, step-by-step guidance that makes tile cutting easy and approachable. Ready to tackle your tile project with confidence? Let’s dive in!
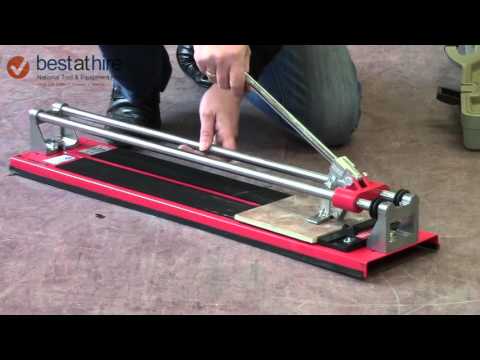
Credit: www.youtube.com
Choosing The Right Tile Cutter
Selecting the right tile cutter ensures precise cuts and smooth edges. Position the tile, align the blade, and apply steady pressure. Experience clean cuts by following the cutter’s guide marks carefully. Proper technique avoids cracks and ensures a professional finish.
Choosing the right tile cutter is crucial for achieving a professional finish in your tiling projects. Whether you’re updating a bathroom or laying a new kitchen floor, the right tool can make all the difference. Not all tile cutters are created equal, and selecting the appropriate one depends on the type of tiles you’re working with and the complexity of your design.Understanding Different Types Of Tile Cutters
Tile cutters come in various styles, each suited for different tasks. Manual tile cutters are great for straight cuts on ceramic tiles. They are easy to use and require no electricity, making them perfect for small projects. On the other hand, electric tile cutters are more powerful and can handle tougher materials like porcelain or stone. They are ideal for larger jobs where precision and speed are essential.Consider Your Tile Material
The material of your tiles influences your choice of cutter. Ceramic tiles are relatively easy to cut and work well with a manual cutter. If your project involves porcelain or natural stone tiles, an electric wet saw might be necessary. These saws have diamond blades that can cut through harder materials with ease. Choosing the right cutter for your tile material ensures clean and accurate cuts.Evaluate The Complexity Of Your Project
The complexity of your tiling project also plays a role in selecting a cutter. If you need to make intricate cuts or work with oddly shaped tiles, a tile nipper or a handheld tile saw might be more appropriate. These tools allow for more detailed work and can help you achieve unique patterns. Consider the design of your project and choose a cutter that offers the flexibility you need.Portability And Space Considerations
Think about where you will be using your tile cutter. If you have limited space or need to transport your tools frequently, a lightweight manual cutter could be the best option. However, if you have a dedicated workspace, an electric cutter with a stable base can provide more accuracy. Your workspace should influence your choice to ensure efficiency and convenience.Budget And Quality Balance
Balancing budget and quality is a key factor in choosing a tile cutter. While it might be tempting to go for the cheapest option, investing in a quality cutter can save you time and frustration. A durable cutter can handle multiple projects and produce better results. Think about how often you will use the tool and choose one that offers the best value for your needs.Seek Recommendations And Reviews
Before making a purchase, seek out recommendations and read reviews. Hearing from others who have tackled similar projects can provide valuable insights. Online reviews often highlight the pros and cons of different models. Engaging with communities or forums can also give you firsthand experiences and help you make an informed decision. Have you ever found yourself frustrated with a tool that wasn’t quite right for the job? Choosing the correct tile cutter can mean the difference between a smooth project and one filled with challenges. Consider these factors carefully to ensure your tiling project is as seamless as possible.
Credit: www.wallsandfloors.co.uk
Step-by-step Guide To Using A Tile Cutter
Using a tile cutter can feel intimidating at first, especially if you’re new to DIY projects. However, with the right guidance, it becomes a straightforward task that you can master with confidence. Whether you’re renovating your kitchen backsplash or updating your bathroom floor, knowing how to efficiently use a tile cutter will ensure that your tiles fit perfectly, saving you time and frustration. Let’s dive into a step-by-step guide that will help you make precise cuts like a pro.
Preparation
Start by gathering all necessary materials. You will need your tile cutter, tiles, a marker, and a measuring tape. Ensure your workspace is clean and well-lit.
Remember, safety first. Wear protective eyewear to shield your eyes from tile shards.
Measure your tile where you need to cut. Mark the line with a marker. Accuracy at this stage will make your cuts precise.
Setting Up The Tile Cutter
Place the tile cutter on a stable surface. This prevents movement during cutting.
Adjust the cutter’s guide to align with your marked line. This ensures a straight cut.
Position the tile snugly against the guide. Double-check alignment before proceeding.
Making The Cut
Score the tile by pushing the cutter’s handle down. Press evenly across the tile.
Scoring is crucial—it creates a weak point for the tile to break cleanly.
Apply gentle pressure to the tile cutter handle to snap the tile along the scored line.
Finishing Touches
Check the cut edges for smoothness. Use a tile file if needed to refine rough edges.
Test fit the tile in its intended space. Ensure it aligns perfectly with adjacent tiles.
Congratulations! You’ve successfully cut a tile. Repeat the process for additional tiles as needed.
Have you ever wondered what projects you could tackle with this newfound skill? Imagine the possibilities! From intricate mosaic designs to custom tile layouts, mastering the tile cutter opens up creative opportunities. Share your thoughts in the comments below about how you plan to use this skill in your next project. And remember, practice makes perfect. Each cut brings you closer to becoming a seasoned DIYer.
Expert Tips And Tricks For Perfect Cuts
Achieving perfect cuts with a tile cutter requires skill and precision. Even a slight mistake can lead to wasted tiles and time. Expert tips can make the process smoother and ensure flawless results. Whether you’re cutting ceramic or porcelain, understanding techniques is crucial. Let’s explore some valuable tips for using a tile cutter effectively.
Choose The Right Blade
Not all blades work for every tile type. Ceramic tiles need a different blade than porcelain tiles. Select the appropriate blade to ensure clean cuts. A diamond blade is ideal for hard tiles. Always check the manufacturer’s recommendation.
Measure Twice, Cut Once
Accuracy is vital in tile cutting. Double-check measurements before making a cut. Use a ruler or tape measure for precise markings. This prevents mistakes and ensures perfect fits. Marking the tile clearly helps in accurate cutting.
Secure The Tile Firmly
A stable tile avoids slips during cutting. Use clamps or a sturdy surface to hold the tile. This keeps the tile steady and prevents uneven cuts. Safety is important, so ensure the tile is locked in place.
Apply Consistent Pressure
Uneven pressure leads to jagged edges. Apply steady pressure along the tile. Start from one end and move smoothly to the other. This creates a clean, even cut without chips. Practice helps in achieving consistent pressure.
Practice On Spare Tiles
Before cutting expensive tiles, practice on spare ones. This helps in mastering the technique without fear of damage. Spare tiles are great for testing blade settings and pressure. Practicing builds confidence and skill.
Keep The Blade Clean
A dirty blade affects cutting quality. Clean the blade regularly for optimal performance. Remove debris and dust after each use. A clean blade ensures sharper cuts and extends the blade’s life. Maintenance is key to effective tile cutting.

Credit: www.wikihow.com
Frequently Asked Questions
Do You Cut Tile Wet Or Dry?
Cut tile wet for reduced dust and smoother edges. Dry cutting is suitable for small, quick tasks. Use wet saws for precision and safety. Ensure proper ventilation and protective gear when dry cutting. Both methods require appropriate tools for effective results.
Choose based on project needs and tile material.
What Is The General Rule Of Ceramic Tile Cuts?
Cut tiles from the center towards the edges for uniformity. Use a wet saw for precise cuts. Ensure cuts are smooth to prevent chipping. Always measure twice before cutting to avoid mistakes. Safety is crucial; wear protective gear while cutting.
Is There A Trick To Cutting Porcelain Tile?
Use a wet saw with a diamond blade for cutting porcelain tiles. Mark the tile accurately before cutting. Wear safety gear to protect from dust and shards. Ensure the tile is firmly secured to avoid chipping. Practice on scrap pieces to improve precision and technique.
How To Use A Tile Cutter Pen?
Use a tile cutter pen by marking the cutting line on the tile’s surface. Apply gentle pressure while dragging the pen along the line. Ensure the tile is stable to avoid mistakes. Double-check your markings for accuracy before cutting. This tool aids precision in tile installation projects.
Conclusion
Using a tile cutter can seem tricky at first. But with practice, it becomes easier. Remember to measure tiles carefully. Mark your lines clearly. Always handle the cutter with care. Safety is important, so wear gloves and goggles. Clean cuts depend on smooth, steady pressure.
Patience is key to getting good results. With these tips, you can cut tiles like a pro. Start small and build your confidence. Soon, your tiling projects will look neat and professional. Happy tiling!




