Ever stood in the middle of a home renovation project, staring at a stack of tiles, wondering how to cut them just right? You’re not alone.
Whether you’re sprucing up your kitchen backsplash or laying down a new bathroom floor, using a tile cutter is a skill that can make or break your DIY project. Imagine the satisfaction of making precise cuts, fitting each tile perfectly, and seeing your vision come to life.
It’s like solving a puzzle, and you hold the key. In this guide, we’ll take you through the steps to master your tile cutter, transforming what seems like a daunting task into an achievable goal. Ready to make your tiling project a success? Keep reading to unlock the secrets of using a tile cutter like a pro.
Choosing The Right Tile Cutter
Choosing the right tile cutter is crucial for any tiling project. The right tool makes cutting tiles easier and more precise. Different projects need different cutters. Let’s explore what to consider.
Manual Tile Cutters
Manual tile cutters are best for straight cuts. They are simple and easy to use. Ideal for ceramic and porcelain tiles. They do not work well with thick tiles. Always check the blade quality before purchasing.
Electric Tile Cutters
Electric tile cutters are versatile. They handle straight, curved, and intricate cuts. Perfect for thick and hard tiles. They need a power source. Ensure the motor is strong enough for your tile type.
Wet Tile Saws
Wet tile saws are excellent for precision. They use water to cool the blade. This reduces dust and increases safety. Ideal for cutting natural stone and large tiles. They are more expensive but worth the investment.
Glass Tile Cutters
Glass tile cutters are specialized tools. They are designed for delicate glass tiles. They prevent chipping and cracking. Ensure the cutter has a carbide wheel. This ensures clean and smooth cuts.
Consider The Project Scale
Large projects need durable and efficient cutters. Small projects can use basic manual cutters. Consider the frequency of use. For regular projects, invest in a high-quality cutter.
Budget And Quality
Always balance budget with quality. Cheap cutters may not last long. Investing in quality saves money in the long run. Read reviews and ask for recommendations. This helps in making an informed choice.
Preparing Your Tiles
Proper preparation is key for successful tile cutting. This step ensures smooth cuts and reduces waste. Start by gathering your tools and materials. Check your tile cutter for functionality. This preparation saves time and effort.
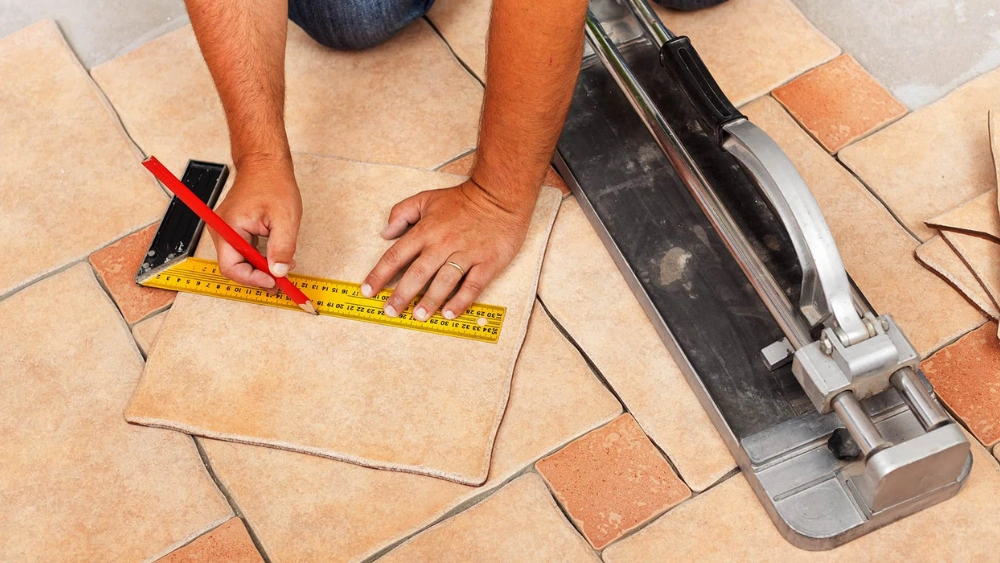
Checking Tile Dimensions
Measure your tiles accurately. Use a ruler or tape measure. Mark the dimensions clearly. This ensures precise cuts. Double-check measurements for accuracy. Mistakes can lead to wasted tiles.
Inspecting Tiles For Flaws
Examine each tile closely. Look for cracks or chips. Flawed tiles may break during cutting. Remove damaged tiles from your selection. Using perfect tiles ensures a clean finish.
Cleaning The Tile Surface
Clean tiles thoroughly before cutting. Remove dust and debris. This helps the cutter grip the tile. A clean surface reduces cutting errors. Use a damp cloth to wipe tiles.
Marking Your Cut Lines
Use a pencil or marker for marking. Draw lines where cuts are needed. Clear markings guide the cutter. Double-check lines before starting. Accurate lines lead to precise cuts.
Organizing Your Workspace
Set up a clutter-free workspace. Organize tools and materials neatly. A tidy area enhances efficiency. Ensure good lighting for visibility. A well-organized space prevents mistakes.
Techniques For Accurate Cutting
Accurate tile cutting is essential for a professional finish. Mastering the techniques ensures clean edges and precise dimensions. A tile cutter is the perfect tool for this task. It requires practice and understanding to achieve the best results.
Understanding Your Tile Cutter
Know your tile cutter’s parts and functions. It includes the handle, cutting wheel, and base. Familiarize yourself with its operation. This knowledge helps in controlling the cutter effectively.
Preparing The Tile
Start by measuring the tile. Use a ruler or measuring tape for exact dimensions. Mark the cutting line with a pencil or chalk. Double-check the measurements. This reduces errors in cutting.
Positioning The Tile
Place the tile on the cutter’s base. Align it with the marked line. Ensure it is stable and does not move. This helps maintain accuracy during cutting.
Applying Pressure Evenly
Press down on the handle steadily. Ensure uniform pressure throughout the cut. Avoid quick or uneven movements. Smooth pressure leads to clean cuts.
Scoring The Tile
Run the cutting wheel along the marked line. Score the tile lightly at first. Increase pressure gradually. This prevents cracking or chipping.
Breaking The Tile
After scoring, apply pressure to break the tile. Use the handle to push down firmly. The tile should snap along the scored line. Be gentle to avoid damaging the tile.
Checking The Edges
Inspect the cut edges for smoothness. Use sandpaper if needed to smooth rough edges. Ensure there are no chips or irregularities. This improves the tile’s appearance.
Cleaning Up
Clear debris from the cutting area. Dust and small pieces can affect further cuts. Keep the workspace tidy for safety and efficiency.
Frequently Asked Questions
How To Cut Floor Tiles For Beginners?
Begin by measuring and marking the tile where you need to cut. Use a tile cutter for straight cuts. Employ a tile nipper for small, intricate cuts. For curved cuts, a wet saw is best. Always wear safety goggles and gloves for protection while cutting.
When Cutting Tile, Which Side Do You Cut?
Cut tiles on the glazed side for a cleaner edge. Use a tile cutter or wet saw. Ensure the cut aligns with the marked line for precision. Cutting from the top side prevents chipping and maintains the tile’s finish. Always prioritize safety by wearing protective gear during the process.
Is It Better To Use A Tile Cutter Or Wet Saw?
Use a tile cutter for straight cuts in ceramic tiles. Choose a wet saw for intricate or angled cuts. A tile cutter is cost-effective and easy for DIY projects. A wet saw provides precision and is suitable for larger projects.
Both tools have their advantages depending on the task.
Is There A Trick To Cutting Porcelain Tile?
Use a diamond blade wet saw for clean porcelain tile cuts. Score and snap for small tiles. Maintain steady pressure to avoid chipping. Always wear safety goggles and gloves.
Conclusion
Using a tile cutter is easier than it seems. Practice makes perfect. Start with simple cuts to gain confidence. Always remember safety measures. Wear gloves and goggles for protection. Keep your workspace clean and organized. This helps avoid mistakes. A well-maintained tile cutter lasts longer.
Clean it after each use. Check the blade regularly for sharpness. Replace dull blades promptly. Your projects will look professional. Enjoy the satisfaction of a job well done. Happy tiling!


