Imagine having the power to transform your DIY projects or professional tasks with precision and ease. Whether you’re hanging shelves, installing tiles, or framing a new wall, a laser level can be your secret weapon.
But how exactly do you use this tool to its full potential? This guide is designed to unlock the mysteries of laser levels and show you how to harness their accuracy for perfect results every time. By the end of this article, you’ll not only understand how to use a laser level but also feel confident in tackling projects that once seemed daunting.
So, ready to elevate your skills and achieve flawless finishes? Let’s dive in!

Credit: plslaser.com
Choosing The Right Laser Level
Choosing the right laser level can enhance your projects significantly. Whether for home improvement or professional tasks, the right tool makes a difference. Laser levels come in various types and with different features. Understanding these can guide you to the best choice for your needs.
Types Of Laser Levels
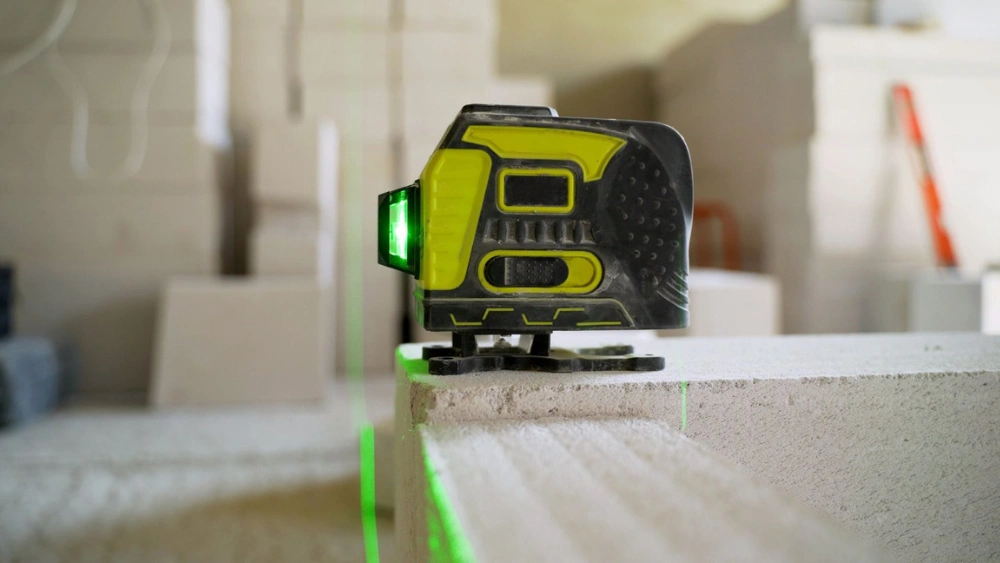
There are several types of laser levels available. The most common types include dot lasers, line lasers, and rotary lasers. Dot lasers project a single point on a surface. They are useful for marking specific spots. Line lasers emit a line across a plane. Ideal for tasks like hanging pictures or tiling. Rotary lasers create a 360-degree line around a space. Perfect for larger projects requiring full-room leveling.
Features To Consider
Laser levels come with various features that can enhance their usability. Range is crucial. Ensure the laser level covers the area you need. Accuracy is key. Look for high precision in measurements. Visibility matters. Choose a laser level with bright beams for clear visibility. Consider battery life. Long-lasting batteries prevent interruptions during work. Ease of use is important. Select a model with simple controls and setup.

Credit: www.youtube.com
Setting Up Your Laser Level
Setting up a laser level is an essential step in ensuring accuracy. It helps in various tasks like aligning shelves, hanging pictures, and construction projects. A proper setup will save time and reduce errors.
Understand the basics of the laser level before starting. Familiarize yourself with its components. Read the manual for specific instructions.
Preparing The Workspace
Clear your workspace from obstructions. Ensure there is enough room to move around. Check the surface where the laser will rest. It should be stable and flat.
Remove any clutter that can interfere with the laser line. Make sure the area is well-lit. This helps in seeing the laser clearly.
Mounting The Laser Level
Choose the right mounting tool for your laser level. Tripods are common and provide stability. Ensure the tripod is secure and balanced.
Attach the laser level firmly to the mount. Check that it is level by using the built-in bubble. Adjust the height according to your needs.
Power on the laser level. Allow it to calibrate if needed. Check for any wobbling or misalignment. Make sure the laser line is visible and straight.
Calibrating For Accuracy
Calibrating a laser level is essential for ensuring precision in your projects. Whether you’re hanging picture frames, installing tiles, or constructing a deck, accuracy is non-negotiable. It can be the difference between a job well done and a costly mistake. Let’s dive into the importance of calibration and the steps you can take to ensure your laser level is performing at its best.
Importance Of Calibration
Calibration ensures your laser level is delivering consistent and reliable results. Without proper calibration, even the most advanced laser levels can provide inaccurate readings.
Imagine spending hours aligning your project only to find it’s slightly off. Such errors can lead to wasted time and materials. Don’t leave your project to chance; ensure your tool is calibrated.
Regular calibration is like giving your laser level a health check. It keeps your tool functioning optimally and saves you from potential headaches down the line.
Steps For Calibration
Start by placing your laser level on a stable surface. This is crucial as any movement can affect the accuracy of your calibration.
Next, adjust the settings on your laser level according to the manufacturer’s instructions. Each model might have specific requirements, so it’s important to be familiar with them.
Use a ruler or measuring tape to verify the laser’s accuracy. If discrepancies are found, make the necessary adjustments. This ensures your laser level remains reliable.
Repeat the calibration process periodically, especially before starting new projects. This habit will keep your tool trustworthy and your work precise.
Have you ever wondered how much trust you place in your tools? Calibration is your opportunity to ensure that trust is well-founded.
Using Laser Level For Various Projects
Laser levels have become essential for many projects. They offer precise lines for alignment tasks. These handy tools are useful in various fields. Learn how to utilize them effectively. From home improvement to construction, their applications are vast. Discover how to make the most of this tool in different scenarios.
Home Improvement Tasks
Laser levels simplify home improvement tasks. They ensure straight lines when hanging shelves. You can use them for aligning pictures on walls. They help in tiling jobs too. Get even tiles without any hassle. Use them for installing cabinets as well. Achieve a professional finish easily.
Construction Applications
Construction projects benefit greatly from laser levels. They help in laying foundations accurately. Use them for setting up walls straight. Their precision ensures everything is level. They also assist in installing drop ceilings. Get smooth and even surfaces effortlessly. Builders rely on these tools for precise measurements.
Safety Tips When Using A Laser Level
Using a laser level can make your DIY projects easier and more precise. However, like any tool, safety should be your top priority. Have you ever wondered how to protect yourself while using this handy gadget? This section will guide you through essential safety tips, ensuring your laser level experience is both productive and safe.
Protective Gear
Wearing the right protective gear is crucial when handling a laser level. Goggles designed for laser protection can shield your eyes from harmful rays. You might think regular sunglasses are enough, but they don’t offer the necessary protection. Instead, invest in specialized laser safety goggles.
Additionally, consider wearing gloves to maintain a firm grip on your equipment. This prevents accidental slips, especially when you’re working with other tools simultaneously. Ever tried juggling a drill and a laser level without gloves? It’s a slippery slope, literally.
Avoiding Eye Damage
The laser beam from your tool is not just a fancy light. It can cause serious eye damage if you’re not careful. Always avoid looking directly into the beam. You might think a quick glance won’t hurt, but even brief exposure can lead to lasting effects.
Position your laser level at a safe angle, ensuring that the beam doesn’t accidentally point towards people or pets. Have you ever caught your pet mesmerized by the laser beam? It’s cute until you realize the risk involved. Redirect the beam responsibly.
Finally, educate those around you about the potential risks. If you’re working in a shared space, let others know about the laser level in use. Open communication reduces accidents and keeps everyone safe.
Are you ready to use your laser level with confidence and safety? Following these tips will not only protect you but also enhance your project outcomes. Remember, safety first means success always.
Troubleshooting Common Issues
Using a laser level can be tricky. Common issues include incorrect calibration or uneven surfaces affecting accuracy. Ensure the device is properly set up and surfaces are level to get precise results.
Troubleshooting common issues with your laser level can seem daunting, but it doesn’t have to be. Everyone faces hiccups with gadgets, and a laser level is no exception. Knowing how to tackle these problems can save you time and frustration. Imagine working on a project, and suddenly, your laser level isn’t performing as expected. Let’s dive into some practical solutions to get you back on track swiftly.Resolving Alignment Errors
Alignment errors can throw off your entire project. If your laser lines aren’t level, double-check the surface you’re placing the laser level on. A slightly uneven surface can cause misalignment. Ensure that the laser level is correctly calibrated. Most devices have a self-leveling feature, but it might need a manual check occasionally. Refer to your manual for calibration instructions specific to your model. If errors persist, inspect the laser level for any physical damage. A minor bump can disrupt the internal alignment. Repair any visible issues or consult a professional if necessary.Battery And Power Concerns
Power issues can unexpectedly halt your progress. Always check that your batteries are fully charged before starting a task. Keeping spare batteries handy can save the day. If the laser level doesn’t turn on, ensure the battery compartment is clean. Dust or corrosion can impede the connection. Gently clean it with a dry cloth. Consider using rechargeable batteries for cost efficiency and environmental benefits. Investing in a good quality charger can also extend the battery life. Have you ever been caught mid-project with a dead laser level? Planning ahead can prevent that inconvenience. Encountering these issues is a part of the learning curve. By addressing them with these solutions, you enhance your skills and confidence with the tool. What other challenges have you faced with a laser level? Sharing your experiences can help others.Maintenance And Care
Using a laser level involves setting it on a flat surface and aligning it with your target. Regularly check its calibration to ensure precision. Clean the lens with a soft cloth to maintain clear laser lines.
Maintaining and caring for your laser level ensures its longevity and precision. Think of your laser level as a trusty sidekick in your toolkit. Keeping it in top shape not only saves you money but also guarantees smooth operations every time you need that perfect line. Neglecting maintenance can lead to inaccurate readings, costing you time and potential frustration. Are you giving your laser level the attention it deserves? Let’s dive into some actionable tips to keep your device in tip-top condition.Cleaning The Device
Dust and debris can easily accumulate on the lens and other components of your laser level. After each use, gently wipe down the device with a soft, dry cloth. Avoid using harsh chemicals that could damage the sensitive parts. Occasionally, a slightly damp cloth can be used for stubborn dirt. However, ensure that no moisture enters the internal components. A clean device not only performs better but also extends its life.Storage Tips
Proper storage is key to protecting your laser level from unnecessary wear and tear. Always store your device in its original case or a padded bag to protect it from impacts and dust. Ensure it’s kept in a dry, cool place away from direct sunlight. Consider the environment where you store your tool. Humidity and temperature swings can affect its accuracy. By taking these simple steps, you can ensure your laser level is ready for action whenever you are. Taking care of your laser level might seem like a small task, but it has a significant impact. Have you ever experienced a misalignment during a project due to a neglected tool? It’s a small investment of time that pays off in hassle-free, accurate results every time.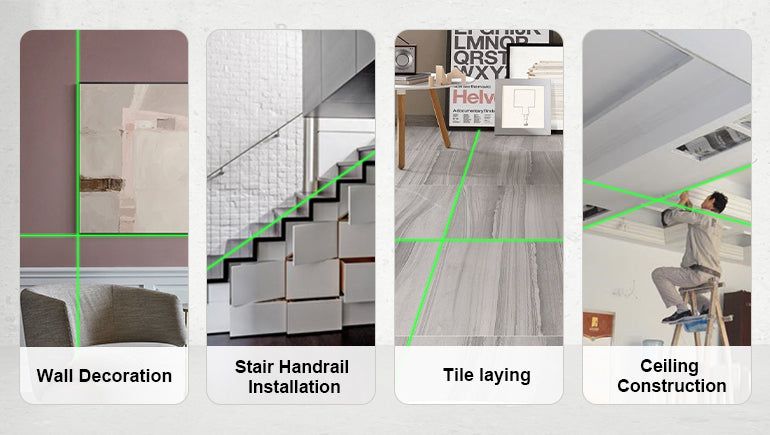
Credit: mileseeytools.com
Frequently Asked Questions
Are Laser Levels Easy To Use?
Yes, laser levels are generally easy to use. They provide accurate measurements quickly. Most models come with straightforward instructions. Users can easily set up and operate them. These tools are ideal for both professionals and DIY enthusiasts. Always refer to the manual for optimal use and safety tips.
How Does A Laser Work Step By Step?
A laser works by exciting atoms with energy. Atoms release photons, creating light. Mirrors in the laser chamber amplify this light. The light becomes a focused beam. This beam is emitted through a partially transparent mirror. The result is a powerful, coherent light beam used in various applications.
Do You Need A Tripod For A Laser Level?
Using a tripod for a laser level ensures stability and accuracy. It elevates the device, providing better visibility. Tripods are essential for uneven surfaces or taller measurements. They enhance precision, making your projects more efficient. Investing in a tripod can significantly improve your laser level’s performance and reliability.
How To Make Sure A Laser Level Is Straight?
Place the laser level on a flat surface. Check the bubble vials for alignment. Adjust until centered. Use a tripod for stability. Verify accuracy with a ruler or tape measure.
Conclusion
Using a laser level can simplify your projects. It ensures accuracy and saves time. Start by setting it up on a stable surface. Always check your laser level’s manual for specifics. Use it indoors for hanging pictures or aligning tiles.
Outdoors, it helps with leveling patios or fences. Remember to wear safety goggles when necessary. Practice makes perfect, so don’t rush. Keep it clean and store it safely. Follow these steps, and you’ll use a laser level with ease. Enjoy more precise results in your tasks.


