Imagine the satisfaction of having your very own water source right in your backyard. Drilling your own water well can be more than just a dream—it can be a reality.
You might wonder if it’s possible to do this on your own without breaking the bank or needing specialized knowledge. The good news? It is! In this guide, you’ll discover step-by-step how to turn your vision into a tangible source of fresh, clean water.
You’ll learn about the tools, techniques, and tips that can transform you into your very own water well expert. So, if you’re ready to take control of your water supply and potentially save money, keep reading. This could be the start of a refreshing new chapter in your life.

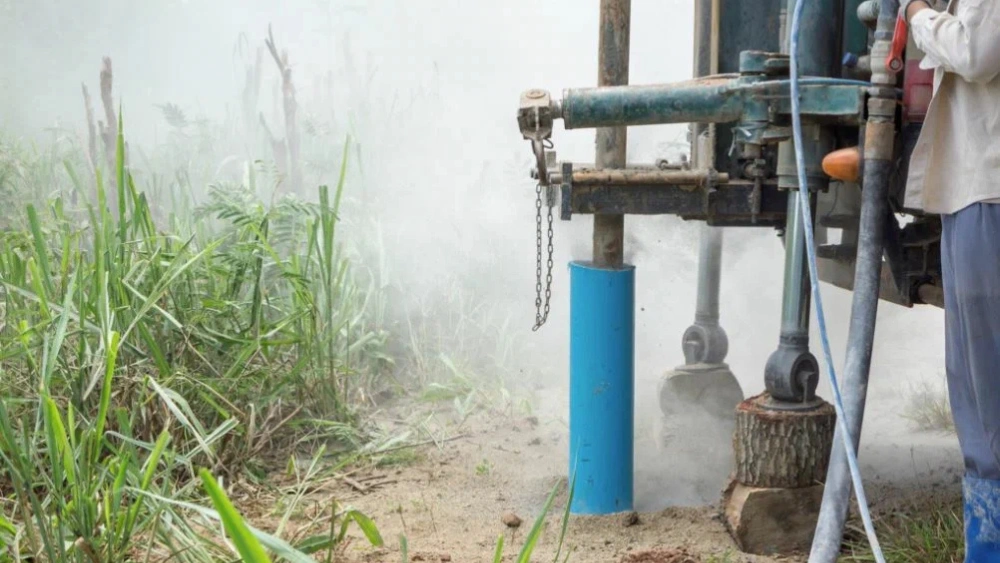
Credit: www.emergencywaterwell.com
Choosing The Right Location
Selecting the right spot for drilling a water well is crucial. Consider proximity to your home and available resources. Avoid areas with potential contamination. Proper location ensures clean water and efficient access.
Drilling your own water well can be a rewarding project, providing you with a personal source of fresh water. However, choosing the right location is crucial. A poorly chosen site can lead to wasted time and resources. Consider key factors like groundwater availability, legal requirements, and environmental impacts. Careful planning helps ensure success.Assessing Groundwater Availability
Start by understanding the local groundwater levels. You don’t want to drill where water is sparse. A neighbor’s well can offer clues about water depth and flow. Talk to locals or seek advice from professionals to gauge water availability. Next, check geological surveys. These can provide detailed maps showing water tables and soil types. Prioritize areas with higher water tables to increase your chances of success. Remember, groundwater can vary seasonally. Consider how water levels might change throughout the year. Will your well still be reliable in the dry season?Legal And Environmental Considerations
Before you grab your drill, know the legal requirements in your area. Some places have strict regulations about well drilling. You may need permits or face restrictions based on local laws. Consider the environmental impact of your well. Are you drilling near a protected area? Avoid locations that might disrupt local ecosystems. Respect nature while meeting your water needs. Think about your neighbors. Will your well affect their water supply? You don’t want to cause unintended consequences. Open discussions can prevent future issues. Choosing the right location is more than just picking a spot on a map. It’s about balancing practical needs with legal and ethical considerations. Are you ready to make informed decisions and create a lasting resource for your home?
Credit: www.youtube.com
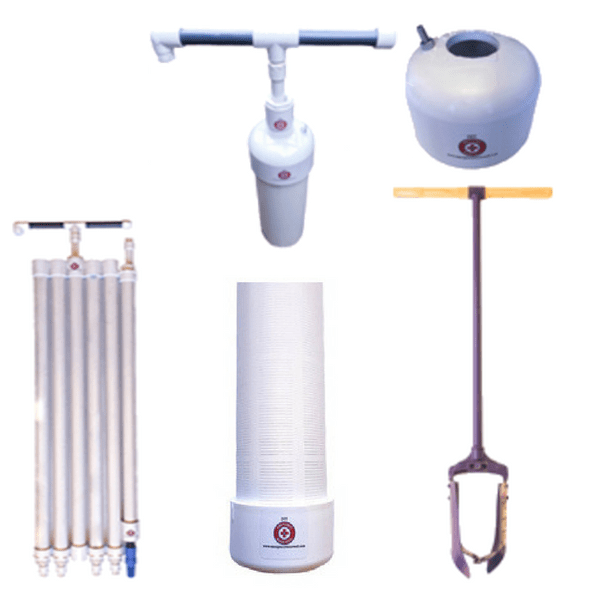
Gathering Necessary Equipment
Drilling your own water well requires proper equipment. Gathering the right tools and gear ensures efficiency and safety. This process demands preparation and careful selection of materials. Below are key items you need for successful drilling.
Essential Drilling Tools
Start with a sturdy drill rig. It’s the backbone of your operation. Choose one suitable for your soil type. Next, you’ll need drill bits. They vary in size. Select the right diameter for your well. A casing pipe is crucial. It stabilizes the borehole and prevents collapse.
Have a pump on hand. It’s vital for extracting water. A shovel and pickaxe help remove debris. They keep your site clean. Water is essential for cooling the drill bit. Ensure a steady supply nearby.
Safety Gear And Precautions
Safety cannot be overlooked. Wear protective gear at all times. A helmet shields your head. Sturdy boots protect your feet. Gloves safeguard your hands from sharp objects.
Eye protection is necessary. Dust and debris can cause injury. Ear protection reduces noise impact. Drilling can be loud. Use masks to prevent inhalation of particles.
Ensure first aid kits are accessible. Accidents can happen anytime. Stay alert and cautious. Follow safety instructions diligently.
Preparing The Site
Selecting a suitable location is crucial when drilling your own water well. Ensure the site is clear of obstacles and easily accessible. Proper preparation of the area guarantees a smoother drilling process and enhances safety.
Drilling your own water well can be an exciting and rewarding project. However, preparing the site is a crucial first step that can make or break the success of your endeavor. Proper preparation ensures safety and enhances efficiency. Whether you’re a seasoned DIY enthusiast or a curious beginner, understanding how to prepare your site is essential.Clearing And Leveling The Area
Before you begin drilling, ensure the site is clear of any debris, rocks, or vegetation. This isn’t just about aesthetics—it’s about safety and accessibility. Imagine trying to maneuver equipment around a cluttered space; it not only slows down progress but can lead to accidents. Leveling the area is equally important. A flat surface provides stability for your drilling equipment. You don’t want your drill rig tilting or wobbling while in use. Consider using a shovel or a small excavator to achieve a level ground. This step might require some sweat, but it’s a vital foundation for your drilling project.Marking The Drilling Spot
Once your site is clear and level, it’s time to pinpoint the exact spot for drilling. This is not a decision to take lightly. You might wonder, “How do I choose the right spot?” Start by assessing the land for clues like low-lying areas that may indicate a water source beneath. Use stakes or spray paint to mark your chosen spot clearly. This helps avoid confusion and ensures precision when you bring in the drilling equipment. Why guess when you can have certainty? Marking your drilling spot also aids in planning where to place other equipment and tools. In your journey to drill your own well, these preparatory steps are not just tasks—they’re your groundwork for success. Remember, a well-prepared site can turn challenges into manageable tasks. Are you ready to start your drilling adventure with confidence?Drilling Techniques
Drilling your own water well is a rewarding project. Understanding the right techniques is crucial. The process requires careful planning and execution. Two main categories exist: manual and mechanical methods. Each offers unique advantages for different situations.
Manual Drilling Methods
Manual drilling is cost-effective. It suits small-scale projects well. The hand auger is a popular tool. It uses human power to turn a spiral blade. This method is ideal for shallow wells. It works best in soft soil types. Another option is the sludging technique. It involves a pipe and water circulation. This method is simple yet effective. It requires less equipment than other techniques.
Mechanical Drilling Options
Mechanical drilling is faster. It uses machinery to drill deeper wells. Rotary drilling is a common choice. It employs a rotating drill bit. This method is versatile. It handles various soil types efficiently. Another option is the cable tool method. This technique uses a heavy drill bit. It repeatedly lifts and drops to break soil layers. Both options suit different depths and soil conditions.
Casing And Well Screen Installation
Creating a reliable water well involves several steps. One critical phase is casing and well screen installation. These components ensure the well’s durability and prevent contamination. Proper installation is key for a long-lasting water source.
Selecting The Right Casing Material
Choosing the right casing material is vital. Casings protect the well from collapsing. Steel and PVC are popular choices. Steel is strong and durable. It’s ideal for deep wells. PVC is lighter and resistant to corrosion. It suits shallower wells. Consider local soil conditions before deciding.
Installing The Well Screen
A well screen is essential for clean water. It filters out sand and debris. Place the screen at the well’s bottom. Ensure it aligns with the aquifer. Attach the screen securely to the casing. This prevents unwanted particles from entering. Regular maintenance keeps the screen effective.
Proper installation of casing and well screen ensures a clean water supply. It’s a crucial step in drilling your own well. Follow these guidelines for best results.
Developing The Well
Drilling your own water well requires careful planning and understanding of the process. Start by choosing a suitable location with access to groundwater. Use proper equipment to dig deep, ensuring clean and reliable water supply for your home.
Developing your own water well can be both rewarding and challenging. It’s not just about drilling a hole in the ground; it involves a series of crucial steps to ensure clean and reliable water. Once you’ve reached the desired depth, the real work begins. This stage is all about preparing the well to produce water effectively and safely for your use. Let’s dive into the specifics of developing your well to ensure it delivers the best water possible.Cleaning And Flushing The Well
Cleaning and flushing your well is essential to remove debris and contaminants. After drilling, mud, sand, and other particles may have accumulated in the well. Use a high-pressure hose or a bailer to flush out these unwanted materials. This process helps to clear the water and improve its quality. You’ll want to see a significant reduction in sediment in the discharge water. If you don’t, repeat the process until the water runs clear. Think of it like rinsing a glass before you drink from it—necessary for purity and safety.Testing Water Flow And Quality
Testing the flow rate and quality of your well water is crucial. Start by measuring the flow rate to ensure a steady supply. You can do this by timing how long it takes to fill a container of known volume. This will help you understand if the well can meet your water needs. Next, assess the water quality. Get a sample tested for contaminants like bacteria, nitrates, or heavy metals. Regular testing can save you from potential health risks. Would you drink from a source without knowing what’s in it? In my experience, I found it surprising how even a small oversight in cleaning could impact water quality. A thorough approach ensures that your well serves as a reliable resource for years to come. Are you ready to take the next step in your well development journey?Maintaining Your Well
Maintaining your water well is crucial for clean, safe water. Regular checks help prevent issues. They also extend your well’s lifespan. Ignoring maintenance can lead to costly repairs. It can also affect water quality.
Regular Inspection And Cleaning
Inspect your well at least once a year. Check for cracks in the well casing. Ensure the well cap is secure. Remove any debris around the well. This prevents contamination. Clean the well screens regularly. Use a brush or air compressor. This keeps water flow steady. It also improves efficiency.
Troubleshooting Common Issues
Low water pressure can be frustrating. Check the pump and pipes first. They might be clogged or worn out. If water smells bad, test for bacteria. You may need a disinfecting treatment. Muddy water signals a problem too. The well might need cleaning or repairs. An expert can offer solutions. Regular maintenance can prevent these issues.
Credit: www.shoptinyhouses.com
Legal And Safety Considerations
Drilling a water well demands careful attention to legal and safety rules. Understanding local regulations prevents legal troubles. Prioritize safety by wearing protective gear and following guidelines to avoid accidents during drilling.
Drilling your own water well can be an exciting venture. It gives you access to fresh water right from your backyard. However, before you grab your tools and start digging, there are crucial legal and safety considerations you must address. These aspects ensure your well is not only functional but also compliant with laws and safe for your family. Ignoring these can lead to hefty fines or unsafe water, so it’s worth taking the time to understand them thoroughly.Permits And Regulations
Before you start drilling, check with your local authorities for required permits. Regulations vary significantly depending on where you live. Some areas have strict rules about water rights and environmental impact. You might need to submit detailed plans or conduct environmental assessments. Skipping this step can lead to legal trouble. You could face fines or be forced to fill your well if it doesn’t meet legal requirements. Make sure you understand what your area demands. A simple call to your city’s planning department can provide clarity.Health And Safety Standards
Safety isn’t just about wearing a hard hat and gloves; it’s about ensuring your water is drinkable. Contaminated water can cause serious health issues. You need to test your water for chemicals and bacteria before using it. Consider hiring a professional to conduct these tests. They can identify if your water is safe and guide you on how to maintain its quality. Would you trust untreated water for your family? Ensuring health standards is not just wise; it’s essential. Remember, drilling a water well is more than just a DIY project. It’s a commitment to legal compliance and safety. With proper permits and adhering to health standards, you can confidently turn the tap and enjoy fresh water.Frequently Asked Questions
Can I Drill A Water Well Myself?
Yes, you can drill a water well yourself. Ensure you follow local regulations and safety guidelines. Obtain necessary permits and use appropriate equipment. Hiring a professional is often recommended for efficiency and compliance. Always prioritize safety and environmental considerations when undertaking such a project.
How Much Does It Cost To Drill Your Own Water Well?
Drilling a water well costs $1,500 to $12,000, depending on depth, location, and local regulations. Always research thoroughly.
How Deep Should A Well Be For Drinking Water?
A well for drinking water should be 100 to 500 feet deep. Depth varies based on location and water table. Ensure the well is professionally drilled and tested for safety. Local regulations and geological conditions also influence the required depth for safe drinking water access.
How Do Water Well Drillers Know Where To Drill?
Water well drillers use geological surveys, local knowledge, and advanced technology like ground-penetrating radar to find optimal drilling locations. They analyze soil types, rock formations, and water tables to ensure successful well placement. This expertise helps them identify areas with the best chances of accessing a reliable water source.
Conclusion
Drilling your own water well requires patience and planning. Start by choosing the right location. Gather necessary tools before beginning. Follow step-by-step instructions carefully. Ensure safety throughout the process. Know local regulations and get permits if needed. Keep your equipment in good condition.
Clean and maintain the well regularly. This ensures a steady supply of water. With dedication, you can successfully drill a well. Enjoy the satisfaction of accessing your own water source. Stay informed and ask for help if necessary. Happy drilling!


