
Are you ready to master the art of brake line flaring? With the right tool and guidance, you can ensure your vehicle’s brake system is safe and efficient.
Imagine driving confidently, knowing your brakes are well-maintained. We’ll explore how to use a brake line flaring tool effectively. You’ll discover step-by-step instructions, practical tips, and common mistakes to avoid. By the end, you’ll have the knowledge to tackle brake line flaring like a pro.
So, roll up your sleeves and let’s dive in to enhance your automotive skills and ensure your safety on the road.
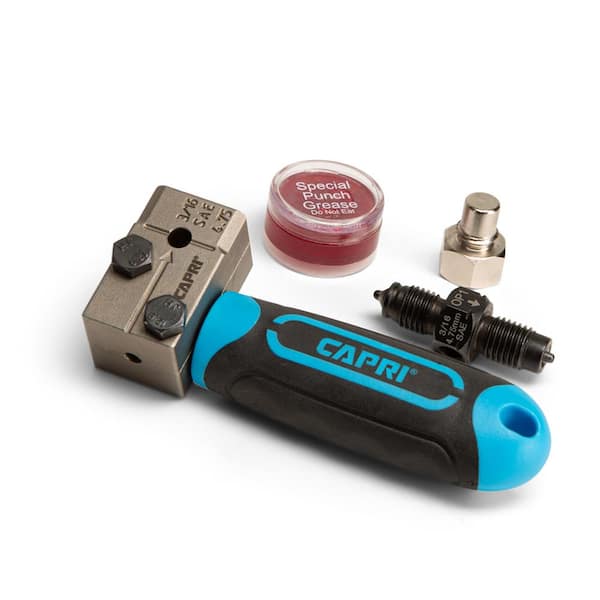
Credit: www.homedepot.com
Choosing The Right Flaring Tool
Selecting the right brake line flaring tool ensures precision and safety. Consider the tool’s compatibility with your vehicle’s brake lines. High-quality materials and ease of use are crucial for effective flaring.
Choosing the right flaring tool is crucial for safe brake line repairs. With several options available, selecting the best tool can be daunting. This guide simplifies the decision process, ensuring you pick the right tool for your needs.Understanding Flaring Tool Types
Different flaring tools suit different tasks. The two main types are single and double flaring tools. Single flaring tools create one cone-shaped flare. Double flaring tools make a stronger flare with two steps. Knowing the difference helps you choose wisely.Material Compatibility
Consider the brake line material before choosing a tool. Some tools work best with steel, while others suit copper or aluminum. Check the tool’s specifications to ensure compatibility. Using the wrong tool can damage your brake line.Ease Of Use
Complex tools can frustrate beginners. Look for user-friendly options if you are new to flaring. Some tools come with detailed instructions, which can be helpful. A comfortable grip and simple operation enhance the experience.Durability And Quality
Invest in a high-quality tool for long-term use. Strong materials ensure the tool withstands frequent use. Read reviews to gauge a tool’s durability. Quality tools often save money in the long run.Price And Budget
Flaring tools range in price. Set a budget before shopping. Remember, the cheapest option may not be the best. Balance cost with the tool’s features and quality. Investing wisely can prevent future repair costs.Brand Reputation
Reputable brands often offer better tools. They provide reliable performance and support. Research different brands and their customer reviews. A trusted brand ensures peace of mind. By considering these factors, you can choose the right flaring tool. This ensures safety and efficiency in your brake line repairs.Step-by-step Flaring Process
Understanding the step-by-step flaring process ensures precise brake line connections. Start by securing the brake line flaring tool. Then, follow each step carefully to achieve a clean flare, ensuring optimal performance and safety.
Braking line flaring is an essential skill for anyone working on their vehicle’s brake system. The process involves creating a flare on the end of a brake line, ensuring a tight fit when connected to other components. While it may seem daunting, breaking it down into manageable steps makes it straightforward. Here’s a detailed guide to help you master the art of brake line flaring, ensuring your vehicle’s safety and performance.Gather Your Tools
Before diving into the process, ensure you have all necessary tools at hand. A flaring tool kit is crucial, consisting of a flaring tool, a clamp, and a deburring tool. You’ll also need brake lines, a cutting tool, and some lubrication. Having everything within reach will streamline your workflow and save time.Prepare The Brake Line
Start by cutting the brake line to your desired length using a cutting tool. Precision is key here; a clean cut will lead to a better flare. Once cut, use the deburring tool to smooth out any rough edges. This step prevents leaks and ensures a perfect seal.Clamp The Brake Line
Place the brake line in the clamp of your flaring tool kit. Make sure it’s positioned correctly, with the end of the line slightly above the clamp. This alignment is critical for achieving an even flare. Tighten the clamp securely to hold the brake line in place during the flaring process.Create The First Flare
Now, attach the flaring tool and gently press down to create the first flare. Use consistent pressure to avoid uneven flares. A tip from my experience: take your time with this step. Rushing can lead to mistakes and wasted brake lines.Double Flaring
For most brake lines, a double flare is required. This involves repeating the flare process to create an extra layer, adding strength and security. It’s like doubling down for safety. Check your car manual to confirm if a double flare is necessary for your specific vehicle.Inspect Your Work
Once flared, examine your brake line carefully. Look for any cracks or uneven surfaces. A flawless flare should be symmetrical and sturdy. If it doesn’t look right, it’s worth redoing for peace of mind. Remember, this isn’t just about mechanics; it’s about ensuring your safety on the road.Connect And Test
Finally, attach your newly flared brake line to the brake system. Ensure a secure fit and check for leaks. Testing is critical before hitting the road. Would you trust a mechanic who skips this step? Don’t compromise on safety—your life could depend on it. Mastering brake line flaring might seem like a small detail, but it’s a critical component of vehicle maintenance. It’s a skill that not only saves money but also ensures the safety and reliability of your ride. So, are you ready to take control of your vehicle’s brake system?Troubleshooting Common Mistakes
Using a brake line flaring tool can be tricky. Incorrect alignment leads to faulty flares. Ensure the tubing is securely clamped.
When using a brake line flaring tool, even the most experienced DIYers can encounter common mistakes that can lead to inefficiencies or safety concerns. Troubleshooting these mistakes is crucial for ensuring your brake lines are properly flared and functional. Understanding these pitfalls can save you time, effort, and ensure your vehicle’s brake system operates safely.Misalignment Issues
One frequent problem is misalignment. If the tool isn’t properly aligned, your flare can be uneven or crushed. Double-check your setup before applying pressure. Ensure the brake line is correctly centered in the tool. Remember, precision is key to a successful flare. It’s worth spending an extra minute on alignment to avoid redoing your work.Incorrect Tubing Cut
A clean cut is fundamental. If your tubing isn’t cut squarely, flaring becomes a challenge. Use a sharp tube cutter to ensure a straight cut. Avoid using worn-out tools that can cause jagged edges. Consider the last time you replaced your cutter blade. A dull blade can ruin your flare before it even starts.Over- Or Under-tightening
Tightening the tool too much or too little can lead to inadequate flares. Feel the resistance as you tighten. It should be firm but not forced. Have you ever thought about the torque you’re applying? It’s easy to overestimate your strength, but gentle, consistent pressure often yields the best results.Using The Wrong Type Of Flare
Different vehicles may require different types of flares. Using the wrong type can lead to leakage or fitting issues. Research your vehicle’s specifications before starting the task. Match the flare type to your vehicle’s needs. Have you checked your vehicle manual? It holds the key to choosing the correct flare type.Skipping Lubrication
Lubrication reduces friction and prevents damage. Skipping this step can lead to a botched flare. Apply a small amount of lubricant to the tool’s contact points. This simple step can prevent unnecessary wear. Think about it: would you rather spend a few seconds lubricating or hours fixing a mistake?Ignoring Test Flares
Always do a test flare on a scrap piece. This helps you gauge the tool’s performance before working on the actual brake line. Test flares reveal potential issues in your approach. It’s a small time investment that can prevent larger headaches. How often do you test your work before the final product? Testing can be the difference between success and frustration. Addressing these common mistakes head-on will boost your confidence and ensure your brake line flaring tool delivers optimal results. So, next time you pick up your flaring tool, remember these insights to make your project smooth and successful.
Credit: riteacademy.com

Credit: www.amazon.com
Frequently Asked Questions
How Hard Is It To Flare Brake Lines?
Flaring brake lines requires precision and the right tools. It’s moderately challenging for beginners. Practice ensures better results. Always ensure clean cuts and proper alignment for a safe flare. With patience and attention to detail, most DIY enthusiasts can master it.
Is It Okay To Single Flare Brake Lines?
Single flare brake lines are not recommended. Double flares ensure safety and prevent leaks. Always opt for double flaring to maintain reliability and compliance with industry standards. Proper installation of brake lines is crucial for vehicle safety.
How Do You Use A Flaring Tool?
To use a flaring tool, cut the tubing evenly. Insert it into the flaring tool’s clamp. Tighten the clamp securely. Align the flaring cone with the tubing’s end. Turn the handle to press and form the flare. Release the clamp and inspect the flare for accuracy.
What Is The Angle Of A Brake Line Flare Tool?
The angle of a brake line flare tool is typically 45 degrees. This angle ensures proper sealing and fit. Brake line flare tools create double flares for secure connections in automotive brake systems. Proper flaring prevents leaks and maintains safety.
Always check the tool specifications for the correct angle.
Conclusion
Mastering the brake line flaring tool boosts your car repair skills. It’s essential for safe and efficient brake system maintenance. Practice makes perfect. Start with simple projects to gain confidence. Always use high-quality tools for the best results. Safety should be your top priority.
Ensure all connections are secure and leak-free. Regularly check your brake lines for wear and tear. This keeps your vehicle running smoothly. With patience and practice, you will excel. Your car and safety will thank you. So, grab your tools and start flaring today!


