
Do you find yourself wrestling with an old pull-out faucet that just doesn’t look or perform like it used to? You’re not alone.
Over time, mineral deposits, grime, and wear can turn your once gleaming faucet into a source of frustration. But before you consider replacing it, there’s good news: a thorough cleaning can often restore its shine and functionality. Imagine the satisfaction of seeing your faucet work like it’s brand new again, without the need for costly replacements.
In this guide, you’ll discover simple, effective methods to clean your old pull-out faucet. Get ready to transform your kitchen’s focal point and enjoy a sparkling, efficient faucet once more. Let’s dive in!
Tools And Materials Needed
Gather essential items such as a screwdriver, vinegar, and a soft cloth to clean an old pull-out faucet. Use a wrench and toothbrush to remove grime and build-up. Ensure all materials are non-abrasive to protect the faucet’s finish.
Cleaning an old pull-out faucet might seem daunting, but with the right tools and materials, it’s a straightforward task. Having everything you need before you start will save time and reduce frustration. Here’s a handy list of tools and materials you’ll need to ensure your faucet looks and functions like new.Basic Tools You’ll Need
A few basic tools are essential for this task. A screwdriver is necessary to remove any screws that hold the faucet together. An adjustable wrench will help you tackle those nuts and bolts that might be rusted or stuck. Keep a pair of pliers handy for any hard-to-reach areas.Cleaning Supplies For A Sparkling Finish
For cleaning, you’ll want to gather some basic supplies. White vinegar is a natural and effective cleaner, perfect for tackling mineral deposits. Baking soda adds some gentle abrasion for stubborn spots. Also, a soft cloth or sponge is crucial for wiping down surfaces without scratching them.Lubricants And Sealants
After cleaning, ensure everything moves smoothly with the right lubricants. Plumber’s grease is a great choice to keep parts moving easily. If you find any leaks during cleaning, having thread seal tape on hand can help seal connections securely.Safety Gear
Don’t forget about safety! Protect your hands with rubber gloves to avoid irritation from cleaning solutions. If you’re working in tight spaces, safety goggles can protect your eyes from splashes.Optional But Helpful Tools
A small brush like an old toothbrush can help you reach crevices. If you’re dealing with a lot of build-up, consider using a lime scale remover. These aren’t essential but can make the job easier. Isn’t it incredible how having the right tools can transform a daunting task into a manageable one? With everything organized, you’re set to bring your old pull-out faucet back to life. What tools do you find indispensable for household repairs?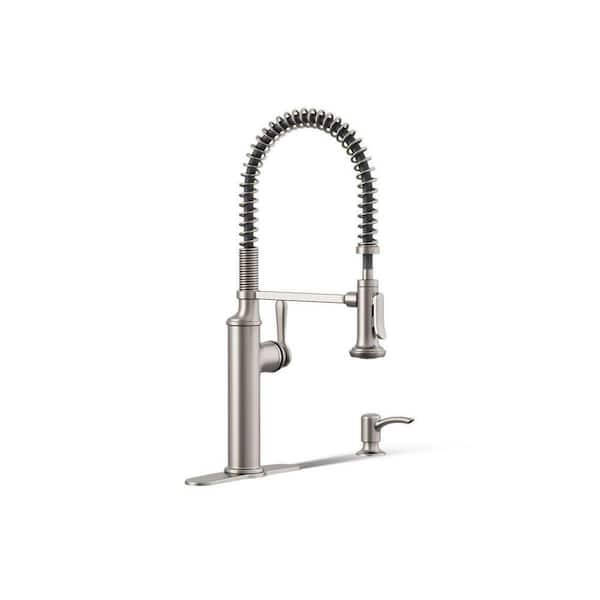
Credit: www.homedepot.com
Safety Precautions
Ensure safety by turning off the water supply. Wear gloves to protect your hands from harsh cleaning agents. Use a gentle cleaner to avoid damaging the faucet’s finish.
Cleaning an old pull-out faucet may seem like a straightforward task, but it’s crucial to take safety precautions to protect yourself and the faucet. You want to ensure that your cleaning process is not only effective but also safe. Before diving into the actual cleaning, let’s look at some essential safety measures to keep in mind.1. Turn Off The Water Supply
Before you begin, always turn off the water supply to the faucet. This prevents any accidental sprays or leaks. Locate the shut-off valves under your sink and turn them clockwise until they are fully closed.2. Unplug Electrical Appliances Nearby
Water and electricity don’t mix. Make sure you unplug any electrical appliances near the sink. This simple step can prevent potential electrical hazards.3. Gather Appropriate Tools And Materials
Use the right tools for the job to avoid damaging the faucet. A soft cloth, mild detergent, and a non-abrasive brush are usually all you need. Harsh chemicals or rough materials can scratch or tarnish the faucet.4. Wear Protective Gear
Consider wearing gloves to protect your hands, especially if you have sensitive skin. Gloves can also provide a better grip on slippery parts.5. Ensure Proper Ventilation
If you’re using any cleaning agents, make sure the area is well-ventilated. Open windows or use a fan to avoid inhaling any fumes. It’s important to maintain a fresh air flow to keep the environment safe.6. Check For Loose Parts
Before cleaning, check if there are any loose parts on the faucet. This can prevent any accidental breakage during the cleaning process. Tighten any loose screws or fittings gently.7. Test Cleaning Products
Test any new cleaning product on a small, inconspicuous area of the faucet first. This helps you ensure it won’t damage or discolor the finish. Always follow the instructions on the cleaning product label.8. Be Mindful Of Sharp Edges
Old faucets might have worn or sharp edges. Handle the faucet carefully to avoid cuts or injuries. If you notice any sharp areas, consider repairing them before proceeding. How do you prioritize safety when cleaning at home? Remember, a bit of caution goes a long way in maintaining both your safety and the longevity of your faucet.Removing The Faucet Head
Removing the faucet head is crucial for cleaning an old pull-out faucet. Twist it counterclockwise to detach. This allows thorough access to interior parts, ensuring effective cleaning and improved water flow.
Cleaning an old pull-out faucet can seem daunting, especially if it’s been a while since you last tackled this task. But the truth is, it’s not as complicated as it might appear. The first step—and often the most important—is removing the faucet head. This allows you to clean all the hidden nooks and crannies where grime tends to accumulate. So, let’s dive into the process of removing your faucet head with ease.Understanding The Faucet Design
Before you start, take a moment to observe your faucet. Is the faucet head removable by hand, or do you need tools? Most modern pull-out faucets have a head that unscrews easily. However, older models might require a wrench. Knowing this will save you time and prevent unnecessary frustration.Gathering Your Tools
Having the right tools at your disposal makes the job a breeze. You might need a pair of pliers or an adjustable wrench. A soft cloth can protect the finish from scratches. Don’t forget a bowl to catch any drips. The more prepared you are, the smoother the process will go.Turning Off The Water Supply
Before removing the faucet head, ensure the water supply is turned off. This prevents any unwelcome surprises. You don’t want water spraying everywhere unexpectedly. Locate the valve under your sink and turn it to the off position.Unscrewing The Faucet Head
Once the water is off, it’s time to unscrew the faucet head. If it’s hand-tightened, simply twist it counterclockwise. If it’s stuck, use your pliers or wrench, but be gentle. Applying too much force can damage the faucet. Are you finding it tough to get a grip? Wrapping a rubber band around the head can provide extra traction.Checking For Mineral Build-up
After removing the head, inspect it for mineral deposits. Hard water can cause a crusty build-up that affects water flow. Look inside the head and around the aerator. If you see white or greenish deposits, it’s time for a thorough clean.Cleaning The Interior Parts
With the head removed, soak it in a vinegar solution. This breaks down mineral deposits effectively. Use an old toothbrush to scrub away stubborn grime. Rinse thoroughly to avoid leaving any vinegar residue behind.Reattaching The Faucet Head
After cleaning, reattach the faucet head securely. Make sure it’s aligned correctly. Twist it clockwise until snug. Turn the water supply back on and test for leaks. Everything working fine? Congratulations, you’ve successfully cleaned your faucet head! Remember, cleaning an old pull-out faucet not only improves its performance but also extends its lifespan. Have you ever found an unexpected blockage while cleaning your faucet? Share your experiences in the comments below.
Credit: theraleighbeergarden.com
Cleaning The Aerator
The aerator in a pull-out faucet plays a crucial role. It mixes air with water, ensuring a steady stream and reducing splashes. Over time, mineral deposits can clog the aerator. This affects water flow and pressure. Regular cleaning is necessary to maintain the faucet’s efficiency.
How To Remove The Aerator
Start by turning off the water supply. This prevents any accidental leaks. Gently unscrew the aerator from the faucet tip. Use pliers if it’s tightly attached. Wrap the aerator in a cloth to avoid scratches.
Cleaning The Aerator Components
Disassemble the aerator carefully. Separate all its parts for thorough cleaning. Soak them in vinegar for an hour. Vinegar dissolves mineral buildup effectively. Use a small brush to scrub each part. Ensure every hole is clear.
Reassembling The Aerator
After cleaning, rinse the components with water. Make sure there’s no vinegar residue. Reassemble the aerator by stacking its parts correctly. Screw it back onto the faucet. Tighten it securely, but avoid over-tightening.
Testing The Faucet
Turn on the water supply. Test the faucet’s flow. Check if the water streams smoothly and evenly. If the flow is still weak, repeat the cleaning process. Ensure all aerator parts are correctly aligned.
Addressing Mineral Buildup
Mineral buildup in faucets can affect water flow. It makes them look dirty and old. Regular cleaning ensures smooth operation. It also extends the faucet’s life.
Calcium and lime deposits are common culprits. They settle on faucet surfaces over time. Cleaning them regularly helps maintain the faucet’s shine. It also ensures water flows freely.
Understanding The Causes
Mineral buildup happens due to hard water. Hard water contains high levels of calcium and magnesium. These minerals deposit on faucets over time.
Ignoring these deposits can lead to clogs. Clogs reduce water pressure and flow. Addressing buildup early prevents these issues.
Preparing The Cleaning Solution
Vinegar is a natural cleaning agent. It dissolves mineral deposits effectively. Mix equal parts of vinegar and water in a bowl.
Prepare enough solution to submerge the faucet head. This ensures thorough cleaning. The solution should be ready before starting the cleaning process.
Cleaning The Faucet Head
Remove the faucet head carefully. Check for any loose parts. Submerge it in the vinegar solution.
Let it soak for at least 30 minutes. This allows the vinegar to break down the minerals. Rinse the faucet head with warm water afterward.
Scrubbing Away Stubborn Deposits
Some deposits may remain after soaking. Use a soft-bristle brush for scrubbing. Gently remove any lingering buildup.
Be careful not to scratch the faucet surface. Repeat the process if necessary. Ensure all deposits are removed for a clean finish.
Once clean, dry the faucet head thoroughly. Ensure all parts are dry before reassembly. Reattach the faucet head securely.
Check for leaks once assembled. Test the water flow to ensure smooth operation. Your faucet should now work efficiently.
Cleaning The Hose
Old pull-out faucets often have hoses that need thorough cleaning. Over time, debris and mineral deposits can build up. This can affect water flow and hygiene. Cleaning the hose helps maintain your faucet’s efficiency.
Step 1: Detach The Hose
Turn off the water supply under the sink. Carefully unscrew the hose from the faucet base. Use a wrench to loosen any tight fittings. Place a towel underneath to catch any dripping water.
Step 2: Check For Blockages
Examine the hose for visible blockages or kinks. Use a flashlight to inspect the inside. A blocked hose can reduce water pressure. Ensure the hose is clear before proceeding.
Step 3: Soak The Hose
Fill a bucket with warm water and vinegar. Submerge the hose completely. Let it soak for 30 minutes to dissolve mineral deposits. Vinegar is effective in breaking down hard water stains.
Step 4: Clean The Interior
Use a flexible brush to scrub the inside of the hose. Gently move the brush in and out. This removes lingering debris. Rinse the hose with clean water after scrubbing.
Step 5: Reattach The Hose
Reattach the hose to the faucet base. Ensure it is securely fastened. Turn the water supply back on. Check for leaks and test the water flow. A clean hose ensures smooth operation.
Reassembling The Faucet
Carefully reassembling the faucet ensures smooth functioning after cleaning. Align components correctly for optimal water flow. Secure connections to prevent leaks and maintain efficiency.
Reassembling the faucet after cleaning is a crucial step to ensure it functions smoothly and lasts longer. Once you’ve meticulously cleaned each component, it’s time to put everything back together. This step might seem daunting, but it’s simpler than you think if you follow a structured approach.1. Organize The Parts
Lay out all the parts on a clean towel. This will help you visualize how everything fits together. If you took photos during disassembly, now is the time to use them. Check that you have all pieces accounted for before starting.2. Inspect The Parts
Take a moment to inspect each part for any damage or wear. Sometimes, during cleaning, small cracks or wear marks might become more evident. It’s better to replace any faulty parts now rather than dealing with leaks later.3. Apply Lubrication
Use a plumber’s grease to lightly coat the moving parts. This ensures smooth operation and prevents wear. Remember, a little goes a long way. Excess grease can attract dirt and debris.4. Begin Reassembly
Start by reattaching the spout. Make sure it’s aligned correctly to avoid leaks. Secure it gently, ensuring it’s snug but not overtightened. Proceed with the other components in the reverse order of disassembly.5. Tighten Connections
As you reassemble, tighten the connections with care. Use your hand initially to thread the pieces together, then use tools to ensure they are secure. Over-tightening can strip threads or crack parts.6. Test The Faucet
Once everything is back in place, turn on the water supply. Check for leaks around the joints and connections. Run the water for a few minutes to ensure smooth operation. If there are any issues, double-check your assembly steps.7. Fine-tuning Adjustments
Sometimes, a slight adjustment is needed for perfect alignment or water flow. Don’t hesitate to make these small tweaks. Your faucet should move smoothly and deliver water without any hiccups. What makes the reassembly process even more rewarding is knowing you’ve extended the life of your faucet with your own hands. What challenges did you face during reassembly, and how did you overcome them? Share your thoughts in the comments!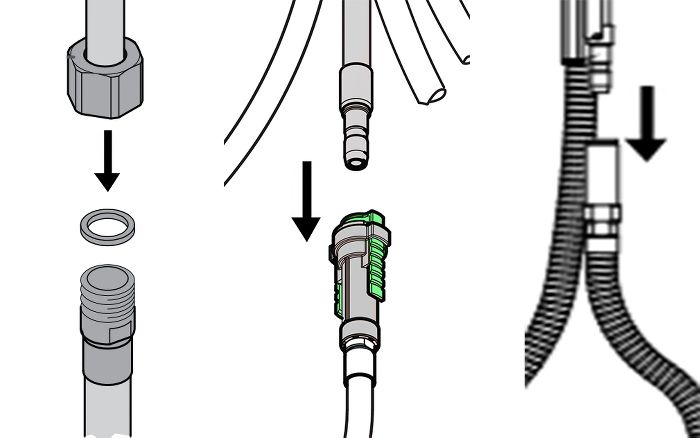
Credit: www.pfisterfaucets.com
Maintenance Tips
Regular maintenance of an old pull-out faucet can extend its lifespan. With a few simple steps, you can ensure smooth operation and prevent leaks. Let’s dive into some essential tips for maintaining your faucet.
Inspect For Leaks
Check the faucet and hoses for any signs of leaks. A small drip can lead to bigger issues over time. Tighten loose fittings with a wrench. Replace worn-out washers to stop the leak.
Clean The Aerator
The aerator at the tip can clog with minerals. Unscrew it gently. Use vinegar to dissolve any buildup. Brush it clean and rinse with water before reassembling.
Lubricate Moving Parts
Faucet joints and handles need regular lubrication. Apply a silicone-based lubricant to moving parts. This ensures smooth operation and prevents corrosion.
Check The Spray Head
The spray head may get clogged with debris. Detach it carefully. Soak in warm water mixed with vinegar. Use a brush to remove any particles. Reattach securely.
Test The Water Pressure
Low water pressure can indicate a blockage. Ensure the valves are fully open. Clean any debris from the hoses. This helps maintain optimal water flow.
Examine The Hoses
Inspect hoses for cracks or wear. Replace damaged hoses immediately. Secure connections tightly. This prevents leaks and ensures efficient water delivery.
Regular Cleaning
Wipe down the faucet regularly. Use mild soap and water. Avoid harsh chemicals that can damage finishes. Regular cleaning keeps the faucet looking new.
Frequently Asked Questions
How To Clean A Pull Out Faucet Head?
Detach the faucet head by unscrewing it. Soak it in equal parts vinegar and water for 30 minutes. Use a brush to scrub away residue. Rinse thoroughly with water. Reattach the faucet head and ensure it functions properly. Regular cleaning prevents buildup and maintains water flow.
How To Clean A Pull-out Tap?
Detach the spray head and soak it in vinegar for 30 minutes. Scrub with a brush, rinse thoroughly, and reattach. Wipe the tap body with a damp cloth to remove any residue. Regular cleaning prevents buildup and ensures smooth operation.
Always check manufacturer guidelines for specific cleaning instructions.
How To Clean A Non-removable Faucet Aerator?
Turn off the water supply. Use a cloth to protect the faucet. Unscrew the aerator with pliers. Soak in vinegar for 30 minutes. Scrub gently with a toothbrush, then rinse. Reattach the aerator securely.
How To Clean A Calcified Faucet?
To clean a calcified faucet, soak a cloth in vinegar and wrap it around the faucet. Leave it for an hour, then scrub gently with a toothbrush. Rinse with water and wipe dry. For stubborn deposits, repeat the process or use a baking soda paste.
Conclusion
Cleaning an old pull-out faucet is simple with the right steps. Regular maintenance keeps it functioning well. Use mild cleaners to avoid damage. Ensure all parts are dry before reassembly. A clean faucet prevents leaks and enhances kitchen hygiene. Routine checks can extend its lifespan.
Don’t ignore any unusual noises or drips. Address these early to avoid bigger issues. Remember, a little care goes a long way. Enjoy a smoothly running faucet with these easy tips. Happy cleaning!


