
Are you ready to transform your home with a touch of elegance and sophistication? Cutting base molding with a miter saw might seem daunting, but it’s easier than you think.
Imagine the satisfaction of seeing perfectly aligned baseboards enhancing your living space. Don’t worry about complicated jargon or overwhelming techniques; we’ve got you covered with simple, step-by-step instructions. Whether you’re a seasoned DIY enthusiast or just starting out, this guide is tailored to help you achieve professional-looking results.
Dive in and discover how you can effortlessly cut base molding with precision and style!
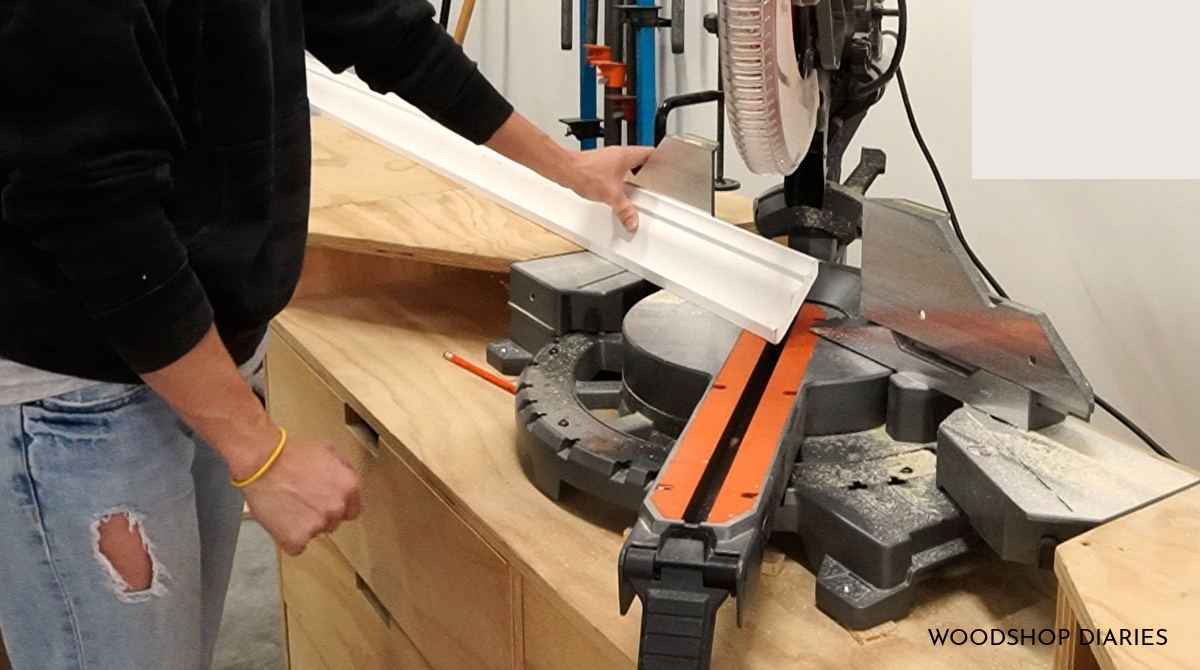
Credit: www.woodshopdiaries.com
Choosing The Right Miter Saw
Cutting base molding requires precision and the right tools. The miter saw is essential for this task. It ensures clean and accurate cuts. Not all miter saws are created equal, though. Choosing the right one can enhance your cutting experience. Consider your needs and the saw’s features carefully.
Types Of Miter Saws
Miter saws come in various types. Each type offers unique benefits. The basic miter saw is ideal for simple cuts. It is easy to use and great for beginners. The compound miter saw is versatile. It allows for both miter and bevel cuts. The sliding compound miter saw provides more flexibility. It can handle larger pieces due to its sliding feature. Lastly, the dual compound miter saw offers bevel cuts in both directions. This feature saves time and effort.
Key Features To Consider
Several key features make a miter saw stand out. First, consider the blade size. Larger blades can cut wider and thicker materials. Next, think about the saw’s power. More power means smoother cuts through dense wood. A laser guide is a helpful feature. It shows the cut line for better accuracy. Dust collection systems keep your workspace clean. Safety features, like blade guards, protect users. Look for a saw that balances these features with your needs.
Credit: bendtoolco.com
Essential Tools And Materials
Cutting base molding with a miter saw requires the right tools and materials. Proper preparation ensures clean and accurate cuts. Gathering essential items in advance streamlines the process, reducing errors and saving time.
Safety Gear
Safety should always be your top priority. Equip yourself with protective eyewear to shield against debris. Ear protection is crucial, as miter saws can be loud. Wearing gloves helps maintain a firm grip and protects your hands.
Measuring Tools
Accurate measurements are vital for precise cuts. Use a tape measure for exact length determination. A carpenter’s square ensures the angles are perfect. Pencil and paper come in handy for jotting down measurements.
Additional Supplies
Have extra blades available for smoother cuts. Sandpaper helps smooth out rough edges. Keep clamps ready to secure the molding while cutting. Consider a sawhorse for stability during the process.
Preparing The Work Area
Clear the area of any clutter for safety. Organize tools within reach to avoid accidents. Ensure adequate lighting to see clearly while working.
Preparing the work area is crucial for cutting base molding with a miter saw. A well-organized space ensures precision and safety. Before starting, make sure your work area is clean and clutter-free. This allows easy movement and access to tools. Follow these steps to set up your work area effectively.Setting Up The Saw Station
Choose a stable surface for the saw station. A workbench or sturdy table works well. Ensure the surface can support the weight of the saw. Position the miter saw centrally on the table. This provides space for both sides of the molding. Secure the saw firmly to avoid movement during cutting. Arrange your tools within reach. Keep the saw blade and other accessories nearby. This reduces time spent searching for items.Ensuring Adequate Lighting
Proper lighting is essential for accuracy. Set up bright lights around your work area. Avoid shadows on your cutting line. Shadows can lead to mistakes. Consider using adjustable lamps for focused lighting. Check the lighting from different angles. Ensure you can see clearly while cutting. Natural light from windows can help during the day. At night, rely on bright overhead lights. This maintains visibility and precision.Measuring And Marking The Molding
Measuring and marking are essential steps in cutting base molding with a miter saw. Precise measurements ensure a flawless fit, while accurate marking guides your cuts for a professional finish. Skipping these steps can lead to wasted materials and frustrating do-overs. Let’s dig into the techniques you need for accuracy and perfection.
Accurate Measuring Techniques
Begin with measuring the wall space where the molding will go. Use a reliable tape measure and double-check your numbers. It’s surprising how often a small miscalculation can throw off an entire project.
Consider using a measuring tape with bold markings for clarity. This minimizes errors and helps you see the numbers clearly, especially in dim lighting.
Get a measuring partner if possible. An extra pair of hands can hold the tape steady and offer a second opinion on your measurements.
Marking For Perfect Cuts
Once you’ve got your measurements, it’s time to mark the molding. Use a pencil with a sharp point to ensure precise lines. A faint line can lead to misalignment, so make it clear and visible.
Think about using a carpenter’s square to guide your marks. This tool helps you keep your lines straight and aligned, crucial for perfect cuts.
Before making your cuts, consider marking the angle on the molding with a protractor. This step ensures you set your miter saw to the correct angle, avoiding any guesswork.
Have you ever felt the frustration of cutting a piece only to realize your marks were off? Taking the time to measure and mark accurately saves you from such headaches. What’s your favorite tool or trick for ensuring precision in your projects? Share your thoughts below!
Adjusting The Miter Saw
Adjusting the miter saw ensures precise cuts for base molding. Angle the blade correctly for seamless joints. Align the saw with the cut line for accurate results.
Adjusting a miter saw is crucial for perfect base molding cuts. Getting the right angle ensures smooth and clean edges. This tool can handle various angles, making it versatile for different cuts. Accurate adjustments prevent mistakes and save time. Let’s explore how to set the correct angle and adjust for bevel cuts.Setting The Correct Angle
Start by checking the saw’s angle settings. Most miter saws have a scale for easy adjustments. To set the correct angle, loosen the knob or lever. Move the saw to the desired degree. Tighten it securely to keep the angle stable. Common angles for base molding are 45 degrees and 90 degrees. The saw should align with the angle marks for precision. Double-check the angle to avoid uneven cuts.Adjusting For Bevel Cuts
Bevel cuts require tilting the saw blade. This is different from miter cuts which adjust the table. Loosen the bevel lock to tilt the blade. Set the blade to the desired bevel angle. Common bevel angles are 45 degrees. Ensure the blade is firmly secured after adjusting. A stable blade prevents accidents and ensures accuracy. Always verify the bevel angle before cutting. This step is crucial for consistent results.Cutting Techniques
Cutting base molding with a miter saw can seem challenging. But with the right techniques, you can make precise cuts. These techniques ensure a perfect fit for your molding. Mastering these methods saves time and reduces material waste. Whether making straight cuts or compound cuts, understanding the process is crucial.
Making Straight Cuts
Straight cuts are the simplest type of cut. Begin by measuring the length of the molding needed. Mark the measurement with a pencil on the molding. Place the molding on the miter saw table. Ensure it sits flat against the fence. Set the saw blade to a 90-degree angle. This ensures a straight cut. Hold the molding firmly. Start the saw and slowly lower the blade. Cut through the molding steadily. Check the cut for accuracy.
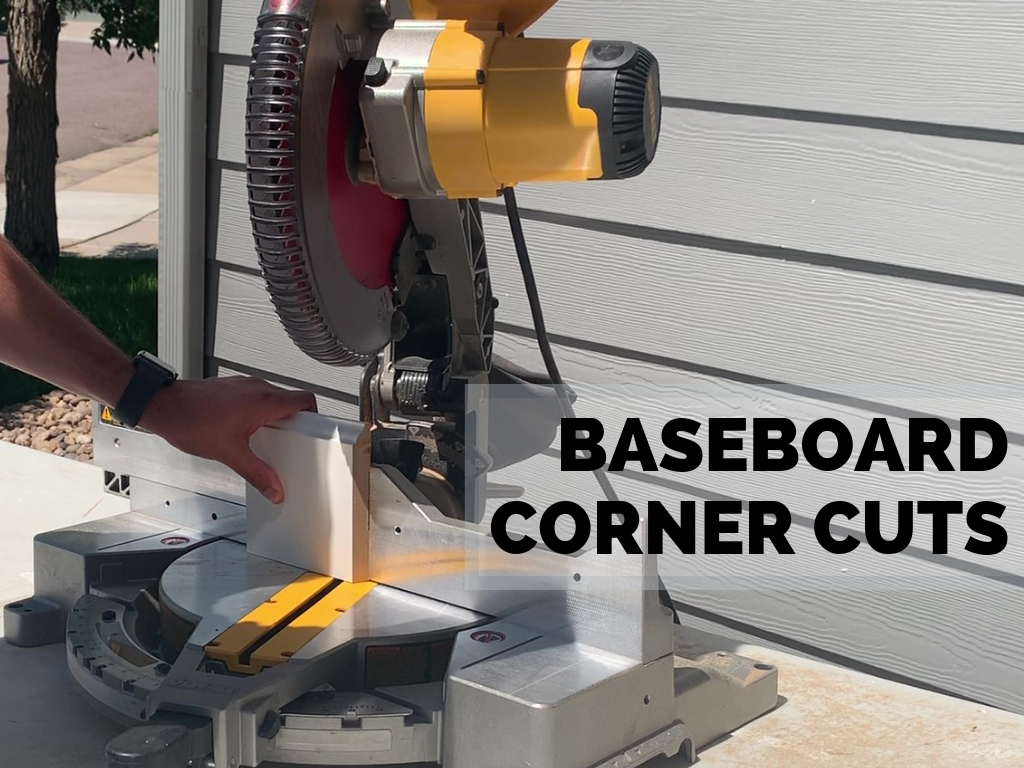
Creating Compound Cuts
Compound cuts involve both bevel and miter angles. These cuts are necessary for corners. First, determine the angle of the corner. Set the miter angle on the saw. Adjust the bevel angle as well. Secure the molding on the saw table. Make sure it aligns with the fence. Hold it tight to avoid movement. Turn on the saw and lower the blade gently. Cut through the molding with care. Confirm the angles match the corner perfectly.
Common Mistakes To Avoid
Avoid cutting base molding with a dull blade as it leads to rough edges. Ensure accurate angle settings to prevent misaligned cuts. Secure the molding firmly to avoid shifting during the cut.
Cutting base molding with a miter saw requires precision and care. Mistakes can lead to wasted materials and frustration. Understanding common errors helps you achieve a perfect cut every time. Let’s dive into frequent mistakes and how to avoid them.Inaccurate Measurements
Accurate measurements are crucial for a clean cut. Always double-check your measurements before cutting. Use a reliable measuring tape for consistency. Mark clearly with a pencil to avoid misalignment. Remember, a small error can lead to gaps or overlaps.Improper Saw Handling
Handling the miter saw correctly is vital for safety and accuracy. Ensure a firm grip on the saw handle. Keep the saw blade aligned with your marking. Always use a slow and steady motion during the cut. Quick movements can result in jagged edges or inaccurate angles. Familiarize yourself with the saw’s operation to prevent mistakes.
Credit: www.youtube.com
Finishing Touches
Creating a stunning finish for your base molding requires attention to detail. A miter saw helps to achieve precise cuts, but the real magic happens in the finishing touches. This final step enhances the beauty of your work, ensuring it stands out.
Sanding And Smoothing
Start with sanding to remove rough edges. Use fine-grit sandpaper for a smooth surface. Sand along the grain to prevent scratches. Feel the surface to ensure it’s even. A smooth finish prepares the wood for paint or stain.
Applying Paint Or Stain
Choose between paint or stain based on your decor. Paint offers bold colors and a clean look. Stain provides a natural, wood-like appearance. Apply with a brush or cloth for even coverage. Let it dry completely to avoid smudges.
Protect your work with a clear sealant. This adds durability and shine. Consider the room’s lighting and style for the best finish. Enjoy the transformation as your base molding complements your space.
Safety Tips
Cutting base molding with a miter saw requires careful attention to safety. Protect yourself from accidents. Ensure a smooth, successful project. Follow these essential safety tips for a safe working environment.
Proper Handling Of Tools
Always wear protective gear. Gloves and goggles are crucial. They prevent injuries. Maintain a firm grip on the saw. Ensure stability while cutting. Keep fingers away from the blade. Concentrate on the task at hand.
Inspect the miter saw regularly. Check for loose parts. Make sure it’s clean. A clean saw works better. Avoid distractions. Focus on each cut. Stay alert to prevent mishaps.
Emergency Procedures
Know the emergency shut-off. Familiarize yourself with its location. Quick action can stop accidents. Have a first-aid kit nearby. Treat minor injuries promptly.
Inform others around you. Let them know you’re working. This awareness reduces interruptions. Clear the work area of obstacles. Avoid tripping hazards. Keep the path clear for safety.
Frequently Asked Questions
Can I Cut Baseboards With A Miter Saw?
Yes, you can cut baseboards with a miter saw. It offers precise angled cuts, perfect for corners. Ensure the blade is sharp for clean cuts. Always measure and mark accurately before cutting. Use safety goggles and follow safety instructions for best results.
What Is The 7% Rule For Baseboards?
The 7% rule for baseboards suggests that their height should be 7% of the wall’s total height. This guideline helps maintain proportional aesthetics in interior design, ensuring baseboards complement the room’s overall appearance without overwhelming the space.
What Is The Best Way To Cut Base Moulding?
Use a miter saw for precise base moulding cuts. Measure carefully and mark the cut lines. Set the saw at a 45-degree angle for corners. For straight cuts, adjust the saw to 90 degrees. Always wear safety gear to protect yourself.
Do You Have To Cut Baseboards At 45 Degrees?
No, you don’t have to cut baseboards at 45 degrees. Use 45-degree cuts for outside corners and 90-degree cuts for straight edges. For inside corners, cope the joints for a clean fit.
Conclusion
Cutting base molding with a miter saw isn’t difficult. Just follow the steps. Start by gathering your tools and materials. Measure your space accurately. Mark your molding for precise cuts. Use the miter saw carefully. Safety should always come first.
Practice makes perfect, so don’t rush. With time, you’ll improve your skills. Base molding adds value to any room. It creates a polished finish. Enjoy the process and final results. Remember, patience is key. Happy cutting!


