Imagine you’re about to tackle a project that involves cutting safety glass. Perhaps you’re upgrading your home, working on a DIY project, or handling a repair job.
Regardless of the reason, you’re probably curious about how to do it safely and effectively. Cutting safety glass isn’t just about having the right tools—it’s about knowing the right techniques to ensure precision and avoid accidents. In this guide, we’re going to dive into the step-by-step process that simplifies the task for you.
You’ll discover tips and tricks that even professionals swear by, all while keeping safety as your top priority. We know how frustrating it can be to find scattered and complex information. That’s why we’ve gathered everything you need in one place. Unlock the secrets to cutting safety glass like a pro, and feel confident in your skills. Dive in, and let’s transform your approach to working with safety glass.
Safety Glass Basics
Safety glass is a vital component in modern architecture and vehicles, designed to minimize injury during accidents or breakages. Understanding its basics is essential before you attempt to cut it. Whether you’re a DIY enthusiast or a professional, grasping these fundamentals will ensure you handle safety glass correctly and securely.
Types Of Safety Glass
Safety glass comes in various forms, each with unique characteristics. Tempered glass is one of the most common types, known for its strength and shattering into small, harmless pieces upon impact. Laminated glass, on the other hand, consists of layers bonded with a plastic film, keeping the shards in place even when broken.
Consider the glass type you are working with. It determines the tools and techniques you’ll need. Cutting laminated glass, for example, requires careful handling to avoid damaging the inner layers.
Properties And Uses
Safety glass isn’t just about toughness; it offers multiple benefits. Laminated glass is excellent for soundproofing and UV protection, making it a favorite for windows and skylights. Tempered glass is heat-resistant, ideal for kitchen areas and shower doors.
Think about where you’ll use safety glass. Its properties can enhance your space, providing security and functionality. Are you looking to reduce noise or increase safety in high-traffic areas?
By understanding these basics, you are better equipped to handle safety glass. It’s not just about knowing what type you have but appreciating its properties and uses. How can you leverage these insights in your next project?
Credit: www.eurekalert.org
Essential Tools
Cutting safety glass demands precision and the right tools. This task requires specific equipment for accuracy and safety. Knowing which tools to use makes the job easier. Below, we explore the essential tools needed for cutting safety glass.
Glass Cutting Tools
A glass cutter is the primary tool you need. It has a sharp wheel to score the glass surface. Use a sturdy glass cutting table for stability. Glass pliers help in snapping the glass along the scored line. A straightedge or ruler ensures straight cuts.
Safety Gear
Safety gear is crucial to protect you from injuries. Wear safety goggles to shield your eyes from glass shards. Use gloves to protect your hands from cuts. Consider a dust mask to avoid inhaling glass particles. Protective clothing can add an extra layer of safety.
Preparation Steps
Preparing to cut safety glass requires careful attention to detail. Proper preparation ensures a smooth and safe process. This involves setting up your workspace and taking accurate measurements.
Workspace Setup
Choose a clean and flat surface for cutting. Ensure the area is free from clutter. Adequate lighting is important for visibility. Wear protective gloves and goggles for safety. Keep necessary tools within easy reach.
Measurement Techniques
Use a tape measure for accurate dimensions. Mark the glass with a grease pencil or marker. Double-check all measurements before proceeding. This prevents costly mistakes. A straight edge helps guide your markings. Ensure all markings are visible and clear.
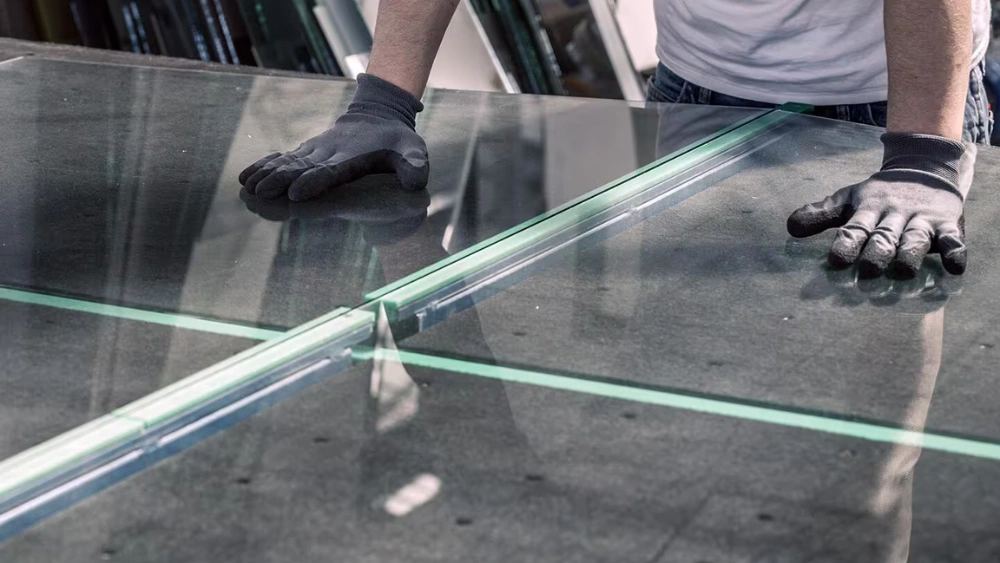
Cutting Techniques
Safety glass is essential for modern construction and vehicles. Cutting it requires precision and the right techniques to ensure safety and accuracy. Before starting, gather all necessary tools. A glass cutter, safety gloves, and eye protection are vital. Follow these steps to cut safety glass effectively.
Scoring The Glass
Begin by marking the cut line on the glass. Use a straight edge to guide the glass cutter. Apply firm pressure and score the glass along the marked line. The scoring should be deep enough to weaken the glass structure. Take your time, ensuring the score is even throughout. Consistent scoring leads to cleaner breaks.
Breaking The Glass
After scoring, it’s time to break the glass. Place a firm surface beneath the scored line. Apply gentle pressure on either side of the score. The glass should snap along the line you scored. Be cautious during this step to avoid injury. Safety gloves protect your hands from sharp edges.
Dealing With Edges
Once broken, the edges may be rough or sharp. Use a sanding tool or fine-grit sandpaper to smooth them. Rub gently until the edges are safe to handle. This step ensures no one gets cut from handling the glass. Proper edge treatment gives a professional finish to your project.
Handling Safety Concerns
Handling safety glass requires careful attention. The glass is designed to be strong and resistant. Cutting it can be tricky without proper measures. Prioritizing safety is essential to prevent accidents. Learn how to handle it with care.
Protective Measures
Wear safety goggles to protect your eyes. Glass shards can be dangerous. Use gloves to shield your hands from cuts. Ensure your workspace is clean and organized. A clutter-free area helps avoid mishaps. Always work in a well-ventilated space. Dust can cause irritation.
Common Mistakes To Avoid
Never rush the cutting process. Speed leads to errors and accidents. Avoid using incorrect tools; they can break the glass. Measure twice before cutting. Precision prevents unnecessary waste. Do not ignore safety gear. It safeguards you from harm.
Post-cutting Procedures
Post-cutting procedures ensure safety glass retains its protective qualities. Smooth edges with sandpaper to prevent injury. Clean the glass thoroughly to remove any debris from cutting.
Once you’ve successfully cut safety glass, what comes next? Ensuring your glass is ready for use involves a few crucial steps. These post-cutting procedures not only enhance safety but also improve the longevity and appearance of your glass. Let’s walk through the essential tasks you’ll need to perform.Edge Finishing
Edges can be sharp and dangerous after cutting safety glass. It’s essential to smooth them out to prevent injury. Use a fine-grit sandpaper or a glass file to gently round off the sharp edges. If you have access to a glass grinder, that’s even better for a professional finish. Remember, the goal is to make the glass safe to handle. Take your time with this step to ensure all edges are smooth.Cleaning And Storage
After cutting and finishing the edges, the glass needs a thorough cleaning. Use a glass cleaner or a mixture of water and vinegar to wipe away any dust or debris. A microfiber cloth can prevent scratches during cleaning. Proper storage is also crucial to maintain the integrity of the glass. Store it upright in a safe place where it won’t get knocked over or scratched. Consider using protective padding or foam to keep the glass secure. Have you ever thought about how storing glass incorrectly could lead to unwanted scratches or even breakage? Taking these precautions helps ensure your safety glass remains in pristine condition until it’s ready for use.Troubleshooting Tips
Safety glass can be tricky to cut. Use a glass cutter with a diamond tip for precision. Wear protective gear to avoid injuries.
Cutting safety glass can be a challenging task, even for those who have some experience. While it is designed to withstand impact and pressure, safety glass requires precision and care during the cutting process. This is where troubleshooting tips become invaluable. They can help you navigate common pitfalls and ensure you achieve a clean and safe cut. Let’s explore some of the issues you might encounter and how to address them effectively.Common Cutting Issues
One frequent issue is chipping along the cut line. This can ruin the glass and result in wasted material. You might also face uneven cuts, where the glass does not break along the scored line. Another problem is tool slipping, which can lead to inaccurate cuts and potential safety hazards. Misalignments are also common, especially if your tools are not properly secured.Solutions And Fixes
To combat chipping, ensure your cutting tool is sharp and apply consistent pressure. A dull tool can cause the glass to fracture unevenly. For uneven cuts, check that your scoring line is continuous and precise. Scoring the glass only once is crucial to prevent jagged breaks. If your tool keeps slipping, consider using a non-slip mat or clamps to stabilize the glass. This provides a steady base and minimizes movement. For alignment issues, use a straight edge or guide to keep your score line straight. Double-check measurements before scoring to avoid misalignment. Have you ever thought about how the environment might affect your cutting? Temperature can play a role. Cutting glass in extreme cold can cause brittleness, so maintaining a moderate temperature could enhance your results. Remember, practice makes perfect. Each cut will build your confidence and skill. What challenges have you faced when cutting safety glass? Share your experience and solutions in the comments below!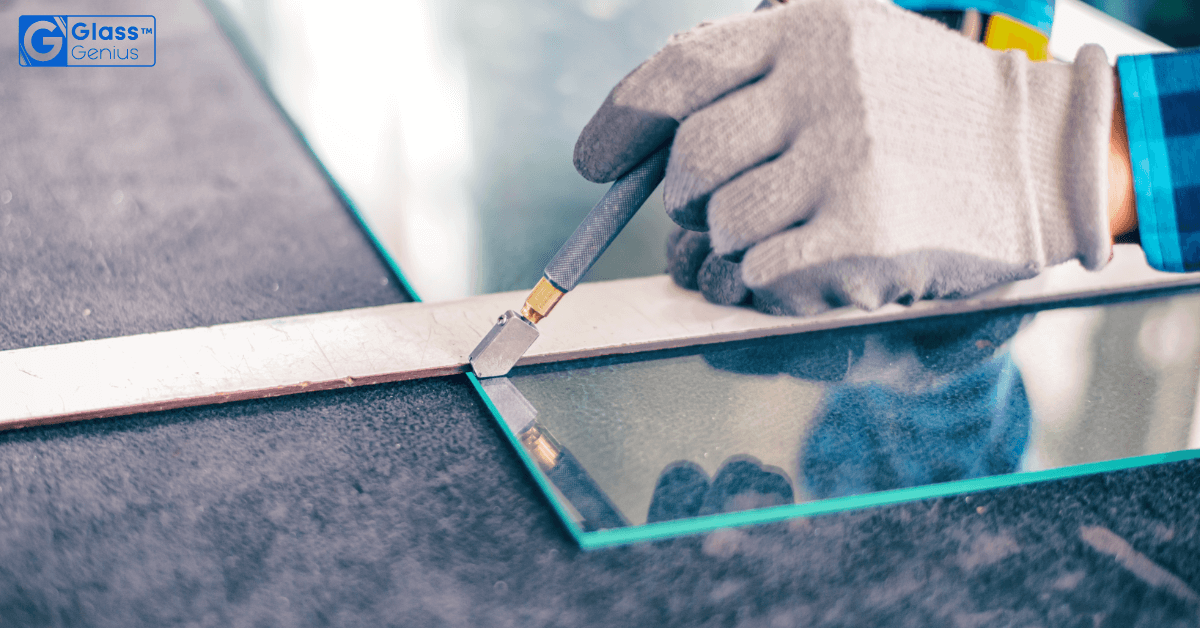
Credit: www.glassgenius.com

Credit: www.youtube.com
Frequently Asked Questions
Can You Cut Safety Glass With An Angle Grinder?
Cutting safety glass with an angle grinder is not recommended. Safety glass is designed to shatter in a controlled way. Using an angle grinder can cause unsafe breaks and chips. It’s best to use specialized tools or consult a professional for cutting safety glass.
Can You Cut Automotive Safety Glass?
Cutting automotive safety glass is not recommended. It’s designed to shatter for safety. Specialized professionals using specific tools should handle any adjustments or repairs. Always prioritize safety and consult experts for any modifications.
How To Cut Tempered Glass Without A Diamond Blade?
Use a glass cutter to score the surface, then gently tap to create stress fractures. Apply pressure carefully to snap the glass along the scored line. Ensure safety by wearing gloves and eye protection during the process. Cutting tempered glass without a diamond blade can be risky and may not guarantee clean breaks.
How Hard Is It To Break Laminated Safety Glass?
Breaking laminated safety glass is challenging due to its strong, interlayer design. It resists shattering, enhancing security. Special tools are often required to break it effectively. This glass type maintains integrity even when cracked, making it ideal for safety and security applications.
Conclusion
Cutting safety glass requires care and precision. Follow the steps for success. Gather the right tools and materials first. Measure and mark the glass accurately. Use a glass cutter designed for safety glass. Apply firm pressure for a clean score.
Then, gently break the glass along the scored line. Always wear safety gear to protect yourself. Practice patience and stay focused throughout the process. With these guidelines, cutting safety glass becomes manageable. Remember, safety is your top priority. Take your time and be cautious.
You’ll achieve the desired results efficiently and safely.


