
Have you ever found yourself in the middle of a project, just to realize you don’t have a soldering iron handy? Imagine if you could transform a simple tool from your toolbox into a makeshift soldering iron.
Yes, with just a screwdriver, you can create a functional soldering iron that can help you complete your DIY projects without a hitch. This isn’t just a clever hack; it’s a game-changer for anyone who loves to tinker. You might be thinking, “Is this really possible?
” Absolutely. And it’s easier than you might imagine. In this guide, you’ll discover how to make a soldering iron with a screwdriver, step by step. You’ll learn the essentials you need and how to safely and effectively execute this DIY trick. Intrigued? Keep reading to unlock this practical skill that will surely come in handy when you least expect it.
Essential Tools And Materials
Creating a soldering iron from a screwdriver is an intriguing DIY project. For success, gather the right tools and materials. Each component plays a crucial role in the process. Below, we explore the essentials needed for this project.
Screwdriver Selection
Choose a screwdriver with a metal shaft. The shaft should be long and sturdy. A flathead is ideal for this task. Ensure the handle is insulated for safety. Avoid flimsy or plastic shafts.
Heating Element Options
Select a heating element that fits around the screwdriver shaft. Common options include ceramic or coil heaters. Ensure it can reach sufficient heat levels. The heat should be evenly distributed for effective soldering. Check for compatibility with your power source.
Power Supply Requirements
A reliable power source is vital. A DC power supply is a good choice. Ensure it matches the heating element’s voltage and current needs. Use a power supply with adjustable settings for versatility. Safety features are important to prevent accidents.
Additional Supplies
Gather additional items like heat-resistant gloves. Insulating tape is essential for securing components. Solder wire is needed for testing the iron. A stand for the soldering iron ensures safe storage. Keep a fire extinguisher nearby for emergencies.

Credit: www.amazon.com
Safety Precautions
Creating a soldering iron from a screwdriver can be an exciting project. Safety is crucial during this DIY endeavor. Proper precautions prevent accidents and ensure smooth operation. Below are essential safety measures to keep in mind.
Protective Gear
Wearing protective gear is vital. Safety goggles shield your eyes from sparks and debris. Gloves protect your hands from heat and sharp objects. A long-sleeved shirt keeps your skin safe. Ensure your clothing is non-flammable.
Work Area Setup
Set up a dedicated work area. It should be clean and clutter-free. Use a sturdy table for stability. Ensure good lighting for visibility. Keep flammable materials away from your workspace. Ventilation is important to clear fumes. Ensure your soldering iron is unplugged when not in use.
Handling Electronics Safely
Handle electronics with care. Ensure devices are powered off before soldering. Avoid touching circuit components with bare hands. Use insulated tools to prevent electric shock. Keep sensitive parts away from heat. Maintain a safe distance from your soldering iron tip. Always check connections twice to avoid mistakes.
Preparing The Screwdriver
Creating a soldering iron from a screwdriver requires preparation. The screwdriver is your base tool. Proper preparation ensures efficient soldering. This section covers key steps. These steps transform the screwdriver into a soldering iron.
Choosing The Right Size
Pick a screwdriver with a metal tip. The tip should be medium-sized. Small tips heat quickly but might be unstable. Large tips take longer to heat. Medium tips balance heat and stability. Check the handle for comfort. Ensure it fits well in your hand.
Cleaning And Polishing
Clean the screwdriver tip thoroughly. Remove any dirt or rust. Use sandpaper for polishing. Polishing enhances heat conduction. Shiny tips conduct heat better. Ensure the tip is smooth. Smooth tips provide even heat distribution.
Modifying The Tip
Modify the tip for soldering. Sharpen it slightly. Sharpening focuses heat on small areas. Use a file for sharpening. Avoid making the tip too sharp. A pointed tip might damage components. Ensure the tip retains some thickness. This prevents overheating.
Assembling The Heating Element
Creating a soldering iron with a screwdriver offers a practical DIY challenge. Assembling the heating element is crucial for effective soldering. This process involves selecting the right coil, wrapping the screwdriver, and securing the connection. Each step needs careful attention to ensure success.
Selecting The Coil
The coil is the heart of your heating element. Choose a coil with the right resistance. Copper wire is a popular choice due to its conductivity. Ensure the coil is thin enough to heat quickly. This helps in achieving the desired temperature for soldering.
Wrapping The Screwdriver
Wrap the coil around the screwdriver carefully. Start at the tip and work your way up. Make sure the coil is tightly wound. Loose coils can reduce heat efficiency. This step impacts the effectiveness of the heating element.
Securing The Connection
Securing the connection ensures the coil stays attached to the screwdriver. Use heat-resistant tape for this purpose. Ensure the tape holds the coil firmly. Proper securing prevents the coil from unraveling. This maintains consistent heat during soldering.
Connecting The Power Supply
Connecting the power supply is crucial when making a soldering iron with a screwdriver. Attach wires securely to the battery terminals. Ensure proper insulation to prevent short circuits and maintain safety.
Connecting a power supply to your homemade soldering iron is crucial. This step ensures your tool functions safely and effectively. Proper connection will allow the soldering iron to heat up efficiently. Let’s explore the essential aspects of this process.Choosing The Right Voltage
Selecting the correct voltage is vital. Too high or too low can damage your tool. Most soldering irons operate around 30 watts with a voltage of 110-220 volts. Check your power supply’s compatibility with these specifications. Using the correct voltage ensures safety and longevity.Wiring Techniques
Proper wiring is essential for a stable connection. Start by stripping the ends of your power cord and the wire on the screwdriver. Twist the wires together securely. Use electrical tape or heat shrink tubing to insulate the connection. This step prevents short circuits and protects against electric shock.Testing The Setup
Before using the soldering iron, test the setup. Plug it into the power outlet carefully. Wait a few minutes to see if the tip heats up. If it does, your connection is successful. If not, recheck the wiring and voltage settings. Ensure everything is secure and properly insulated. Testing ensures your soldering iron is ready for use.Testing And Troubleshooting
Transform a screwdriver into a soldering iron by testing and troubleshooting essential steps. Ensure safety by checking connections and heating elements. Adjust carefully for efficient performance.
Testing and troubleshooting your DIY soldering iron is crucial to ensure it works effectively and safely. These steps help you identify and fix any issues, guaranteeing a smooth soldering experience. Whether you’re a beginner or a seasoned DIY enthusiast, knowing how to test and troubleshoot your creation will save you time and frustration.Initial Power On
When you first power on your soldering iron, do it in a controlled environment. Ensure the area is free of flammable materials and have a fire extinguisher handy. Plug in your homemade tool and switch it on, observing whether it heats up. Listen for any unusual sounds or smells. A sizzling or burning smell might indicate a wiring problem. If something seems off, disconnect it immediately and inspect the connections.Temperature Checks
Once your soldering iron is powered on, check the temperature. Is it getting hot enough to melt solder, but not so hot that it could damage components? You can use a temperature gauge or thermocouple to verify the heat level. A simple method involves using solder itself. Touch the solder to the tip; it should melt smoothly. If it’s not melting, the iron may not be reaching the correct temperature.Identifying Common Issues
Sometimes, your soldering iron might not work as expected. Common issues include loose connections, inadequate heating, or inconsistent power. Check for loose connections. Tighten any screws and ensure wires are securely attached. If the iron heats inconsistently, it could be due to a faulty heating element or power supply. Have you ever realized how a small oversight can lead to bigger problems? Keeping a checklist might help you avoid such issues. What other steps would you consider adding to ensure your soldering iron works perfectly? Engage with your DIY project by questioning each step. Are there any signs you might have overlooked? Your careful attention ensures safety and functionality, leading to a successful soldering experience.Tips For Effective Soldering
Crafting a soldering iron from a screwdriver is straightforward. Start by wrapping the screwdriver tip with copper wire. Connect the wire to a power source, ensuring it heats adequately for soldering tasks.
Creating your own soldering iron using a simple screwdriver is an exciting DIY project. But, once you’ve built it, mastering the art of soldering is crucial for success. Here are some practical tips to ensure you’re soldering like a pro.Technique Mastery
Developing a steady hand is key. Hold the soldering iron like a pen, allowing your fingers to guide it precisely. Think about how you write with a pencil—familiar, right? Heat the joint, not the solder. Wait for the parts to warm up before applying solder. This ensures a strong bond and prevents cold joints, which can lead to poor connections. Work efficiently but don’t rush. Take your time to observe how the solder flows and adjust accordingly. Are you holding the iron at the right angle?Maintaining The Diy Soldering Iron
Regular maintenance keeps your soldering iron in top shape. Clean the tip after each use to remove residue. A damp sponge works wonders for this. Check connections frequently. Loose or corroded connections can cause inconsistent heating. Tighten screws and replace any worn parts to keep your tool reliable. Store it properly. Let your soldering iron cool before putting it away to avoid damaging the components or the surface you place it on. Do you have a dedicated spot for your tools?Handling Different Materials
Different materials require unique approaches. For electronic components, use thin solder for precision. This helps avoid bridging and short circuits. Metals like copper or brass may need more heat. Ensure your DIY soldering iron can reach the required temperature for these tougher materials. Plastic parts demand caution. Excessive heat can melt or warp them, so consider using a heat sink. How do you adapt your technique for different materials? By implementing these tips, you can refine your soldering skills and make the most of your DIY soldering iron. Are you ready to tackle your next project with confidence?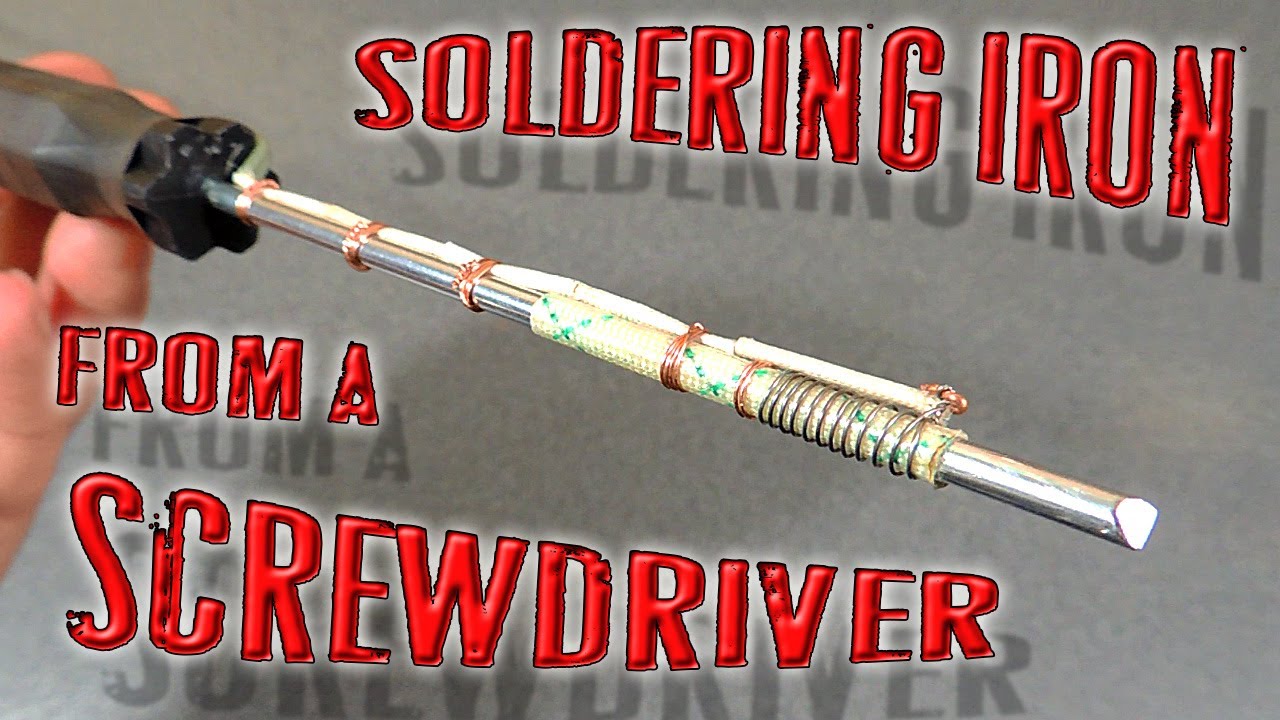
Credit: www.youtube.com

Credit: www.onetransistor.eu
Frequently Asked Questions
How To Make A Soldering Iron With Household Items?
Use a metal rod, heat source, and insulated handle. Secure the rod to the handle. Heat the rod with a candle or lighter. Test on scrap metal for soldering effectiveness. Always prioritize safety during use.
What Can I Use If I Don’t Have A Soldering Iron?
Use a lighter or candle with caution for small soldering tasks. A wood-burning tool can also serve as an alternative.
What Can You Use Instead Of Soldering Metal?
Use conductive adhesive or wire wrapping as alternatives to soldering metal. They provide strong connections without heat.
How To Make A Temporary Soldering Iron?
To make a temporary soldering iron, use a wire and a lighter. Coil the wire, heat with the lighter, and use the hot end for soldering. Always work in a safe environment and take necessary precautions to avoid burns or accidents.
Conclusion
Creating a soldering iron from a screwdriver is simple. Gather tools and follow steps carefully. This DIY project saves money and teaches skills. Perfect for hobbyists or beginners. Always prioritize safety. Use gloves and goggles while soldering. Practice makes perfect.
Try different techniques and improve. Share your results with friends. They might find it useful too. Enjoy your new soldering iron and start creating. Keep experimenting with new projects. Stay creative and learn from each experience. Happy soldering!


