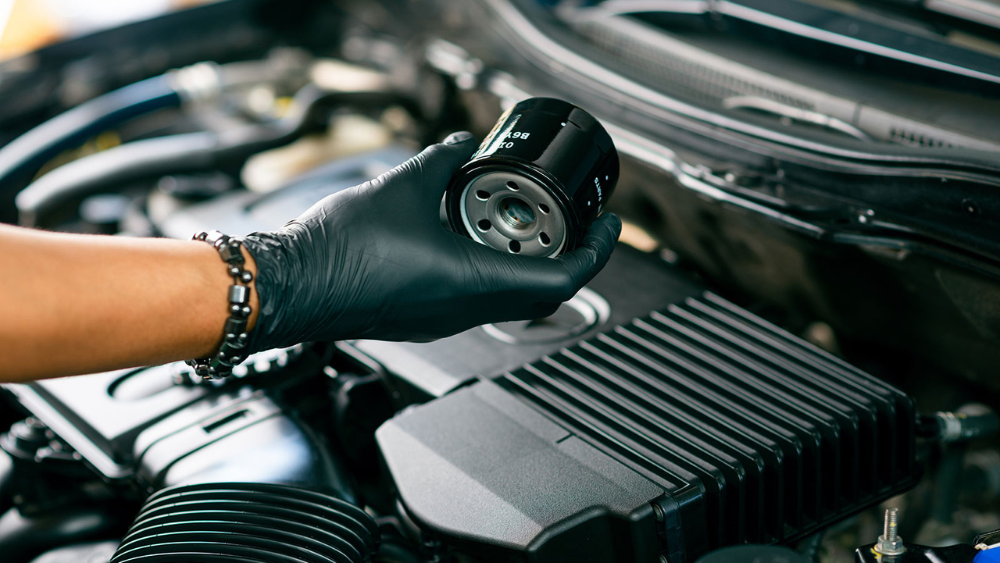
Are you stuck trying to remove an oil filter without the right tools? It’s a common dilemma, and it can be frustrating when you’re ready to finish an oil change, but that stubborn filter just won’t budge.
The good news is, you don’t need to make an emergency trip to the store for a wrench. With a few clever tricks and techniques, you can easily tackle this task using items you likely already have at home. Discover how you can save time, money, and a lot of hassle.
Let’s dive in and explore simple solutions that will have you back on the road in no time.
Credit: www.apexinds.com
Alternative Tools
Removing an oil filter without a wrench might seem challenging. But alternative tools can make the task easier. These tools are often found around the house. They offer a practical solution when a wrench is not available.
1.Using a BeltA sturdy belt can substitute as a wrench. Wrap the belt around the filter tightly. Pull the loose end to create tension. Twist the filter counterclockwise. This method provides a good grip and leverage.
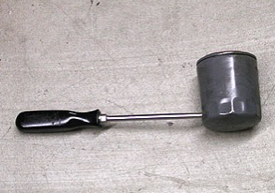
2.Employing a ScrewdriverA screwdriver can be an effective tool. Pierce the filter with the screwdriver. Use it as a lever to turn the filter. This method requires caution to avoid spills. Ensure the oil pan is ready to catch any leaks.
3.Trying a Rubber GloveRubber gloves can improve grip. Wear the glove on your dominant hand. Twist the filter with steady pressure. The rubber surface helps hold the filter securely. This technique works best with lightly stuck filters.
4.Using SandpaperSandpaper can aid in increasing friction. Wrap a strip around the filter. Hold the sandpaper and turn the filter. The rough texture provides extra grip. This approach is simple yet effective.
5.Applying Duct TapeDuct tape offers another handy option. Wrap the tape around the filter tightly. Leave a tail to pull. Use the tail to turn the filter. The adhesive helps maintain a firm hold.
Credit: www.reddit.com
Safety Precautions
Taking off an oil filter without a wrench may seem challenging, but with the right techniques, it can be done safely. However, ensuring your safety is crucial. Before you dive into the task, it’s important to understand the risks involved. Remember, the oil filter is part of your car’s engine system, which can be hot and oily. You wouldn’t want to end up with burns or cuts.
Preparation is Key:Before getting started, make sure your car’s engine is completely cool. Touching a hot engine can cause serious burns. It’s always a good idea to wear gloves to protect your hands from any sharp edges. Do you have an old towel or rag? It can come in handy to wipe away any excess oil or dirt.
Avoid Slippery Situations:Oil can make surfaces slippery, increasing the risk of accidents. Lay down some newspapers or a tarp where you’ll be working. This prevents oil from spilling onto the floor, reducing the risk of slips. Have you ever stepped on oil and lost your balance? It’s not fun, trust me.
Proper Lighting:Working under a car can be tricky without adequate lighting. Use a flashlight or work light to ensure you can see what you’re doing clearly. Shadows can make it hard to spot potential hazards. Imagine trying to remove an oil filter in the dark—it’s a recipe for disaster.
Correct Positioning:Being in the right position is crucial. Ensure your car is on a stable surface and use wheel chocks to prevent it from rolling. Lie on your back or side, whichever is more comfortable and safe for you. Have you ever tried to work under a car without proper support? It’s exhausting and dangerous.
Think about the last time you took on a DIY project. What safety precautions did you take? Did they make your task easier? Your safety should always come first when dealing with car maintenance. With these tips in mind, you’re ready to tackle the task efficiently and safely.
Step-by-step Guide
Removing an oil filter without a wrench is simple with the right technique. First, use a rubber glove for better grip. Next, twist the filter gently to loosen it, ensuring you catch any oil drips with a cloth.
Taking off an oil filter without a wrench might seem daunting at first, but with the right approach, it’s entirely doable. Whether you’re in a pinch without the right tools or just eager to try something new, this step-by-step guide will walk you through the process. Get ready to roll up your sleeves and tackle this automotive challenge with confidence.1. Gather Your Materials
Before diving in, ensure you have a few basic items on hand. Grab a pair of rubber gloves, a sturdy rag or towel, and a bit of sandpaper. These household items will provide grip and protect your hands during the process. Have a container ready to catch any oil drips.2. Ensure Safety First
Safety should always be a priority. Make sure the engine is cool to avoid burns. Place the vehicle on a flat surface and engage the parking brake. This ensures stability and prevents any unwanted movement while you’re working underneath the car.3. Locate The Oil Filter
Find the oil filter by consulting your vehicle’s manual if needed. It’s usually a round, metal canister attached to the engine. If you’ve changed the oil filter before, you might remember the location.4. Use Rubber Gloves For Better Grip
Put on a pair of rubber gloves to enhance your grip on the oil filter. This simple step can make a significant difference. If the filter is particularly oily, wipe it down with a rag before attempting to twist it off.5. Try The Old-fashioned Hand Twist
With your gloves on, attempt to twist the oil filter counterclockwise. Apply steady pressure and use both hands if possible. Sometimes, a little extra elbow grease is all it takes to get the filter moving.6. Enhance Grip With A Rag Or Sandpaper
If the filter is stubborn, use a rag or a piece of sandpaper. Wrap it around the filter and try twisting again. The added texture can help your hands grip better and prevent slipping.7. Use A Belt Or Strap
If the filter still won’t budge, consider using a belt or strap. Loop it around the filter, hold the ends tightly, and twist. This DIY strap wrench can provide the leverage you need to turn the filter.8. Keep The Area Clean
Once the filter is off, be prepared for some oil spillage. Have your container ready to catch drips and clean up any mess with your rag. Keeping the area tidy makes the process smoother and more efficient.9. Reflect On The Experience
Think about how this process went for you. Was it easier or harder than expected? Understanding what worked well can help you improve for next time. Maybe even consider keeping a wrench handy for the future. Trying new methods can be a rewarding experience. Who knows, maybe this will become your preferred technique. Have you ever tackled a task with unexpected tools? Share your story and inspire others to think creatively.
Credit: www.youtube.com
Frequently Asked Questions
How Do You Remove An Oil Filter Without A Wrench?
Use a belt or strap to grip the filter tightly. Turn it counterclockwise to loosen. You can also use a screwdriver to puncture and twist the filter off. Ensure to have a container ready to catch any oil spillage. Always wear gloves for safety.
What Can I Use Instead Of An Oil Filter Wrench?
Use a rubber strap wrench or a belt to remove an oil filter. A pair of channel-lock pliers can also work. A screwdriver through the filter for leverage is another option. Ensure a secure grip to prevent damage.
What Can I Use To Unscrew An Oil Filter?
Use an oil filter wrench to unscrew an oil filter. Strap wrenches or socket wrenches work too. Hand tools like pliers can help if the filter is tight. Always ensure a firm grip to avoid slipping.
What To Use If You Don’t Have A Strap Wrench?
Use a rubber belt or an old leather belt as a substitute for a strap wrench. Wrap it around the object, and twist to loosen or tighten. A rope or towel can also work similarly by providing grip and leverage for turning.
Conclusion
Removing an oil filter without a wrench is simpler than it seems. With common tools, anyone can do it. Hands, a screwdriver, or a strap can help loosen it. Ensure the car is off and cool for safety. Clean the area after removal.
Double-check for leaks once the new filter is in place. Regular maintenance can keep your car running smoothly. Try these easy methods next time you’re stuck. Car care doesn’t have to be complicated. Anyone can maintain their vehicle with a bit of effort.
Your car will thank you!


