
Have you ever wondered if your grounding sheet is actually working? You might be using it every night, but without testing it, you can’t be sure it’s doing its job.
Imagine the peace of mind knowing your sheet is effectively grounding you. That’s where a multimeter comes in handy. In this guide, you’ll discover a simple and precise way to check the effectiveness of your grounding sheet using a multimeter.
With each step, you’ll gain confidence and ensure that your investment in better sleep and health is truly paying off. Let’s dive into how you can easily verify your grounding sheet’s performance and start feeling the benefits you deserve.

Credit: www.urbanhippee.com.au
Understanding Grounding Sheets
Grounding sheets are fascinating tools for improving wellness. They connect you to the Earth’s energy. This connection can help balance your body’s electrical charge. It’s a simple concept with significant benefits. Many people use grounding sheets for better sleep and well-being. These sheets are embedded with conductive materials. They mimic the grounding effect of walking barefoot on grass.
Purpose Of Grounding Sheets
The primary purpose of grounding sheets is to reconnect you with the Earth. This connection helps neutralize free radicals in the body. Grounding sheets aim to reduce stress and inflammation. They can potentially improve sleep quality. They work by channeling the Earth’s energy through conductive materials. Many users report feeling more relaxed and refreshed.
Benefits Of Proper Grounding
Proper grounding offers numerous health benefits. It can enhance your sleep patterns significantly. Grounding reduces stress levels and promotes calmness. Many experience reduced pain and inflammation. It also improves circulation and energy levels. People often feel more balanced and focused after grounding. Regular use of grounding sheets can support overall well-being.
Tools Needed For Testing
Testing a grounding sheet is crucial for safety and effectiveness. Knowing the right tools is essential. With the right equipment, the process becomes straightforward and reliable. Understanding each tool’s role helps ensure accurate results.
Choosing The Right Multimeter
A multimeter is the primary tool. It measures electrical properties like voltage and resistance. Choose a digital multimeter with good sensitivity. Ensure it has a clear display. Look for one with a continuity setting. This feature helps test connections in the grounding sheet.
Additional Equipment Required
Other tools are necessary for testing. You will need a grounding rod. It connects your multimeter to the earth. This ensures accurate readings. Use alligator clips for secure connections. They attach to the grounding sheet and rod. A measuring tape is helpful. It measures distances between connections.
Preparing For Testing
Testing a grounding sheet with a multimeter ensures its effectiveness. Proper preparation is crucial for accurate results. Follow the steps to set up for testing efficiently.
Safety Precautions
Start by ensuring your workspace is dry and free from clutter. Avoid testing near water or damp areas. Wear rubber gloves for extra safety. Keep distractions away to focus on the task. Use insulated tools to prevent electric shocks.
Double-check the multimeter’s condition. Look for any visible damage. Replace damaged parts before use. Ensure the multimeter is powered off before setting it up. This prevents accidental electrical discharge.
Setting Up The Multimeter
Set the multimeter to measure resistance. This will check the grounding sheet’s conductivity. Adjust the dial to the ohms setting. Ensure the probes are securely attached. Red probe goes into the volt/ohm terminal. Black probe connects to the common terminal.
Calibrate the multimeter if necessary. Follow the manufacturer’s instructions. This ensures accurate readings. Test the multimeter on a known resistor first. Confirm it’s working correctly.
Testing Procedure
Testing a grounding sheet with a multimeter ensures its effectiveness. This process involves checking continuity and measuring resistance. Follow these steps for accurate results. You’ll need a digital multimeter and your grounding sheet.
Checking Continuity
First, set your multimeter to the continuity setting. This setting usually displays a sound wave icon. Plug the black probe into the COM port and the red probe into the VΩmA port. Touch the probes together. The multimeter should beep, confirming it’s working. Now, place one probe on the grounding sheet’s connector. Place the other probe on a different part of the sheet. If the multimeter beeps, the sheet has continuity. This means electricity can flow through it.
Measuring Resistance
Next, set your multimeter to the resistance setting. This is often marked with an Ω symbol. Again, connect the black probe to the COM port and the red probe to the VΩmA port. Place one probe on the grounding sheet’s connector. Place the other probe on a different part of the sheet. Check the multimeter reading. A low resistance value, usually below 100 ohms, is ideal. This indicates the sheet is functioning well. If the resistance is high, the sheet may be damaged.
Interpreting Results
Testing a grounding sheet with a multimeter ensures safety and functionality. Set the multimeter to the resistance setting. Connect the probes to the sheet. A low resistance reading confirms proper grounding.
Testing a grounding sheet with a multimeter can seem daunting, but interpreting the results is where the magic happens. It’s the moment you discover whether your efforts to enhance your sleep and health are paying off. But what do those numbers and readings actually mean? Let’s dive into how you can make sense of your multimeter’s feedback and ensure your grounding sheet is functioning effectively.What Results Indicate
A multimeter measures resistance, which tells you how well your grounding sheet conducts electricity. Ideally, you’ll see a low resistance value, indicating that the sheet is properly grounded. Look for a reading below 100 ohms. This suggests your sheet is effectively transferring electrons from the ground to your body. If your multimeter shows a higher resistance, there might be a problem. Have you connected everything correctly? Check the connections between the grounding sheet and the grounding port.Troubleshooting Common Issues
Encountering unexpected results can be frustrating, but don’t worry. Begin by inspecting the connections. Sometimes, a loose plug can lead to inaccurate readings. Ensure the multimeter is set to measure resistance in ohms. A wrong setting can lead to misleading results. Consider environmental factors. Is your grounding sheet exposed to moisture or damage? Assess the condition of the sheet itself. Have you ever wondered why despite all your efforts, things still don’t seem right? Could it be the multimeter itself? Try testing it with another device to rule out any faults. Taking a systematic approach to interpreting results not only saves time but ensures peace of mind. You deserve to rest easy knowing your grounding sheet is working as it should.
Credit: www.youtube.com
Maintaining Grounding Sheets
Testing grounding sheets with a multimeter ensures proper functionality and connectivity. First, set the multimeter to the continuity setting. Next, place one probe on the grounding sheet and the other on the grounding plug. A beep or reading confirms electrical connection, validating effectiveness.
Regular testing ensures continued benefits of grounding sheets.
Maintaining grounding sheets is essential to ensure they continue to work effectively over time. Grounding sheets are designed to connect you to the earth’s electrical field, promoting better sleep and wellness. However, without regular checks, they might lose their effectiveness, leaving you disconnected and unaware.Ensuring Long-term Effectiveness
To keep your grounding sheet functional, it’s crucial to focus on its long-term effectiveness. Imagine the disappointment of using a grounding sheet every night only to find out it’s not working. You can avoid this by making a habit of checking its condition frequently. Consider the environment where your sheet is used. Is it exposed to moisture or dust? These factors can influence its performance. Ensure your grounding sheet is kept clean and dry, as these conditions can compromise its grounding ability.Regular Testing And Maintenance
Regular testing is vital to maintaining your grounding sheet. By using a multimeter, you can test the conductivity of the sheet to ensure it’s still working correctly. This simple test can save you from prolonged use of a defective sheet. To test, set your multimeter to the continuity setting. Place one probe on the grounding connection of the sheet and the other on a section of the sheet. A beep or reading indicates continuity, confirming your sheet is grounding correctly. Have you ever wondered if a simple cleaning routine can extend the life of your grounding sheet? It absolutely can. Wash your sheet gently and dry it completely before use. This will help preserve its conductive fibers, ensuring consistent performance. Maintaining your grounding sheet doesn’t have to be a chore. With these simple steps, you can ensure your sheet remains effective, allowing you to enjoy the benefits of grounding without interruption. So, when was the last time you checked your grounding sheet?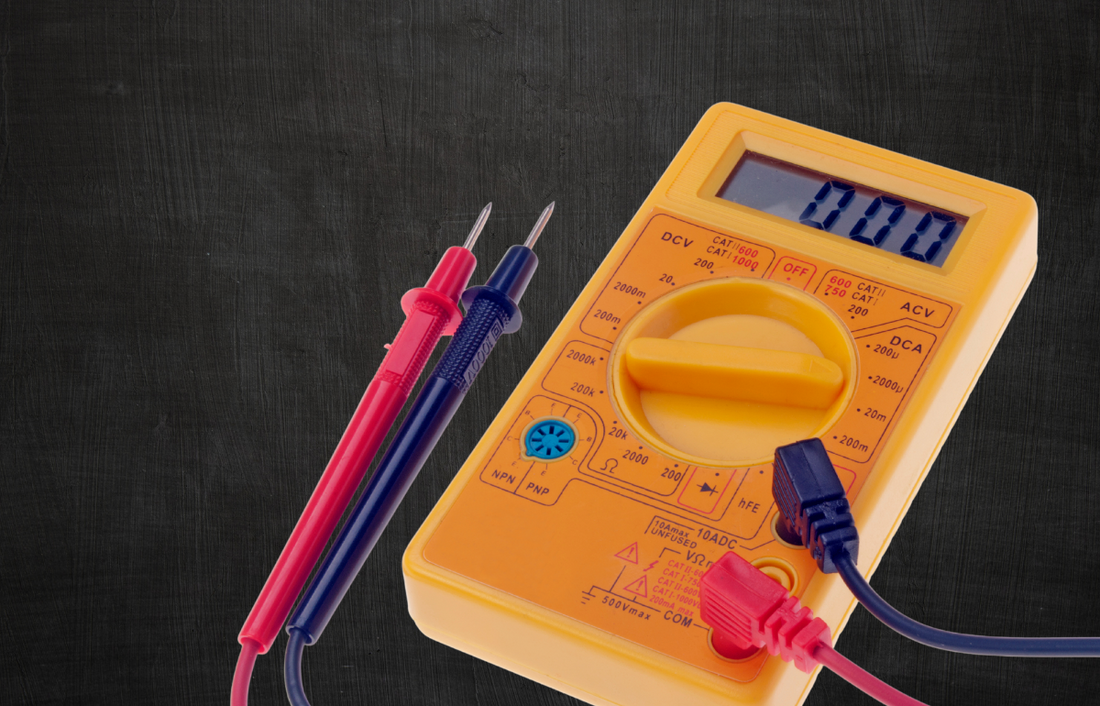
Credit: groundluxe.com
Frequently Asked Questions
How To Test If A Grounding Sheet Is Working?
Use a multimeter to check conductivity between the grounding sheet and a grounded outlet. Ensure the multimeter shows continuity. If the sheet conducts electricity properly, it is functioning. Regular testing helps verify its effectiveness in maintaining grounding benefits.
How To Test Grounding With A Multimeter?
Set your multimeter to the AC voltage setting. Insert one probe into the ground slot of a power outlet. Touch the other probe to a known live terminal. Check for a reading close to zero volts. This confirms proper grounding.
Always ensure safety while performing electrical tests.
How To Electrically Test A Bond Mat?
To electrically test a bond mat, use a multimeter. Set it to continuity mode. Touch the probes to different parts of the mat. A continuous beep or low resistance reading indicates a good electrical connection. Ensure the mat is de-energized before testing for safety.
What Does A Ground Read On A Multimeter?
A ground read on a multimeter checks electrical continuity with the earth. It measures the resistance between the ground and circuit. A low resistance indicates a proper ground connection, ensuring safety and functionality of electrical systems. Ensure your multimeter is set to the correct mode for accurate readings.
Conclusion
Testing a grounding sheet is simple with a multimeter. Follow the steps carefully. First, ensure the multimeter is set to the correct setting. Next, check connections for accuracy. This ensures proper grounding. A good reading means the sheet is working.
If not, check the wires and connections again. Regular checks can prevent issues. This keeps your grounding sheet effective. Enjoy the peace of mind it brings. A well-tested grounding sheet improves safety. Remember, safety first in all settings. Keep your tools handy for regular testing.
Happy grounding!




