Imagine you’re on a drive, enjoying the smooth hum of your engine, when suddenly, your car starts hesitating or stalling. It’s frustrating, right?
One common culprit could be a faulty Manifold Absolute Pressure (MAP) sensor. But here’s the good news: you don’t need to be a car mechanic to diagnose this issue. With a multimeter and a bit of guidance, you can test your MAP sensor yourself.
In this guide, you’ll discover exactly how to use a multimeter to check your MAP sensor’s performance. We’ll break down each step into simple, actionable instructions. You’ll learn how to pinpoint the problem, saving you time and potentially costly repairs. So, are you ready to take control of your car’s health and ensure a smoother ride? Let’s dive into the details, and get your car back on track.

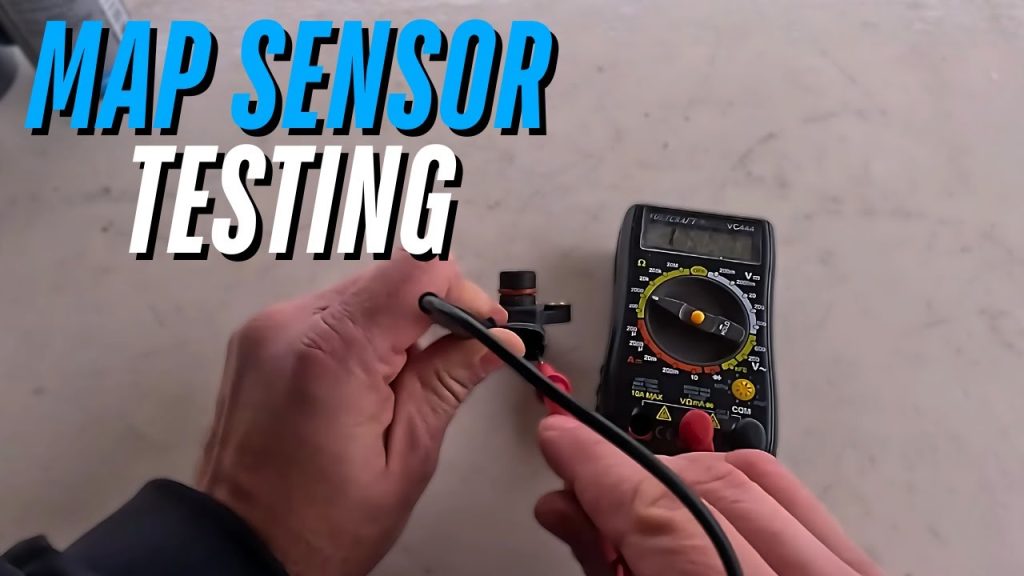
Credit: www.youtube.com
Tools And Equipment Needed
Testing a map sensor requires a multimeter, a basic tool for measuring electrical values. Ensure you have safety gloves and eye protection. A clean workspace and basic knowledge of multimeter settings are essential for accurate results.
Testing a map sensor with a multimeter may sound technical, but with the right tools and equipment, it becomes straightforward. Equip yourself with the essentials, and you’ll be able to diagnose issues with ease. Let’s look at what you need to get started and ensure your map sensor is functioning correctly.1. Multimeter
The multimeter is your primary tool for testing. Ensure it’s a digital multimeter for accurate readings. It’s versatile, allowing you to measure voltage, current, and resistance. Think of it as your eyes into the sensor’s functionality. Have you checked the battery? A dead battery can give false readings.2. Safety Gear
Safety should never be an afterthought. Gloves and goggles protect you from unexpected sparks or fluid leaks. Ever wondered why mechanics wear gear? It’s not just for looks; it’s crucial for safety.3. User Manual
Your vehicle’s user manual is a treasure trove of information. It provides specific details about the map sensor and wiring diagrams. Have you ever tried to assemble furniture without instructions? It’s a similar challenge without the manual.4. Screwdriver Set
A screwdriver set helps you access the map sensor. Different vehicles might require different screwdrivers, so having a variety is handy. Remember that time when you needed a screwdriver but only had a butter knife? Avoid improvisation.5. Pen And Paper
Record your readings for future reference. This simple step helps track changes over time. Can you rely on memory alone for details? Probably not, especially with technical numbers.6. Connector Pins
Connector pins ensure a stable connection between the multimeter and sensor. They help prevent accidental disconnection during testing. Ever experienced the frustration of a wobbly connection? Secure pins can save you from that hassle. Are you ready to gather these tools and dive into testing? Having the right equipment not only simplifies the process but also boosts your confidence. So, what will you tackle first? Your preparation lays the groundwork for success.
Credit: my.prostreetonline.com
Understanding Map Sensor Functions
Understanding how a MAP sensor works is essential for vehicle maintenance. The Manifold Absolute Pressure (MAP) sensor is a key component in a car’s engine. It measures the pressure inside the intake manifold. The information it provides helps the engine control unit (ECU) adjust fuel injection and ignition timing. This ensures optimal engine performance. Let’s dive deeper into its functions.
What Is A Map Sensor?
A MAP sensor reads the air pressure in the intake manifold. This reading helps determine the air density. It sends this data to the ECU. The ECU uses this data to adjust fuel delivery. This process maximizes engine efficiency. Without a functioning MAP sensor, the engine may run poorly.
Why Is The Map Sensor Important?
The MAP sensor plays a crucial role in engine efficiency. It helps maintain the right air-fuel mixture. This balance is vital for fuel economy. It also affects engine power. A faulty sensor can cause engine misfires. It might also trigger error codes in the car’s system.
Common Symptoms Of A Faulty Map Sensor
Recognizing symptoms of a bad MAP sensor can prevent major issues. Common signs include poor fuel economy and rough idle. The engine may also hesitate during acceleration. Check engine light might illuminate. These symptoms indicate the need for sensor testing.
Locating The Map Sensor
To test a MAP sensor with a multimeter, you must first locate it. The MAP sensor plays a crucial role in vehicle performance. It helps monitor air pressure in the intake manifold. Finding this component in your vehicle can seem daunting. But with a little guidance, you can do it easily.
Understanding The Engine Layout
Every vehicle has a unique engine layout. The MAP sensor is often near the intake manifold. This area is generally at the top of the engine. Knowing the basic structure of your engine helps. Consult your vehicle’s manual for a clear diagram. It usually points out key components like the MAP sensor.
Identifying The Map Sensor
The MAP sensor is usually small and rectangular. It often has a three-pin connector attached. Look for a small black box with a wire harness. It might be labeled in some vehicles. This label helps confirm you’re checking the right part.
Checking Common Sensor Locations
MAP sensors are often placed on the firewall or manifold. They might also be on the air cleaner or throttle body. Knowing these common spots can help you find the sensor faster. Take a moment to inspect these areas carefully.
Consulting The Vehicle Manual
Your vehicle manual is a valuable resource. It often includes a detailed engine diagram. Use this to pinpoint the MAP sensor’s exact location. Make sure to check the section on engine components for more help.
Seeking Professional Help
If you struggle to locate the MAP sensor, ask a professional. Mechanics have experience with various vehicle models. They can help identify the sensor quickly. This ensures you are testing the right component.
Preparing The Vehicle For Testing
Before testing the map sensor, ensure the vehicle is properly prepared. Proper preparation ensures safety and accuracy during testing. A well-prepared vehicle allows clear access to the engine components.
Safety Precautions
Start by parking the vehicle on a flat surface. Engage the parking brake to avoid movement. Disconnect the battery to prevent electrical shocks. Wear protective gloves and goggles. Keep loose clothing away from engine parts. Ensure the vehicle is off and cooled down. Avoid touching hot components to prevent burns.
Engine Access
Open the hood of your vehicle carefully. Use the hood prop rod to keep it open. Locate the map sensor near the intake manifold. Clear any debris surrounding the sensor. Remove any covers obstructing access. Ensure all tools are within reach. Create a clean workspace around the engine. This helps avoid losing small parts.
Setting Up The Multimeter
Begin by setting up the multimeter to test the MAP sensor effectively. Select the correct voltage range on your multimeter. Ensure the probes are connected properly for accurate readings.
Setting up your multimeter is crucial for testing a map sensor accurately. The right setup ensures you get correct readings. Understanding how to configure your multimeter can make the process straightforward. Below, we’ll explore key steps to set up your multimeter effectively.Selecting The Right Multimeter Mode
Choosing the correct mode is vital for getting accurate results. For testing a map sensor, select the voltage mode. This mode measures electrical signals from the sensor. Ensure your multimeter is set to measure DC voltage. The map sensor sends DC signals to the engine control unit. Setting the mode incorrectly can lead to inaccurate readings.Calibrating The Multimeter
Calibrating your multimeter ensures accurate measurements. Begin by checking the battery. A low battery affects the readings. Replace it if necessary. Next, zero out the multimeter. This means adjusting it to read zero when not connected. Follow the instructions in your multimeter’s manual. A properly calibrated multimeter reads correctly. This step prevents errors in your map sensor testing. Calibration is simple but essential for accurate results.Performing Voltage Test
Testing a map sensor with a multimeter involves a few steps. The voltage test is one of the most important. This test checks if the sensor is working properly. A map sensor measures the air pressure in the intake manifold. A faulty sensor can cause engine performance issues. This guide will walk you through the voltage test process.
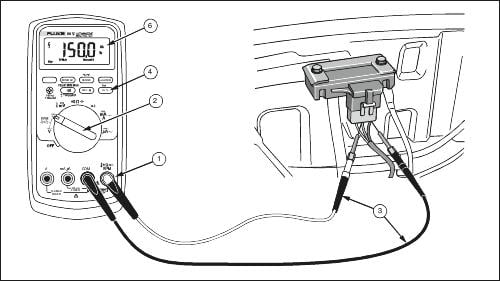
Connecting The Multimeter
First, ensure your vehicle is off. Locate the map sensor in your vehicle. Typically, it’s near the intake manifold. Next, set your multimeter to the voltage setting. Look for the sensor’s connector. Use the multimeter probes to connect to the sensor’s terminals. The red probe connects to the signal wire. The black probe connects to a ground point. Ensure the connections are secure.
Reading Voltage Output
Turn the ignition key to the “On” position. Do not start the engine. Observe the multimeter’s reading. A healthy map sensor shows a voltage between 4.5 to 5 volts. This reading confirms the sensor receives power and functions. If the reading is outside this range, the sensor might be faulty. Double-check your connections and retest. If the issue persists, consider replacing the sensor.
Conducting Resistance Test
Conducting a resistance test on a map sensor helps ensure proper functionality. This test checks the sensor’s internal components for any issues. A faulty map sensor can affect engine performance. Follow these steps to conduct an effective resistance test using a multimeter.
Proper Connection Setup
First, gather necessary tools: a multimeter and user manual. Turn off the vehicle’s ignition. Disconnect the map sensor from the vehicle. Locate the sensor’s pins. Consult the manual for pin configuration details. Set the multimeter to measure resistance. Attach multimeter leads to the sensor’s specified pins. Ensure a secure connection for accurate readings.
Analyzing Resistance Values
Check the multimeter’s display for resistance values. Compare these values with the manufacturer’s specifications. Normal resistance values indicate a functioning sensor. Deviations suggest potential sensor issues. Note any abnormal readings for further inspection. Repeat the test to confirm consistent results. Consistent abnormal readings require sensor replacement or repair. Proper analysis ensures reliable engine performance.
Interpreting Test Results
Testing a map sensor with a multimeter involves measuring voltage and resistance. First, locate the sensor and set the multimeter to the correct settings. Then, connect the probes to the sensor terminals to read the values. Compare these readings to the specifications in your vehicle’s manual to determine sensor health.
Interpreting test results from a map sensor can be a bit like solving a puzzle. You have your readings, but what do they mean? Understanding whether your map sensor is functioning properly or needs replacement is crucial. This section will guide you on how to make sense of the numbers you see on your multimeter and determine the health of your map sensor. Let’s dive into the details of normal voltage and resistance values and how to identify faulty sensor readings.Normal Voltage And Resistance Values
To gauge if your map sensor is in good shape, knowing the normal voltage and resistance values is essential. Typically, a healthy map sensor will produce a voltage between 0.5 to 5 volts when you test it with a multimeter. If you’re seeing numbers outside this range, it’s likely there’s a problem. Resistance readings should also fall within specified values provided by your vehicle’s manual. These are usually measured in ohms. Be sure to check the manual for exact numbers as they can vary depending on the model and make of your car.Identifying Faulty Sensor Readings
What happens if your readings aren’t normal? This is where interpreting comes into play. Faulty sensor readings can mean a few things. If the voltage is too high or too low, it might indicate a wiring issue or a sensor that’s past its prime. When resistance values don’t match expected levels, you might be facing a sensor that has failed. Have you checked that your multimeter is functioning correctly? Sometimes the tool itself can mislead us. Consider if your readings lead to erratic engine performance or stalling. These are tell-tale signs of a map sensor gone awry. By understanding these readings, you can pinpoint the problem and potentially save yourself from further car troubles. Now, think about your last car repair experience—did you wish you had a clearer understanding of the sensor readings? With this knowledge, you can approach your next repair with confidence.Troubleshooting Common Issues
Testing a MAP sensor with a multimeter can reveal common problems. Understanding these issues helps in accurate diagnosis. It’s crucial to address them for efficient engine performance.
Voltage Inconsistencies
Voltage readings should remain steady during testing. A fluctuating voltage suggests a problem. Check the connections first. Loose or corroded wires can cause inconsistencies. Ensure all connections are tight and clean. If the problem persists, the sensor might be faulty.
Resistance Fluctuations
Resistance should be within the manufacturer’s specifications. Use the multimeter to measure it. If resistance fluctuates, inspect the sensor’s wiring. Damaged wires often lead to resistance changes. Replace any faulty wires immediately. If the wiring is intact, consider replacing the sensor.
Replacing A Faulty Map Sensor
Replacing a faulty MAP sensor ensures your vehicle runs smoothly. A damaged sensor can cause performance issues and poor fuel efficiency. Identifying a faulty sensor early can save time and money. Once you diagnose the problem, replacing the sensor is the next step.
Choosing The Right Replacement
Selecting the correct MAP sensor is crucial for proper vehicle function. Check your vehicle’s manual for specifications. Ensure compatibility with your car model and engine type. Consider buying from reputable brands to ensure quality. A reliable sensor offers better longevity and performance.
Installation Tips
Installing a new MAP sensor requires careful handling. Disconnect the battery before starting the installation. Remove the old sensor gently to avoid damaging nearby parts. Position the new sensor correctly and secure it tightly. Ensure all connections are clean and tight to prevent leaks. After installation, reconnect the battery and test the sensor’s functionality.
Credit: www.fluke.com
Frequently Asked Questions
Can You Test A Map Sensor With A Multimeter?
Yes, you can test a MAP sensor with a multimeter. Set the multimeter to measure voltage. Connect the multimeter probes to the sensor’s signal and ground wires. Start the engine and check the voltage readings. Compare them to the manufacturer’s specifications to determine if the sensor is working correctly.
How To Check If A Map Sensor Is Bad?
Test the MAP sensor using a multimeter. Check for voltage changes while the engine is running. Ensure the readings match the manufacturer’s specifications. Inspect for any signs of damage or contamination. Replace the sensor if it fails to meet required readings.
Regular maintenance can prevent sensor issues.
What Is The Voltage Of A Map Sensor?
A MAP sensor typically operates at a voltage range of 0. 5 to 4. 5 volts. It measures manifold pressure. The sensor voltage increases as the manifold pressure rises, providing essential data to the engine control unit. This helps optimize fuel delivery and engine performance.
How To Test If A Sensor Is Bad With A Multimeter?
Set the multimeter to the correct sensor setting. Connect the probes to the sensor terminals. Check for resistance or voltage. Compare readings to manufacturer specifications. If values are outside the range, the sensor may be faulty.
Conclusion
Testing a MAP sensor with a multimeter is straightforward. Follow each step carefully. Ensure your multimeter is set correctly. Check the voltage and ground connections. Interpret readings accurately. These steps help diagnose potential issues. A faulty MAP sensor affects engine performance.
Regular checks can prevent costly repairs. Always prioritize safety when handling electrical components. Consult a professional if unsure. Remember, practice makes perfect. With time, testing becomes easier. Keep your multimeter handy for future diagnostics. Happy testing!


