
Are you tackling a flickering ceiling light or planning to install a new one? Knowing how to test ceiling light wiring with a multimeter can save you time, money, and a headache.
Imagine the satisfaction of confidently handling an electrical task that many find daunting. With the right tools and guidance, you can ensure your lighting setup is both safe and functional. This article will walk you through the process, step-by-step, using simple language and clear instructions.
Before you know it, you’ll be navigating your home’s electrical systems like a pro. So, grab your multimeter and let’s dive in. Your perfectly lit room awaits!

Credit: www.youtube.com
Tools Needed
Testing ceiling light wiring requires specific tools. Having the right tools ensures safety and accuracy. This section covers the essential tools needed.
Multimeter Types
Multimeters come in different types. Digital multimeters are popular for their precision. They display results on a screen. Analog multimeters use a needle to show readings. Both types measure voltage, current, and resistance. Choose one that suits your needs.
Safety Gear
Safety gear is crucial for electrical work. Wear rubber gloves to protect your hands. Use goggles to shield your eyes. Safety gear prevents accidents. Don’t skip this step.
Additional Supplies
Additional supplies make the task smoother. Have electrical tape ready. It insulates wires safely. Use a screwdriver to open fixtures. Keep wire cutters nearby for trimming. These supplies help in efficient testing.
Safety Precautions
Testing ceiling light wiring with a multimeter demands careful safety precautions. Ensure power is off before starting the test. Wear insulated gloves and handle tools with care to prevent electrical hazards.
Testing ceiling light wiring with a multimeter can be a straightforward task if you know the right steps. However, it’s crucial to prioritize your safety throughout the process. Electrical mishaps can be dangerous, and taking the necessary precautions can make a world of difference. Whether you’re a seasoned DIYer or a curious beginner, understanding these safety measures will ensure you’re not only effective but also safe.Switching Off Power
Before you start, make sure to turn off the power supply to the ceiling light. This is a non-negotiable step. Locate your home’s main electrical panel and switch off the circuit breaker corresponding to the room you’ll be working in. Double-check that the power is off by trying to turn on the light. If it doesn’t light up, you’re good to proceed. Remember, it’s better to err on the side of caution and verify than to assume and risk an electrical shock.Handling Electrical Components
Handle all electrical components with care. Use insulated tools to avoid accidental shocks. Even though the power is off, treating every wire as if it’s live is a good habit. Wear rubber-soled shoes to minimize the risk of shocks. Ensure your hands are dry and free of any moisture, as water conducts electricity. Have you ever paused before touching a wire, feeling a bit of apprehension? That’s your intuition reminding you to be cautious. Listen to it. Reassessing your setup before proceeding can prevent common mishaps. By keeping these safety precautions in mind, you not only protect yourself but also ensure the longevity of your home’s electrical systems. Isn’t peace of mind worth the extra step?Preparing The Multimeter
Setting up your multimeter correctly is crucial for testing ceiling light wiring. Start by selecting the appropriate setting for voltage measurement. Ensure the probes are securely connected to the multimeter, ready to check the wiring efficiently.
Preparing the multimeter is a crucial step in testing ceiling light wiring. A well-prepared multimeter ensures accurate readings and safe procedures. Before starting, gather the necessary tools and ensure your multimeter is in good condition. This section will guide you through setting up your multimeter correctly.Setting The Correct Mode
First, identify the type of current you’ll test. For ceiling light wiring, you’ll typically test for AC voltage. Locate the dial on your multimeter. Turn it to the AC voltage setting. This setting is often marked with a “V” and a wave symbol. Choosing the correct mode is essential for accurate readings. It also protects your multimeter from damage. Ensure your probes are securely connected. The black probe goes into the common port. The red probe goes into the voltage port.Checking Multimeter Calibration
Calibration ensures your multimeter gives precise readings. Start by checking your multimeter’s manual. Look for instructions on calibration. Many modern multimeters auto-calibrate. If yours doesn’t, you may need a calibration tool. Test the multimeter on a known voltage source. A standard household outlet works well. Compare the reading with the expected voltage. If it matches, your multimeter is calibrated. If not, adjust it according to the manual. Proper calibration prevents errors during wiring tests. Double-check your multimeter regularly for consistent performance.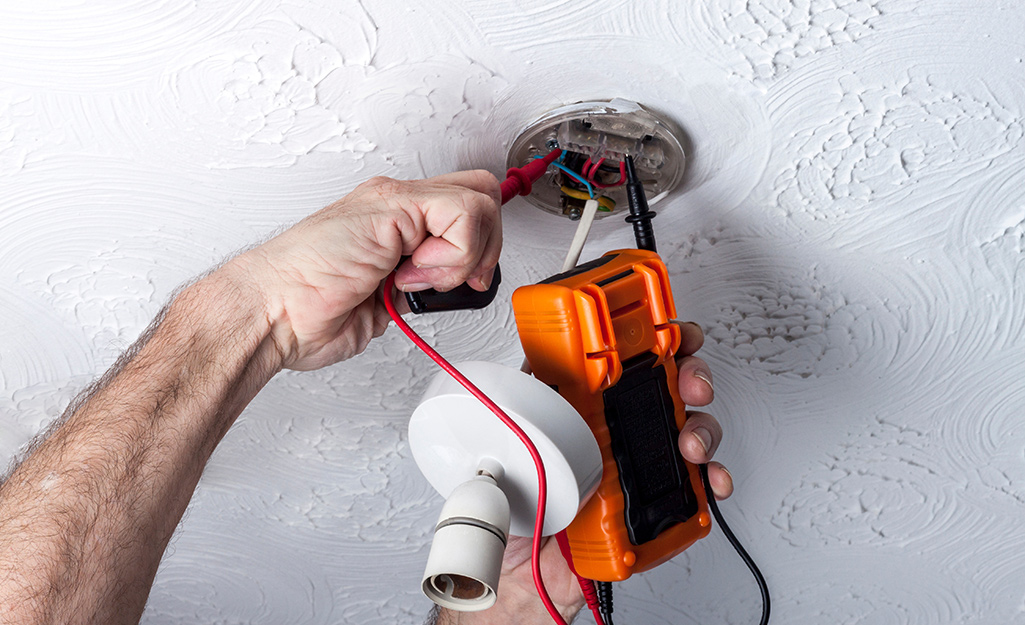
Credit: www.homedepot.com
Testing Voltage
Use a multimeter to test ceiling light wiring safely. Set it to measure voltage. Check connections for proper power flow and identify any issues.
Testing voltage is a crucial step in ensuring your ceiling light wiring is functioning properly. Whether you’re troubleshooting a flickering bulb or installing a new fixture, understanding how to accurately measure voltage can save you time and prevent potential hazards. Using a multimeter, a handy tool for DIY enthusiasts, you can easily check the voltage levels to ensure everything is in working order. Let’s dive into the process with practical steps to keep you safe and efficient.Connecting Leads
To start, grab your multimeter and set it to measure AC voltage, which is typically indicated by a “V~” symbol. Next, ensure the power is turned off at the breaker to avoid any shocks. Once you’re safe, connect the multimeter’s black lead to the neutral wire, usually white, and the red lead to the hot wire, often black or red. Have you ever mixed up wires before? It’s common, so double-check their colors and placement.Reading Voltage Levels
With the leads properly connected, turn the power back on at the breaker. Your multimeter should display a reading, typically around 110 to 120 volts in the U.S. If you see something drastically different, it could indicate a problem. It’s not just numbers; it’s your safety on the line. Make sure the displayed voltage matches what your light fixture requires. If your multimeter shows no reading, there might be an issue with the wiring itself. Are you prepared to troubleshoot, or is it time to call in an expert?Testing Continuity
Testing ceiling light wiring with a multimeter involves checking for continuity. First, ensure power is off. Then, use the multimeter’s probes to check connections, ensuring wires are properly linked. This process helps identify any breaks or faults in the wiring, ensuring safe and reliable lighting.
Testing continuity is a crucial step in checking ceiling light wiring. It ensures the electrical path is complete. This process helps identify broken wires or faulty connections. A multimeter is the best tool for this task. It’s simple to use and provides accurate results. Follow these steps to test continuity effectively.Setting Multimeter To Continuity Mode
Start by turning on your multimeter. Locate the continuity setting, usually marked by a diode symbol. Set the multimeter dial to this mode. This setting allows the device to check if the circuit is complete. You should hear a beep if there’s continuity. A continuous circuit will let electricity flow freely.Interpreting Results
Place the multimeter probes on the wire ends. Listen for a beep or check the display for a zero reading. If you hear a beep, the circuit is complete. This means the wiring is intact. A continuous reading indicates no breaks in the wire. No beep or a high reading suggests a problem. You might need to inspect the wiring further.Troubleshooting Common Issues
Testing ceiling light wiring with a multimeter is crucial for safety. Start by turning off the power supply. Use the multimeter to check voltage and continuity, ensuring wires are connected properly. This simple check can prevent electrical hazards and ensure your light functions correctly.
Testing ceiling light wiring with a multimeter helps fix lighting issues. Common problems include faulty wiring and loose connections. Understanding these problems is crucial for safety. It also ensures effective lighting. Let’s explore some troubleshooting techniques.Identifying Faulty Wiring
Faulty wiring causes flickering lights or no power. Use a multimeter to check continuity. Set the multimeter to continuity mode. Touch the probes to the wire ends. A beep means good wiring. No beep indicates a broken wire. Inspect the wires for visible damage. Replace damaged wires immediately. Ensure all connections are secure.Fixing Loose Connections
Loose connections lead to inconsistent power. Turn off the power before checking connections. Use a screwdriver to tighten loose screws. Check wire nuts for secure fit. Twist the wires together tightly. Cover them with a wire nut. Test the connection with a multimeter. Set it to voltage mode. Touch the probes to the connection points. Proper voltage indicates a good connection. Recheck if voltage is inconsistent.Reconnecting And Final Checks
Before testing ceiling light wiring, ensure safety by switching off power. Use a multimeter to check connections and identify faults. Accurate readings confirm proper wiring, preventing electrical hazards and ensuring light functionality.
Reconnecting the wiring after testing ceiling light wiring with a multimeter is a crucial step. You’ve verified the connections, and now it’s time to ensure everything is safely and securely reassembled. This final phase is all about making sure your hard work pays off with a fully functioning ceiling light. Mistakes happen easily, but with careful attention, you can avoid them. Let’s dive into the specifics of securing wiring and testing light functionality.Securing Wiring
Once you’ve confirmed the wiring is correct, it’s essential to secure it properly. Loose wires can lead to flickering lights or, worse, electrical hazards. Use wire nuts to cap off the connections tightly. Ensure that all wires are neatly tucked into the ceiling box. This not only improves safety but also gives a cleaner appearance. Have you ever encountered exposed wires? They not only look untidy but pose safety risks. Double-check that the wire nuts are firmly attached. Tug gently on the wires to ensure they won’t come loose. This step is a small effort that pays off in preventing future issues.Testing Light Functionality
With the wiring secure, it’s time to test the light functionality. Turn on the circuit breaker and flip the light switch. Does the light come on immediately? If yes, congratulations! Your efforts have paid off. If the light doesn’t turn on, don’t panic. Double-check the connections and ensure the bulb is working. Sometimes, a simple oversight like a loose bulb can be the culprit. Consider how satisfying it feels when the light works perfectly after your efforts. You’ve not only ensured safety but also gained the confidence to tackle more DIY tasks. Have you ever thought about how empowering it is to troubleshoot and resolve these issues yourself? Engaging in these activities hones your skills and builds self-reliance. Reconnecting and final checks are the concluding steps to your journey in testing ceiling light wiring. By securing the wiring and testing the light, you’re ensuring a safe and functional lighting solution. So, next time you encounter a wiring issue, you’ll know exactly what to do.
Credit: www.youtube.com
Frequently Asked Questions
How To Test Ceiling Light Wiring?
Turn off the power supply. Use a voltage tester to ensure wires are not live. Connect the tester to the ceiling wires to verify proper voltage. Inspect connections for signs of damage or wear. Restore power and check the light’s functionality.
Always prioritize safety during testing.
How To Use A Multimeter To Test Wires In A Light Fixture?
To test wires in a light fixture, first, set the multimeter to continuity mode. Disconnect power and remove the fixture cover. Touch the probes to the wire ends; a beep indicates continuity. If there’s no beep, the wire may be broken.
Always ensure safety by turning off electricity before testing.
How To Check If A Wire Is Live With A Multimeter?
Set the multimeter to AC voltage mode. Place the black probe on a neutral or ground. Touch the red probe to the wire. A reading indicates the wire is live. Always ensure safety precautions.
How To Test Led Ceiling Light With Multimeter?
To test an LED ceiling light, set the multimeter to diode mode. Connect the probes to the LED terminals. Observe the multimeter reading; a functioning LED shows a forward voltage between 1. 5-3 volts. Reverse the probes to confirm no reading, ensuring the LED isn’t faulty.
Conclusion
Testing ceiling light wiring with a multimeter is essential. It ensures safety and proper function. Start by gathering your tools. Follow each step carefully. Check for voltage, continuity, and resistance. Always prioritize safety. Turn off the power before testing. Use the multimeter correctly.
Document your findings for future reference. This process can save you time and stress. Understanding wiring helps in troubleshooting. With practice, you’ll gain confidence. Remember, safety first. Proper testing prevents electrical issues. Now, you’re ready to tackle ceiling light wiring with ease.
Keep learning and practicing for best results.




