Imagine you’re cruising down the road, enjoying the breeze, when suddenly your car’s power window refuses to budge. Frustrating, right?
If you’re experiencing this hassle, it might be time to test your power window switch. But where do you start? Don’t worry; you’re not alone. Many car owners face this issue, and thankfully, there’s a simple solution. By using a multimeter, you can quickly diagnose whether the switch is the culprit behind your window woes.
This guide will walk you through the process, step-by-step, ensuring you have the know-how to tackle this common problem with confidence. Ready to get your window back on track? Let’s dive in and learn how to test your power window switch like a pro.
Tools And Materials Needed
Testing a power window switch requires specific tools and materials. Using the right tools ensures accurate results and safety. This guide will help you gather everything needed for the task.
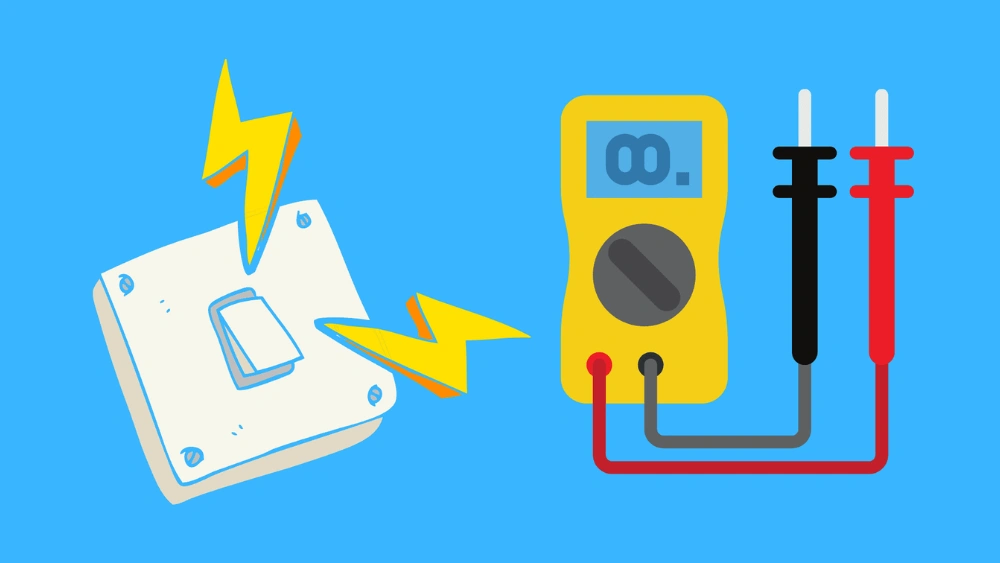
Multimeter
A multimeter measures electrical values. It’s essential for testing the power window switch. Choose one that reads voltage, current, and resistance.
Screwdriver Set
A screwdriver set helps remove the switch panel. Ensure you have both flathead and Phillips screwdrivers. Different vehicles may need different types.
Safety Gloves
Safety gloves protect your hands from electrical shocks. Wear them to ensure safety. Choose gloves that fit well and are made for electrical work.
Cleaning Cloth
A cleaning cloth is useful for wiping down surfaces. Use it to clean the switch area before testing. It helps maintain cleanliness and visibility.
Instruction Manual
The instruction manual for your vehicle provides guidance. It helps locate the switch and understand wiring. Keep it handy for reference.

Credit: www.youtube.com
Safety Precautions
Testing a power window switch with a multimeter requires caution. Proper safety measures protect you and your car. Understanding these precautions avoids accidents and equipment damage.
Wear Protective Gear
Wear safety gloves to prevent electric shocks. Use goggles to protect your eyes from sparks or debris. Proper gear adds a layer of safety.
Disconnect Battery
Disconnect the car battery before starting. This prevents accidental short circuits. Ensure the battery terminals are securely covered.
Work In A Well-lit Area
A well-lit workspace is essential. It helps you see connections clearly. Adequate lighting reduces errors and risks.
Use Insulated Tools
Choose insulated tools for testing. They minimize the risk of electric shock. Insulation provides a safe barrier between you and the current.
Check Multimeter Settings
Ensure the multimeter is set correctly. Incorrect settings can give false readings. Double-check before connecting it to the switch.
Stay Alert
Stay focused and alert. Avoid distractions around you. Concentration is key to safe testing.
Locating The Power Window Switch
To test a power window switch with a multimeter, first locate it on the vehicle’s door panel. Typically found near the armrest, this switch helps control the window’s movement.
Locating the power window switch is the first critical step in testing it with a multimeter. It might seem straightforward, but the complexities of car interiors can make it a bit tricky. Let’s walk through how to find the switch with ease.Identifying The Car Door Panel
Start by identifying the door panel where the power window switch is located. This is usually on the driver’s side, but it can be found on any door where power windows are installed. Take a moment to familiarize yourself with the layout of your vehicle’s door panels.Examining The Control Panel
Next, closely examine the control panel on the door. The power window switch is often grouped with other controls like door locks and mirror adjustments. If you’re unsure, refer to your vehicle’s manual for precise descriptions and diagrams.Checking For Hidden Fasteners
Once you locate the switch, look for any hidden fasteners that may be securing the panel. These could be screws or clips that need careful handling to avoid damage. Some fasteners are cleverly concealed, requiring a bit of exploration to find.Removing The Door Panel
After identifying the fasteners, gently remove the door panel. Be cautious and use the right tools to prevent scratches or breakage. Have you ever tried removing a door panel only to realize you missed a screw? Double-checking saves time and hassle.Accessing The Power Window Switch
With the door panel removed, the power window switch should be in full view. This is your opportunity to inspect for any visible damage or loose connections. A quick visual inspection can sometimes reveal the issue without further testing. Remember, the key to successfully locating the power window switch is patience and attention to detail. Have you ever thought about how much easier car maintenance becomes when you know exactly where to look? It’s a skill worth mastering.Removing The Power Window Switch
Removing the power window switch is essential for accurate testing. This step ensures that you can examine the switch without any obstruction. It’s a straightforward process, requiring only basic tools. By following these steps, you can safely remove the switch and proceed with testing.
Step 1: Gather Your Tools
You’ll need a screwdriver and a plastic pry tool. These tools help you remove the switch without damaging the panel. Make sure they are within reach before starting.
Step 2: Locate The Switch Panel
The switch is usually on the driver’s side door panel. Inspect the panel to find screws or clips holding it in place. Identifying these points is crucial for smooth removal.
Step 3: Unscrew The Panel
Use the screwdriver to remove screws securing the panel. Work carefully to prevent stripping the screws. Keep these screws safe for reinstallation later.
Step 4: Pry Off The Panel
Insert the plastic pry tool under the panel’s edge. Gently lift it to detach the panel from the door. Apply even pressure to avoid breaking the panel.
Step 5: Disconnect Electrical Connectors
Once the panel is loose, you’ll see electrical connectors. Carefully unplug these connectors from the switch. Ensure no wires are damaged during disconnection.
Step 6: Remove The Switch
The switch is now accessible for removal. Detach it by pressing the release tabs. Pull it out gently to avoid damaging surrounding parts.
With the switch removed, you’re ready to test it using a multimeter. This process helps diagnose any electrical issues affecting your power windows.
Setting Up The Multimeter
Setting up the multimeter is essential before testing a power window switch. A multimeter helps measure electrical values like voltage and resistance. Understanding how to set it up can make testing easy and accurate.
Choosing The Right Mode
First, select the correct mode on the multimeter. For testing power window switches, use the continuity mode. This mode checks if electricity flows through the switch. Most multimeters have a dial with various options. Look for the symbol that resembles a diode or sound waves. This is usually the continuity mode.
Adjusting The Multimeter Settings
Once the mode is set, adjust the multimeter settings. Ensure the probes are connected correctly. Insert the black probe into the COM port. Place the red probe in the VΩmA port. These ports are typically marked on the multimeter.
Turn the multimeter on and set it to measure continuity. Some multimeters beep when there’s a complete circuit. If your multimeter has this feature, enable it. This auditory signal helps confirm the switch’s functionality.

Credit: kaiweets.com
Testing For Continuity
Testing power window switches involves checking for continuity with a multimeter. Set the multimeter to the continuity setting. Connect the probes to the switch terminals. Listen for a beep or check the reading, indicating electrical connectivity.
Testing for continuity is crucial for diagnosing power window switch problems. A multimeter helps you check if the current flows through the switch. This process ensures the switch operates correctly. If the current doesn’t flow, the switch might be faulty.Understanding Continuity Tests
Continuity tests verify a complete path for the electric current. A multimeter checks this by measuring resistance. Low resistance indicates good continuity. High resistance or a complete break suggests a faulty switch. Understanding these readings is essential for accurate diagnostics.Performing The Continuity Test
First, gather your multimeter and switch. Set the multimeter to the continuity setting, often shown as a diode symbol. Remove the switch from the car to test it. Place the multimeter probes on the switch terminals. Listen for a beep or check the display for a zero reading. This indicates good continuity. If there’s no beep or a high reading, the switch might be broken. Replacing it could solve the window problem. Always ensure safety by disconnecting the car battery first.Checking Voltage Output
Testing a power window switch with a multimeter requires checking the voltage output. Start by setting the multimeter to measure voltage. Connect its probes to the switch terminals, and activate the switch. Observe the readings to determine if the switch is functioning correctly.
Testing the power window switch with a multimeter may seem daunting, but understanding the process can save you from costly repairs. One crucial step is checking the voltage output. This ensures your switch is getting the power it needs to operate properly. Does your car window refuse to budge? The culprit might be a faulty switch. Let’s dive into checking the voltage output to diagnose the problem and get your window moving again.Understanding Voltage Measurements
Voltage is the pressure from an electrical circuit’s power source that pushes charged electrons through a conducting loop. It’s crucial to know how much voltage the switch is receiving. You’ll use a multimeter to measure this voltage. Make sure it’s set to the appropriate voltage range for your car’s electrical system. Typically, this will be the 12-volt setting for most vehicles. Understanding these measurements is vital. It helps you determine if the switch is getting enough power or if there’s an issue elsewhere in the circuit.Measuring Voltage At The Switch
First, ensure your car is turned off to avoid any electrical mishaps. Safety should always come first. Locate the power window switch panel. You’ll need to remove it gently to access the wiring. This might involve removing a few screws or popping off the panel with a flat tool. Once you’ve exposed the wires, connect the multimeter probes to the switch terminals. Turn on the car’s ignition to allow power to flow. You should see a reading on the multimeter display. Is the voltage reading lower than expected? This indicates a potential issue with the power supply to the switch. If the voltage is correct, the problem might lie within the switch or the window motor itself. Testing voltage isn’t just a technical task. It’s a step toward solving a real-world problem. Have you ever been stuck with a window that won’t roll up in the rain? Knowing how to test voltage can prevent those soggy situations. Don’t let fear of the unknown hold you back. With a little guidance, you can confidently test the power window switch and save yourself a trip to the mechanic. Is your switch getting the power it needs? Now you know how to find out!Interpreting Test Results
After testing your power window switch with a multimeter, interpreting the results is crucial. Understanding the readings helps determine the switch’s condition. Accurate readings can save you time and money on repairs. This section provides insights into what the readings indicate.
Normal Reading Indications
Normal readings suggest the switch is functioning well. Continuity between terminals shows a working circuit. The multimeter should display a consistent ohm reading. This indicates no resistance issues in the switch. A steady voltage reading means power is flowing correctly. High voltage fluctuations might signal underlying issues. Monitor these readings to ensure optimal switch performance.
Identifying Faulty Switch Signs
Faulty switches show inconsistent or zero readings. High resistance indicates a broken circuit. No voltage flow suggests power is not reaching the switch. This can result from internal damage or poor connections. If the multimeter shows no continuity, the switch may be faulty. Look for erratic readings as a sign of malfunction. These signs help identify if a switch needs replacement.
Troubleshooting Common Issues
Power window switches can stop working for different reasons. Knowing how to troubleshoot common issues can save time and money. Using a multimeter helps identify problems quickly. Here are two common issues to check first.
Loose Connections
Loose connections can cause power windows to malfunction. Check the switch connections using a multimeter. Set the multimeter to measure continuity. Touch the probes to the switch terminals. If the meter shows no continuity, the connection might be loose. Tighten the connections and test the switch again.
Damaged Wiring
Damaged wiring often leads to power window issues. Inspect the wires visually for any breaks or frays. Use a multimeter to test the wires for continuity. Set the multimeter to the continuity setting. Place the probes on each end of the wire. A broken wire shows no continuity on the meter. Replace any damaged wires to restore function.
Reinstalling The Power Window Switch
Testing a power window switch with a multimeter helps identify electrical faults before reinstalling. Start by connecting the multimeter probes to the switch terminals. Check for continuity and voltage to ensure proper function.
Reinstalling the power window switch might seem daunting at first, but it’s a straightforward process that brings your car window back to life. After testing the switch with a multimeter and confirming its functionality, the next step is to reinstall it properly. This phase is crucial to ensure that your window operates smoothly.Remove The Old Switch
Before you can reinstall a new or tested power window switch, you need to carefully remove the old one. Use a flathead screwdriver to gently pry the switch out of its housing. Pay attention to the wiring and connectors. Disconnect each connector carefully, ensuring no damage is caused. This step prevents future electrical issues. Have you ever removed something only to find it doesn’t fit back in? Be mindful of how everything is connected.Prepare The New Switch
Once the old switch is out, take your new switch or the tested one and prepare it for installation. Check that all connectors match the ones in your car. Align the pins and connectors to ensure a smooth fit. A mismatch can lead to frustration later on. Think about how smoothly things fit together when everything matches perfectly. It’s the same with your power window switch.Connect The Wiring
Now, connect the wiring to the new switch. Make sure each wire is securely attached to its respective connector. Loose connections can lead to electrical failures. Double-check each connection and ensure they are tight. This is where precision pays off. Did you know a loose wire can cause your window to malfunction? Make sure every connection is secure.Install The Switch Back
With the wiring in place, gently push the switch back into its housing. Ensure it clicks into place securely. Use your fingers to feel for any misalignment. A properly installed switch should sit flush with the panel. Ever tried pushing a button only to find it stuck? Avoid this by ensuring the switch is properly seated.Test The Window
After the switch is reinstalled, test your window. Press the button to check if the window moves up and down smoothly. Isn’t it satisfying when things work perfectly on the first try? Celebrate your success with a smooth rolling window. If the window doesn’t respond, revisit your wiring connections. Sometimes, a small tweak is all it takes for functionality.Final Check
Once the window operates correctly, do a final check. Ensure everything is tight and secure. A quick glance can prevent future issues. Ensure there are no loose wires or misaligned parts. Does your car feel a bit more complete now? It’s all in the details and your careful installation.Reinstalling the power window switch not only gives you a functional window but also a sense of accomplishment. Are you ready to tackle your next DIY project?

Credit: kaiweets.com
Frequently Asked Questions
How To Check If A Power Window Switch Is Bad?
Test the power window switch by pressing it while listening for motor sounds. Check if the window moves. Inspect for any visible damage or dirt. Swap the switch with a working one to confirm. Use a multimeter to check for electrical continuity.
How To Test Power Switch With Multimeter?
Set the multimeter to continuity mode. Touch probes to switch terminals. A beep or reading shows continuity, indicating a working switch. No beep means a faulty switch.
What Is The Voltage Of A Car Window Switch?
A car window switch typically operates at 12 volts. This voltage is standard for most automotive electrical systems.
Why Would Only One Power Window Not Work?
A faulty switch or broken window motor often causes a single power window to fail. Blown fuses, damaged wiring, or mechanical obstructions might also be the issue. Check these components to diagnose and fix the problem efficiently.
Conclusion
Testing your power window switch ensures smooth operation. Use a multimeter for quick checks. It helps detect faults early. Saves time and money. Follow simple steps to test. Confirm your switch is functional. Avoid frustration with window problems. Regular checks improve your car’s reliability.
A little effort goes a long way. Keep your windows working smoothly. Ensure safety and convenience. Troubleshooting can be easy with the right tools. Multimeter tests are straightforward. Be proactive in car maintenance. Boost confidence in your vehicle. Enjoy a hassle-free driving experience.


