Imagine working on your vehicle’s brakes, making adjustments with precision, and having a tool that acts like an extra set of hands. That’s exactly what the third hand brake tool offers.
If you’ve ever found yourself juggling multiple tasks during a brake job, this tool can simplify the process and save you time. You’re about to discover how you can streamline your brake repairs and upgrades effortlessly, achieving professional results without the hassle.
Keep reading to learn how to use this tool effectively and boost your automotive skills, making you more confident in your DIY projects. This guide will walk you through the steps, ensuring you get the most out of your third hand brake tool. Ready to transform your vehicle maintenance experience? Let’s dive in!

Credit: bikerecyclery.com
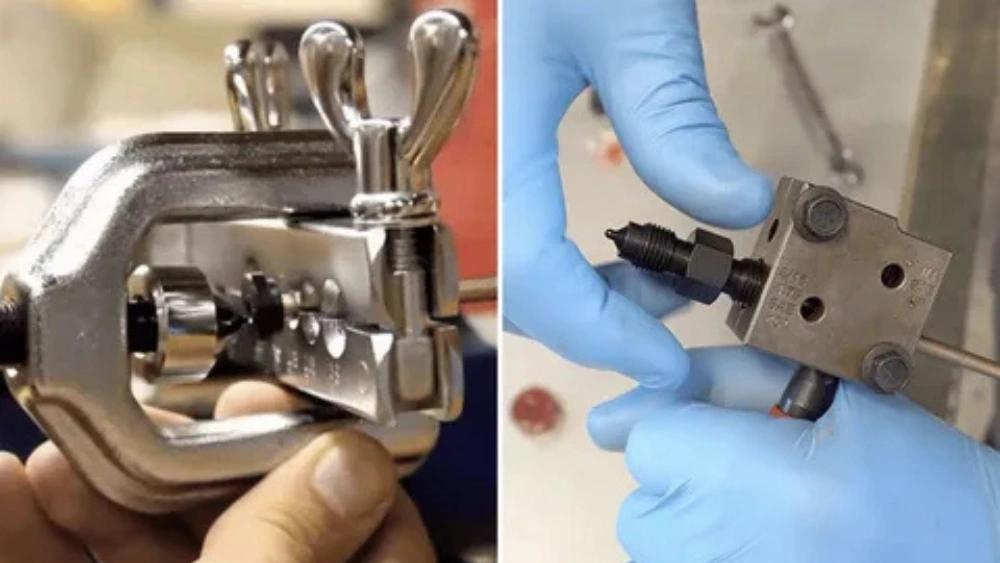
Choosing The Right Third Hand Brake Tool
Choosing the right third hand brake tool is crucial for safety. This tool provides stability during brake adjustments. With the right tool, the process becomes easier and more efficient. Different tools suit different needs and vehicles. Knowing what to look for ensures you make the best choice.
Material And Durability
Consider the material of the third hand brake tool. Stainless steel offers strength and longevity. Plastic tools might break easily. Durable materials ensure the tool lasts longer. Invest in a tool that withstands frequent use. A robust tool is an asset in any garage.
Compatibility With Brake Systems
Check if the tool is compatible with your brake system. Different systems require different tools. Ensure the tool fits your vehicle’s specifications. Compatibility saves time and prevents damage. It’s crucial for effective brake maintenance.
Ease Of Use
A user-friendly tool is essential. Simple designs make the task manageable. Complicated tools can cause frustration. Choose a tool that allows easy adjustments. This ensures a smoother brake maintenance process.
Adjustability And Flexibility
Adjustability offers flexibility during use. Look for tools with adjustable features. This allows for precise control. It adapts to different brake types. A flexible tool caters to various adjustments.
Price And Value
Price is an important factor. Balance cost with quality. An expensive tool isn’t always better. Look for value in functionality. A good tool offers quality without breaking the bank.
Credit: bicycles.stackexchange.com
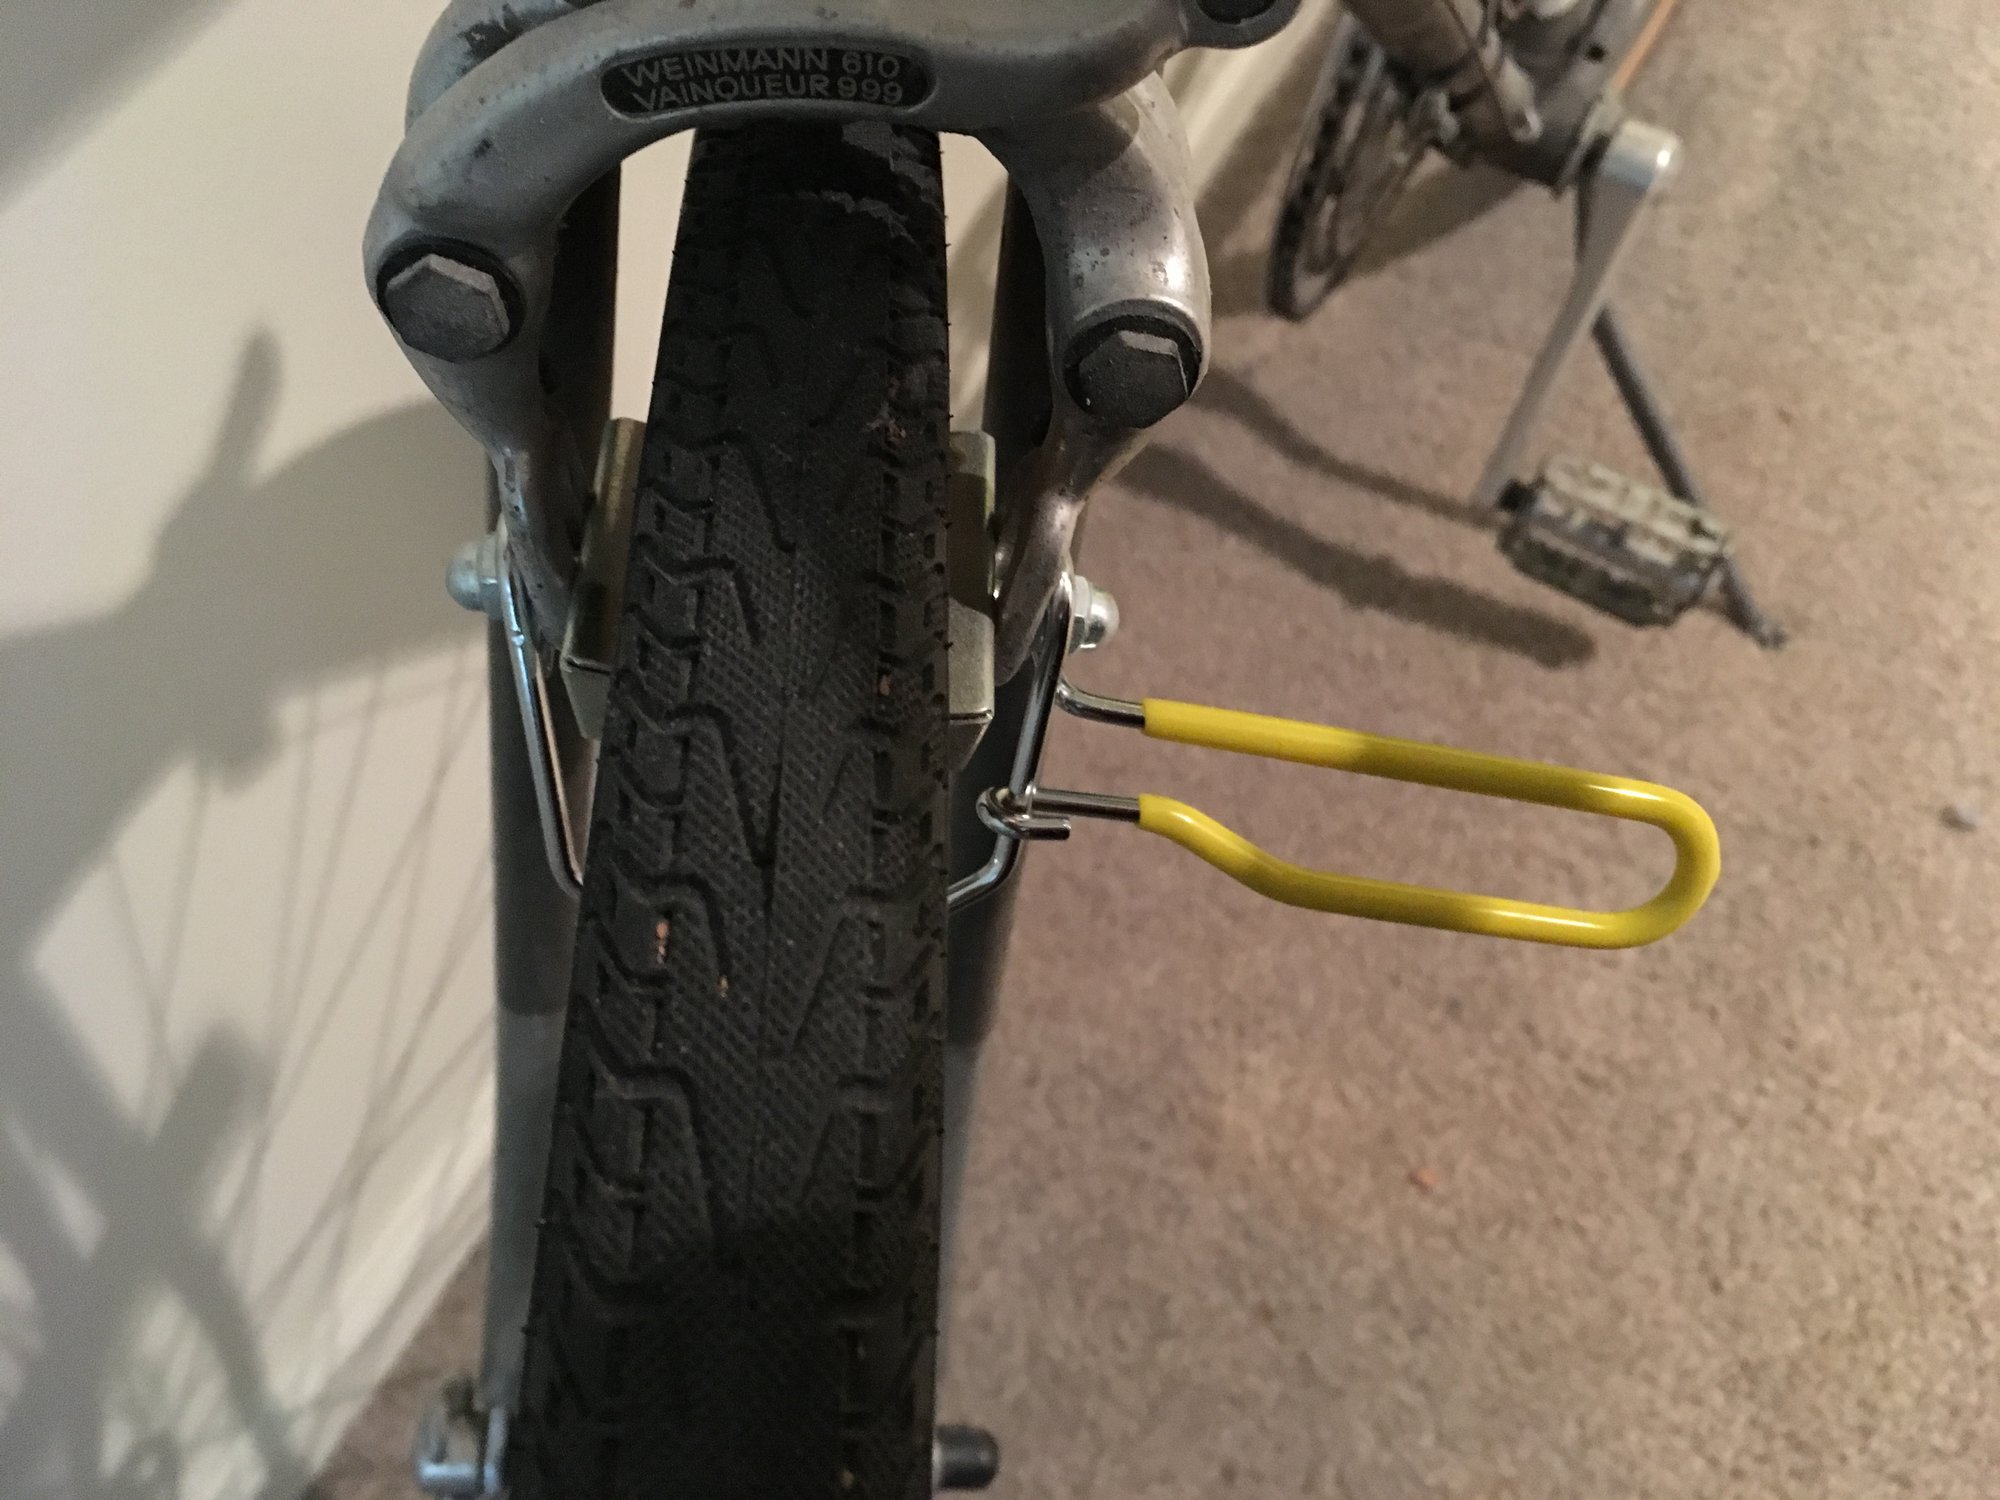
Step-by-step Guide For Effective Use
Using a third hand brake tool can simplify brake adjustments. This guide will walk you through each step to ensure effective use. Clear instructions will help you master this tool effortlessly. Let’s dive into the process to enhance your brake system.
Step 1: Gather Your Tools
Start by collecting necessary tools. The third hand brake tool is key. You’ll also need a screwdriver and pliers. Make sure all tools are within reach.
Step 2: Secure The Brake
Begin by securing the brake lever. Use the third hand brake tool to hold the lever in place. This allows for easy adjustment. Ensure it is tightly secured.
Step 3: Adjust The Cable Tension
Next, focus on cable tension. Loosen the brake cable using a screwdriver. Adjust to preferred tension. Tighten the cable once satisfied. Check for smooth operation.
Step 4: Align The Brake Pads
Ensure brake pads align with the wheel rim. Use pliers to adjust the angle. The pads should touch evenly. This guarantees effective braking.
Step 5: Test The Brakes
Finally, test the brakes. Squeeze the lever and check response. The brakes should engage smoothly. Make adjustments if needed. Repeat testing until satisfied.
Maintenance And Safety Tips
Ensure safety by securing the vehicle on a stable surface before using the third hand brake tool. Regularly check the tool’s grip and alignment for optimal performance. Wear protective gloves to prevent injuries while handling the tool.
When using a third hand brake tool, maintenance and safety are crucial. Regular upkeep ensures the tool remains reliable and safe during use. Neglecting these aspects can lead to accidents or even damage to your bike. By following a few key practices, you can keep your tool in top condition and use it safely.Check For Wear And Tear
Inspect your third hand brake tool regularly. Look for signs of wear like rust or bent parts. Replace any damaged components promptly. A faulty tool can compromise your safety while riding.Keep It Clean
Dirt and grime can affect the tool’s performance. Use a cloth to wipe it down after each use. Consider using a mild cleaner to remove stubborn dirt. A clean tool is a safe tool.Lubricate Moving Parts
Lubrication is key for smooth operation. Apply a small amount of lubricant to the moving parts. Ensure you do not over-lubricate, as excess can attract dirt. Smooth operation prevents unexpected tool malfunctions.Store Properly
Store your tool in a dry, safe location. Avoid places with high humidity which can cause rust. Keeping it in a toolbox can protect it from damage. Proper storage extends the lifespan of the tool.Safety First: Use The Right Technique
Using the correct technique is paramount. Read the manual and practice before using it on your bike. Incorrect usage can lead to injury or bike damage. Always prioritize safety over speed.Engage The Brake Securely
Ensure the brake is fully engaged before use. A loose connection can lead to slippage. Double-check your setup for security. Secure engagement gives you confidence in your tool’s performance.Ask Yourself: Is It Time For Replacement?
Consider the age and condition of your tool. If it frequently malfunctions, it might be time for a new one. Investing in a new tool can save you from potential accidents. Think about your safety and the tool’s reliability. Maintaining and using your third hand brake tool safely is a straightforward yet essential task. By dedicating time to these practices, you ensure a safer biking experience. What strategies do you use to keep your tools in top shape? Your insights might help others stay safe and maintain their gear effectively.
Credit: www.parktool.com
Frequently Asked Questions
How To Use A 3rd Hand Tool?
Secure the 3rd hand tool on your workbench. Position the item you need to hold. Adjust the clamps to fit securely. Tighten the screws to keep the item stable. Use the tool to assist in tasks like soldering or gluing for precise results.
Always follow safety guidelines.
How To Use A Brake Adjustment Tool?
Insert the brake adjustment tool into the adjustment slot. Turn it clockwise to tighten the brakes. Check brake tension. Adjust further if needed for optimal brake function. Always ensure the wheel spins freely after adjustment.
How To Adjust V Brakes To Stop Rubbing?
Loosen the brake caliper bolts. Align the brake pads with the rim. Tighten the bolts. Ensure equal pad clearance. Adjust the barrel adjuster for fine-tuning. Spin the wheel to check for rubbing.
How To Use A Brake Checking Tool?
To use a brake checking tool, first ensure the vehicle is on a flat surface. Connect the tool to the brake system. Follow the manufacturer’s instructions to check for wear or damage. Adjust or replace components as needed for optimal brake performance.
Always prioritize safety during the procedure.
Conclusion
Mastering the third hand brake tool enhances your vehicle repair skills. It’s simple. Follow the steps, practice, and gain confidence. This tool helps with precise brake adjustments. Safety first. Always wear protective gear. Keep your workspace organized. Errors decrease when you’re attentive and prepared.
Explore more repair techniques. A well-maintained vehicle means fewer breakdowns. You save time and money. Share your experiences with others. They learn from your successes and mistakes. Remember, patience is key. With practice, tasks become easier. Enjoy the learning journey.
You become more skilled with each use. Your vehicle runs smoothly.


