
Imagine transforming a simple piece of wood into a masterpiece with intricate designs and smooth edges. This is what you can achieve with a wood router tool.
Whether you’re a DIY enthusiast or a seasoned woodworker, learning how to use this tool can elevate your projects to a whole new level. You might be wondering how exactly this tool can enhance your craftsmanship. The answer lies in its versatility.
A wood router tool is like a magic wand for woodwork, capable of cutting grooves, trimming edges, and creating complex patterns. With the right guidance, you can unlock endless possibilities and bring your creative ideas to life. You’ll discover the essential steps to master the wood router tool, ensuring your safety and achieving precision in every cut. Imagine the satisfaction of crafting flawless pieces that showcase your skills and creativity. By the end, you’ll not only understand the mechanics but also feel confident in using this tool to its fullest potential. Keep reading to uncover tips and tricks that will make your woodworking projects stand out!
Credit: www.homedepot.com
Choosing The Right Wood Router
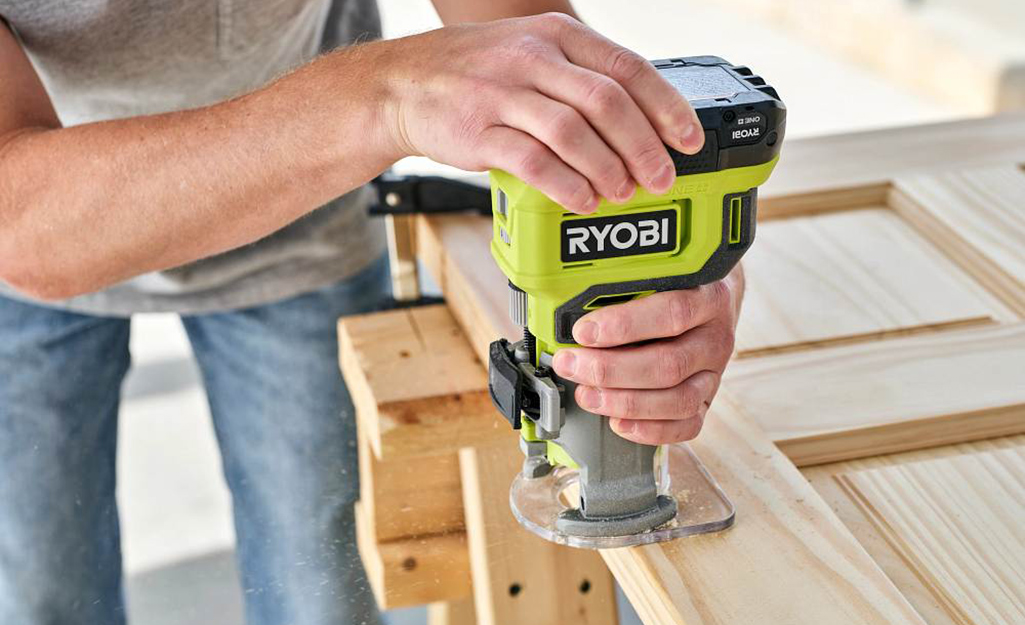
Choosing the right wood router simplifies woodworking projects. Begin with understanding its functions and settings. Adjust the speed and depth for precision. Practice on scrap wood to gain confidence. Ensure safety by using protective gear. This tool enhances creativity in crafting wooden designs.
Choosing the right wood router can change your woodworking experience. It’s crucial to pick the right tool for your projects. A wood router helps in cutting, shaping, and trimming wood. Understanding its features can help you make an informed decision.Types Of Wood Routers
Wood routers come in various types. The fixed-base router is great for beginners. It offers stability for edge work and simple tasks. Plunge routers allow more depth control. They are suitable for more complex tasks. Combo routers provide versatility. You can switch between fixed and plunge bases. Each type has its benefits. Choose based on your project needs.Router Power And Speed Considerations
Power and speed are key factors. A higher power router cuts denser materials easily. For softwoods, less power may suffice. Consider the RPM (revolutions per minute). Higher RPM offers smoother cuts. Variable speed routers give more control. Adjust speed for different materials. This ensures precision in your work.Features To Look For
Look for user-friendly features. Soft start reduces start-up torque. It provides better control. Dust collection ports keep your workspace clean. Ergonomic handles make prolonged use comfortable. Depth adjustment features improve accuracy. LED lights illuminate the work area. This helps in low-light conditions. Safety features like spindle locks are essential. They prevent accidents during bit changes. Choose features that enhance your woodworking experience.
Credit: www.amazon.com
Essential Safety Precautions
Ensure the wood router tool is unplugged before changing bits or cleaning. Wear safety goggles to protect your eyes from flying debris. Securely clamp wood pieces to prevent slipping during operation for a safer woodworking experience.
When using a wood router tool, safety is not just an option; it’s a necessity. Neglecting safety precautions can lead to serious accidents, and no woodworking project is worth risking your well-being. By focusing on essential safety precautions, you can ensure a safer and more enjoyable woodworking experience. Whether you’re a seasoned woodworker or just starting, understanding and implementing these safety measures can make all the difference.Proper Safety Gear
Wearing the right safety gear can protect you from potential hazards. Always use safety glasses to shield your eyes from flying wood chips and debris. Dust masks are crucial for preventing inhalation of harmful particles, especially if you’re working with materials that generate a lot of dust. Don’t underestimate the importance of ear protection, as routers can be incredibly loud. Comfortable gloves can provide a better grip and safeguard your hands from accidental contact with sharp bits. Have you ever thought about how much safer you’d feel with the right gear?Safe Handling Techniques
Safe handling techniques are key to preventing accidents. Always keep your fingers clear of the bit and cutting area. Use both hands to hold the router firmly to maintain control. If you’re routing small pieces, consider using a jig or clamp to secure them, reducing the risk of slipping. Check the router’s bit for wear and tear before starting your project. A dull or damaged bit can lead to unpredictable movements. Can you recall a time when a small oversight almost led to an accident?Workshop Safety Tips
Your workshop environment plays a significant role in safety. Ensure your workspace is clean and free of clutter, which can cause tripping or falling. Adequate lighting is essential for visibility and accuracy. Secure power cords to prevent tangling or tripping. Having a fire extinguisher nearby is always wise, especially when working with wood. It may seem like a small detail, but have you ever tripped over a power cord and thought of its potential danger? By adhering to these essential safety precautions, you can confidently use your wood router tool, knowing you’ve minimized risks. Remember, safety is about preparation and awareness—two things you can control. What safety measure will you implement first to enhance your woodworking experience?Basic Router Techniques
Using a wood router tool can transform your woodworking projects. This versatile tool offers many techniques for enhancing designs. Mastering these basic router techniques is essential. They help achieve smooth, professional results. Let’s explore three fundamental methods that every beginner should know.
Edge Routing
Edge routing shapes the outer edges of wood pieces. It adds a finished look to tables, shelves, and more. Use a guide or fence for straight, consistent cuts. Start the router before touching the wood. This avoids rough starts. Move the router against the rotation direction. It gives better control and cleaner edges. Practice on scrap wood to gain confidence.
Grooving And Slotting
Grooving and slotting create channels in wood surfaces. These techniques are vital for joints and fittings. Choose the right bit size for the desired groove width. Secure the wood to prevent movement. Guide the router steadily along the path. Keep a firm grip for accuracy. Adjust the depth gradually for deeper cuts. Grooving enhances structural connections in your projects.
Creating Decorative Molding
Decorative molding adds elegance to furniture and frames. Select bits with intricate profiles for detailed designs. Test the bit on scrap wood first. It ensures the pattern meets your expectations. Set the wood on a stable surface. Move the router slowly along the wood’s edge. This highlights the molding’s details. Sand the finished piece for a smooth touch. Decorative molding enhances the visual appeal of your work.
Advanced Woodworking Skills
A wood router tool helps create intricate designs and smooth edges on wood projects. Its versatility allows for making decorative edges, grooves, and joints. Essential for enhancing woodworking skills, this tool transforms basic wood pieces into detailed, professional-looking items.
Diving into advanced woodworking skills with a wood router can elevate your craftsmanship to a new level. It’s not just about creating beautiful pieces, but also about pushing the boundaries of what you think is possible. As you master these skills, you’ll find yourself crafting intricate designs that are as functional as they are stunning. Let’s explore some of the advanced techniques that can transform your woodworking projects.Inlay Techniques
Inlaying is a skill that can add extraordinary detail to your projects. It involves embedding pieces of contrasting material into the surface of your workpiece. Start by choosing a pattern that complements your design. Use the router to carve out the area where you want the inlay. Precision is key here; take your time to ensure the depth and edges are uniform. Once you’ve routed the inlay space, fit your chosen material snugly into the cavity. One day, I tried inlaying a simple leaf pattern on a jewelry box lid. The pride in seeing that design come to life was unmatched. Have you considered what designs you might bring to your own projects?Joinery With A Router
Using a router for joinery can greatly increase the strength and aesthetics of your connections. Dovetail and box joints are popular choices that can be achieved with a router. To start, you’ll need a dovetail or box joint jig. This tool guides your router to cut precise shapes. Practice on scrap wood to perfect the fit before moving to your actual project. I remember the first time I crafted a dovetail joint with a router. The tight fit and clean lines amazed me and gave me confidence in my abilities. What type of joinery do you think would best enhance your next project?Complex Pattern Routing
Pattern routing allows you to replicate intricate designs with ease. By using a template, you can guide your router along complex curves and shapes. Start with a sturdy template and secure it to your workpiece. Use a pattern bit with a bearing to follow the template’s edges precisely. I once created a series of identical decorative frames using pattern routing. The key was to ensure the template was flawless. What patterns would you like to replicate in your woodworking? These advanced skills with a wood router can open up new possibilities for your projects. As you practice and refine your techniques, you’ll find yourself creating pieces that reflect your unique style and creativity. What’s your next woodworking challenge going to be?Maintaining Your Wood Router
Using a wood router properly ensures precise cuts and smooth edges. Regular cleaning and lubrication prevent wear and tear. Adjust the speed settings for different wood types to achieve the best results.
Maintaining your wood router is crucial for ensuring its longevity and optimal performance. Just like any tool, a wood router requires regular care and attention to function efficiently. Neglecting maintenance can lead to unexpected breakdowns and costly repairs. Let’s dive into how you can keep your wood router in top shape.Cleaning And Lubrication
Cleaning your wood router should be a regular task. Dust and debris can accumulate quickly, affecting precision. Use a soft brush or compressed air to remove particles from the motor and base. Lubrication is equally important. A drop of oil on moving parts ensures smooth operation. Remember, too much oil can attract dust, so use sparingly. How often do you clean your tools? Regular cleaning extends their life and saves you money in the long run.Inspecting Parts For Wear
Regular inspection helps identify worn-out parts before they cause bigger issues. Check the collet and bit regularly. If they look worn or damaged, replace them immediately. Look at the power cord for cracks or frays. A damaged cord can be a safety hazard. Inspect the base plate and adjust any loose screws to avoid uneven routing. What parts do you think might be wearing out? Spotting these early can prevent frustrating interruptions.Troubleshooting Common Issues
Even well-maintained routers can face occasional hiccups. If your router stalls or vibrates excessively, check the motor brushes. Worn brushes can affect performance. If you notice burn marks on your wood, your bit might be dull. Sharpen or replace the bit for clean cuts. Do you encounter frequent issues with your wood router? Sometimes, the simplest fixes can restore functionality. Regular maintenance of your wood router not only ensures a longer life but also enhances your woodworking experience. By cleaning, inspecting, and troubleshooting, you maintain precision and efficiency, keeping your projects on track.Tips For Mastering Wood Router
Using a wood router can seem tricky at first. But with practice, it becomes simpler. Knowing a few key tips can help. These tips can improve your skills and make your work more precise. They can also help you complete projects faster. Plus, you can try new, creative ideas with confidence.
Improving Precision And Control
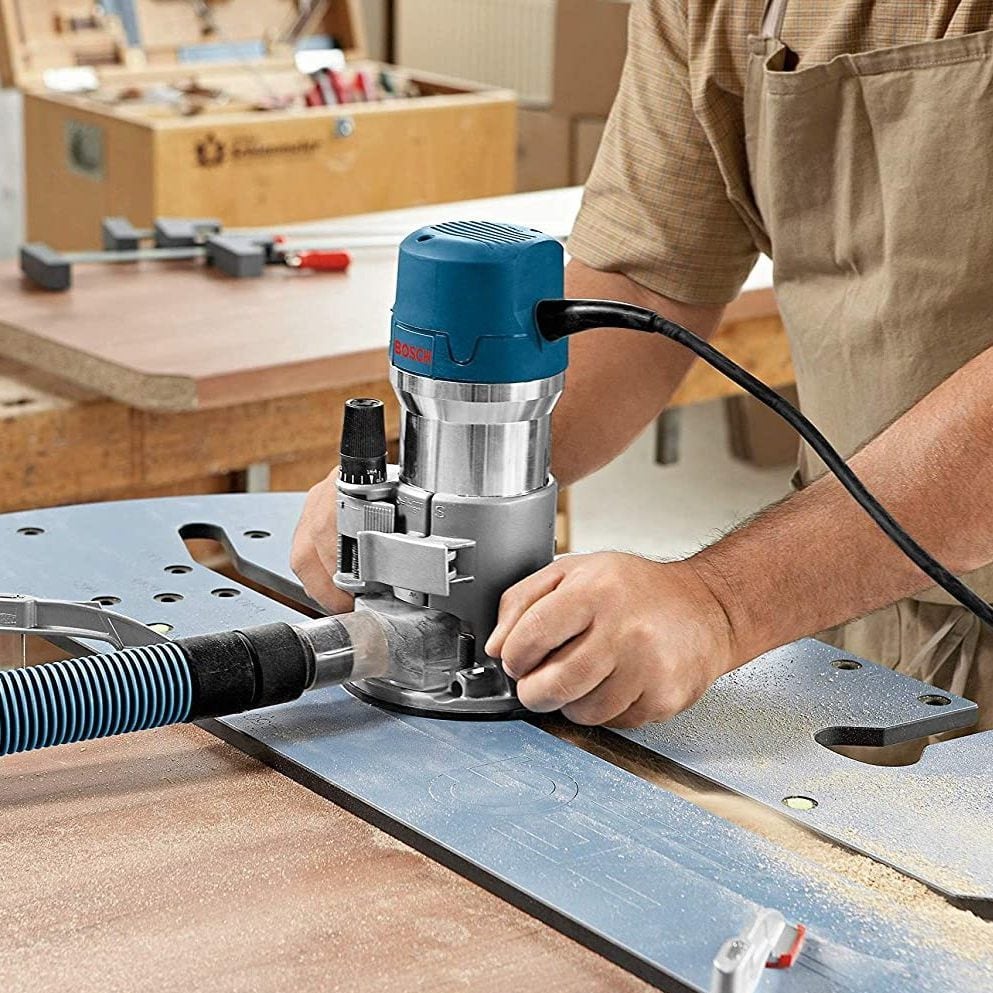
Keep a firm grip on the router. This keeps your cuts straight and clean. Use both hands for better stability. Adjust the speed according to the wood type. Soft woods need slower speeds. Hard woods need faster speeds. Always check your measurements twice. This avoids mistakes and saves wood.
Maximizing Efficiency
Plan your cuts before you start. This helps avoid unnecessary moves. Use sharp bits for clean cuts. Dull bits can slow you down. They can also damage the wood. Clean your router regularly. Dust can cause jams. It can also affect the router’s performance. Practice on scrap wood first. This builds confidence and speeds up your work.
Experimenting With Creative Projects
Let your imagination guide you. Try different bits for unique patterns. Mix wood types for contrast. Practice makes you more comfortable. Comfort leads to creativity. Start small and build up. This helps you learn and grow. Don’t be afraid to make mistakes. Mistakes teach new techniques.
Credit: www.familyhandyman.com
Frequently Asked Questions
How To Router Wood For Beginners?
Start with a quality router and sharp bits. Practice on scrap wood first. Secure the wood firmly. Adjust depth carefully for precision. Move the router steadily along the grain. Wear safety gear and work in a well-lit area. Follow these steps to achieve smooth, professional results.
Do You Push Or Pull A Wood Router?
Push a wood router in the opposite direction of the bit’s rotation. This ensures control and precision. Pushing against the rotation helps avoid accidents and maintains stability. Always maintain a firm grip for safety.
What Not To Do When Using A Router?
Avoid placing the router in enclosed spaces or near metal objects. Do not use outdated firmware. Avoid sharing passwords publicly. Do not overload the router with too many devices. Refrain from neglecting regular maintenance and security updates.
Which Way Do You Run Wood Through A Router?
Run wood against the router bit’s rotation direction. This ensures a clean, controlled cut. Feed the wood from right to left on a table-mounted router. On hand-held routers, move counterclockwise around the workpiece’s edge. Always prioritize safety and maintain a firm grip while routing.
Conclusion
Using a wood router tool can enhance your woodworking skills. Practice ensures precision and confidence. Safety is crucial, so always wear protective gear. Start with simple projects to build experience. Experiment with different bits for varied designs. Maintain your router for long-lasting performance.
A clean work area boosts safety and efficiency. Remember to check your router settings before each use. Enjoy the creative process and watch your skills grow. With patience, you’ll craft beautiful pieces. Happy woodworking!




