
Imagine you’re in the middle of a project, and you reach for your trusty Walco 24 Pipe Wrench, only to realize something’s off. The spring isn’t where it should be, and you’re left scratching your head.
Sound familiar? You’re not alone. Many DIY enthusiasts and professionals encounter this puzzling situation, and it’s crucial to address it before it disrupts your workflow. Understanding where the spring goes on your Walco 24 Pipe Wrench can save you time, prevent frustration, and keep your projects moving smoothly.
We’ll guide you through the exact placement of the spring, ensuring your wrench functions perfectly every time you need it. Dive in, and discover how a simple fix can make all the difference in your toolbox efficiency.
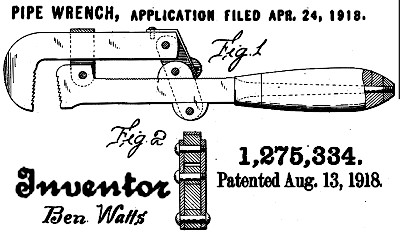
Walco 24 Pipe Wrench Overview
The Walco 24 Pipe Wrench is a strong tool. It helps with tightening pipes. This wrench is made of durable metal. It has a spring mechanism inside. The spring helps the wrench grip pipes firmly. Without the spring, it may slip. That’s why the spring is important.
Using the wrench is easy. The handle is long and comfortable. It gives a good grip. The wrench’s jaws are adjustable. This means it can fit different pipe sizes. The spring is inside the wrench’s body. It connects the jaws to the handle. When you twist the handle, the jaws tighten. The spring makes sure the jaws stay tight. It is a simple but clever design.

Credit: www.ebay.com
Spring Mechanism Functionality
The spring in the Walco 24 pipe wrench is important. It helps the wrench open and close. It is a part that moves up and down. This movement is smooth and easy. The spring is hidden inside the wrench. It works quietly.
When the wrench is used, the spring stretches. It gives power to grip pipes tight. This makes the wrench safe to use. The spring’s job is vital. It supports the wrench’s jaws. Jaws that hold pipes firmly.
Without the spring, the wrench wouldn’t work well. The spring is like a helper. It keeps the wrench ready to use. It makes sure the wrench is effective. The spring is small but very important.
Locating The Spring
The spring on the Walco 24 pipe wrench is small but important. It can be found near the wrench’s jaws. Many times, it is hidden inside the handle. Check carefully. Sometimes, it sits near the adjustment wheel. This wheel helps the wrench grip tight. The spring lets the wrench move back easily. This makes work faster and smoother.
To inspect the spring, you need a few tools. A flashlight is useful for seeing inside small parts. Screwdrivers help open the wrench if needed. Tweezers can grab tiny parts. Always have a clean cloth to wipe dust away. This keeps the wrench in good shape. Be gentle. Patience is key when checking small parts.
Reasons For Spring Misplacement
Springs can get loose over time. Daily use makes them weak. Many people use their wrenches every day. This causes wear and tear. Small parts can fall out. Springs might not fit well. Old springs might break. Broken springs don’t stay in place. Keep checking your wrench.
Using the wrench the wrong way can harm it. Forcing it too hard can bend springs. Dropping it can make parts come loose. Holding it wrong might make the spring pop out. Always follow the right steps. Take care of your tools.
Steps To Reposition The Spring
First, locate the handle on the wrench. Use a screwdriver to remove the screws. Pull apart the handle slowly. You will see the inner parts. Look for the spring. It might be hidden. Check under the jaws. Carefully take out the spring. Keep it safe. You will need it later.
Hold the spring in your hand. Find the spring slot. Insert the spring carefully. Ensure it fits snugly. Check the alignment. The spring should be straight. Place the jaws back in place. Tighten the screws again. Make sure everything is secure. Test the wrench. The spring should work smoothly.
Preventative Maintenance Tips
Check the wrench for any signs of rust. Rust can damage the tool. Look for wear on the moving parts. This helps keep the wrench working well. Make sure the spring is in place. A missing spring can make the wrench loose. Tighten any loose screwsor parts. They can affect the wrench’s performance. Regular checks keep your tool in top shape.
Store the wrench in a dryplace. Moisture can cause rust. Use a toolbox or a shelf. Keep it away from chemicalsthat can harm the metal. Make sure the storage area is not too hot or cold. Extreme temperatures can warp the metal. A clean, safe spot keeps your wrench ready for use.
Troubleshooting Common Issues
Identifying Other Faultsin a Walco 24 Pipe Wrench can be tricky. First, check the jaw for any visible damage. Damaged jaws can make it hard to grip pipes. Next, inspect the handle. A bent or broken handle affects its use. Look at the spring too. If missing, the wrench won’t work well. Make sure all parts move freely. Stuck parts need fixing. Rust can cause parts to stick. Clean rust with a soft brush. Always keep the wrench dry.
Seeking Professional Helpmight be needed if you find faults. Professionals know how to fix wrenches. They can replace broken parts too. Taking the wrench to a shop can save time. A pro can check for hidden faults. They also have special tools to fix issues. If unsure, ask a professional for advice. It’s better than guessing. Regular checks by a professional can keep the wrench in good shape.

Credit: www.hubhistory.com
Credit: www.datamp.org
Frequently Asked Questions
Which Way Does A Pipe Wrench Go?
Place the pipe wrench’s adjustable jaw on the pipe, with the fixed jaw facing forward. Rotate the wrench clockwise to tighten. Ensure a snug grip for effective use and avoid slipping. Always use the wrench in the intended direction to maintain safety and efficiency.
What Are The Five Parts Of A Pipe Wrench?
A pipe wrench has five parts: the handle, fixed jaw, adjustable jaw, nut, and hook jaw. The handle provides grip, while the jaws clamp the pipe. The adjustable jaw allows size changes, and the nut tightens or loosens the grip.
The hook jaw secures the pipe firmly.
Which Jaw Moves On A Pipe Wrench?
The top jaw of a pipe wrench moves. This adjustable jaw tightens or loosens to grip pipes securely.
Why Won’t My Pipe Wrench Tighten?
Your pipe wrench might not tighten due to worn-out teeth or incorrect jaw adjustment. Check for debris or rust. Ensure the wrench size matches the pipe. Replace or adjust components if needed for optimal grip. Regular maintenance can prevent these issues.
Conclusion
Understanding the spring’s placement on the Walco 24 Pipe Wrench helps. Proper placement ensures smooth operation and efficiency. Always refer to the user manual for guidance. This ensures you position the spring correctly every time. Regular maintenance extends the wrench’s lifespan.
If unsure, consult a professional for advice. With this knowledge, you can tackle plumbing tasks confidently. Remember, correct assembly prevents future issues. Keep your tools in top shape for best performance. Now, you can handle repairs with ease. Enjoy using your Walco 24 Pipe Wrench effectively.
Happy wrenching!


