
Are you looking to get hands-on with your home electrical projects or simply want to ensure your devices are functioning safely? Knowing how to test AC voltage with a multimeter is an essential skill that can save you time and money.
Imagine having the confidence to troubleshoot electrical problems on your own, avoiding unnecessary repairs or replacements. In this guide, we’ll walk you through the simple steps to test AC voltage accurately, even if you’re not an electrician. By the end, you’ll not only master the technique but also gain peace of mind knowing you can handle basic electrical checks with ease.
Keep reading, and empower yourself with this practical knowledge that can make all the difference in your DIY toolkit.
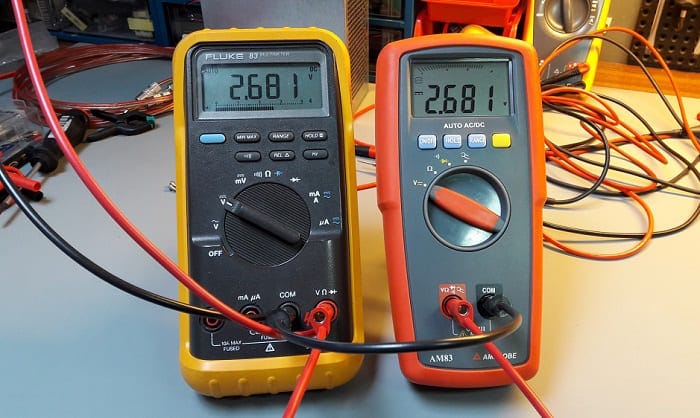
Credit: medium.com
Safety Precautions
Testing AC voltage with a multimeter requires caution to ensure safety. Always wear insulated gloves and use a well-maintained multimeter. Verify the tool is set to AC mode before proceeding.
Testing AC voltage with a multimeter is a common task, but it demands a careful approach to ensure your safety. Electricity can be dangerous, and taking proper safety precautions is essential. Before you start, it’s crucial to prepare yourself and your equipment to prevent any accidents.Wear Protective Gear
Always prioritize your safety by wearing the right gear. Insulated gloves and safety goggles can protect you from unexpected shocks or sparks. Even if you feel confident, these precautions are necessary. Consider a time when I was testing a circuit without gloves. I got a minor shock that served as a wake-up call. It’s easy to overlook these steps, but they make a significant difference.Ensure Multimeter Is Functioning
Before you begin testing, verify that your multimeter is working correctly. A malfunctioning tool can give inaccurate readings or even harm you. Check the battery and test the multimeter on a known voltage source first. This quick step ensures that your device is ready for accurate measurements. Have you ever found yourself in a situation where your tools failed you? Testing your multimeter beforehand can prevent such frustrating scenarios. Regularly inspect the leads and probes for wear and tear. Damaged components can compromise your safety and the accuracy of your readings. Taking these precautions may seem like extra work, but they are worth it. They ensure not only your safety but also the reliability of your measurements. When you approach AC voltage testing with the right mindset and preparation, you protect yourself and get the most accurate results.Understanding Ac Voltage
Understanding AC voltage is essential for anyone using electrical devices. AC stands for alternating current. It’s the type of electricity that powers most homes. Unlike direct current (DC), AC voltage alternates direction. This alternation allows it to travel over long distances efficiently. Knowing how to test AC voltage ensures safety and reliability in electrical projects.
Difference Between Ac And Dc
AC and DC are two types of electrical currents. AC voltage changes direction periodically. This makes it ideal for powering homes and businesses. It can be easily transformed to higher or lower voltages. DC voltage flows in one direction. It’s commonly used in batteries and electronics. Understanding the difference helps in choosing the right tools and techniques for testing.
Common Uses Of Ac Voltage
AC voltage powers most household appliances. It’s used in lighting, heating, and cooling systems. Industries rely on AC for machinery and equipment. Public utilities distribute AC voltage through power lines. This makes it a backbone of modern infrastructure. Knowing where AC voltage is used helps in testing its levels effectively.
Choosing The Right Multimeter
Testing AC voltage with a multimeter involves selecting the correct settings and safely measuring the voltage. Ensure the multimeter is set to AC voltage mode before connecting the probes to the circuit. Proper technique ensures accurate readings and enhances safety.
Choosing the right multimeter is crucial for accurate AC voltage testing. A multimeter helps ensure safety and precision in electrical tasks. Selecting one can be confusing due to numerous options available. Understanding the differences and features simplifies this decision. Let’s dive into the essential aspects of choosing a multimeter.Digital Vs Analog Multimeters
Digital multimeters are often preferred for their precise readings. They display values in numbers, making them easy to read. Analog multimeters use a needle to indicate values on a scale. This can be less precise but offers visual feedback. Digital models are generally more user-friendly for beginners. Analog multimeters might suit those who prefer traditional tools.Features To Look For
Consider the range of AC voltage the multimeter can measure. Ensure it covers the voltage levels you work with. Look for clear display screens for easy reading. Backlit screens help in low-light conditions. Auto-ranging features simplify the measurement process. They automatically select the correct range for you. Check for robust build quality for durability. Safety ratings, like CAT ratings, indicate the multimeter’s protection level. Choose one with a higher safety rating for better protection. Accessories like test leads and probes are essential. Ensure they are durable and well-insulated.Setting Up The Multimeter
Testing AC voltage with a multimeter is a skill every DIY enthusiast should master. It starts with setting up the multimeter correctly. This step ensures accurate readings and prevents damage to your device. Imagine you’re about to bake a cake; you’d first gather all the right ingredients. Similarly, setting up your multimeter is the foundation for successful measurements.
Adjusting The Dial
First, locate the dial on your multimeter. You’ll want to set it to AC voltage—often denoted by a V with a tilde (~). This setting is crucial because it distinguishes AC from DC voltage, which have different behaviors. Ever tried measuring temperature using a scale designed for weight? Setting the dial correctly is just as essential.
Choose a range higher than the expected voltage. If you’re measuring a standard household outlet, set the dial to at least 200 volts. This prevents overload and keeps your readings precise. Think of it as choosing a large enough cup for your drink; you don’t want it to overflow!
Connecting The Leads
Next, connect the leads to the multimeter. The black lead goes into the common (COM) port, while the red lead fits into the port marked for voltage—often labeled VΩ. This setup is akin to connecting your phone charger correctly; without it, nothing works.
Ensure the leads are in good condition. Frayed or broken leads can lead to inaccurate readings or even accidents. Have you ever used a worn-out phone charger that only works when positioned just right? It’s similar to ensuring your leads are intact.
Take a moment to double-check everything. Are the leads connected securely? Is the dial set correctly? This small act can save you from potential errors. Consider this: Would you leave for a trip without checking your car’s fuel gauge? Similarly, ensuring your multimeter is set up properly is essential for reliable measurements.
Setting up a multimeter may seem simple, but it’s a crucial step in testing AC voltage safely and effectively. Have you ever wondered why small mistakes can lead to big problems? Precision in setup is your first defense against inaccurate readings and equipment damage.
Testing Ac Voltage
Testing AC voltage with a multimeter is a crucial skill for anyone dealing with electrical systems. Whether you’re a seasoned electrician or a DIY enthusiast, understanding how to measure AC voltage can prevent potential mishaps and ensure your projects go smoothly. Imagine you’re about to install a new light fixture, but you’re unsure if the current wiring is functional. Knowing how to test AC voltage can save you time and frustration. Let’s dive into the practical steps of locating the voltage source and taking the measurement effectively.
Locating The Voltage Source
First, identify where the voltage is coming from. Check the circuit breaker panel or electrical outlets. You might find yourself wondering, “Is this the right spot to test?” Ensure your multimeter is set to AC voltage. It’s a simple setting, but missing it can lead to incorrect readings. Remember the time you spent puzzling over why the multimeter wasn’t working? Double-checking settings can prevent such confusion.
Next, take a look at the manual for your multimeter. Understanding its specific functions will help you locate the source accurately. If the device has multiple ports, knowing which one to use is key. Have you ever plugged into the wrong port and wondered why there’s no reading? Avoid this by familiarizing yourself with your device.
Taking The Measurement
Once the source is identified, proceed to measure the voltage. Place the probes correctly—red to the live wire and black to the neutral or ground. This might sound straightforward, but it’s easy to mix them up. The first time you measure, double-check your probe placement to prevent errors.
Observe the reading on your multimeter display. Is it showing the expected voltage range? Knowing the normal range for household outlets can help you spot anomalies. You’ve got the tools; now use them to confirm your wiring’s functionality. If the reading is off, consider checking connections or consulting an electrician.
Why is regular testing important? It ensures your electrical systems are safe and efficient. Have you ever faced an unexpected power outage and wondered if it could’ve been avoided? Regular checks can offer peace of mind. So, grab your multimeter and start measuring. What unexpected discovery will you make today?
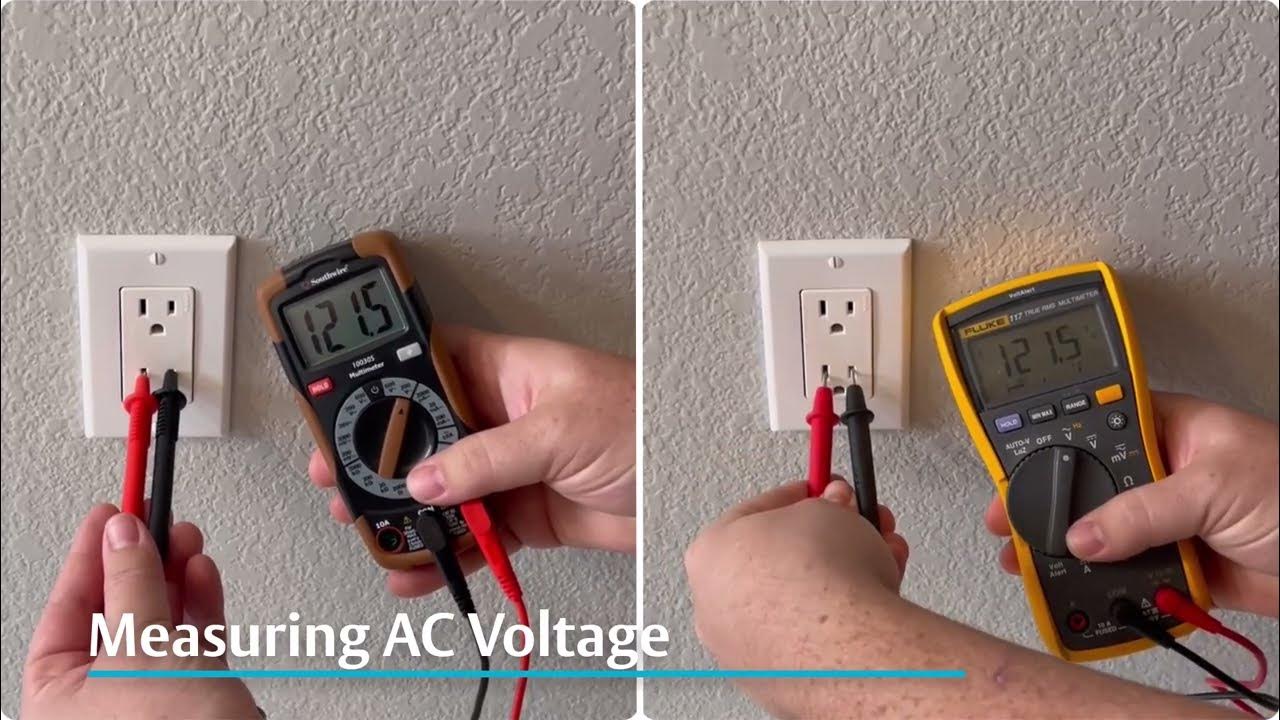
Credit: www.youtube.com
Interpreting The Results
Accurate interpretation of multimeter readings ensures safety and efficiency in testing AC voltage. Observe the display for correct voltage values. Compare results with expected ranges to identify electrical issues promptly.
Interpreting the results from your multimeter when testing AC voltage can feel daunting, but it doesn’t have to be. Once you’ve taken your measurements, the next step is understanding what those numbers mean. Let’s break it down so that you can not only read your results but also know what to do with them.Understanding Readings
When you glance at the multimeter screen, you’ll often see numbers that may not make immediate sense. Typically, AC voltage is measured in volts, and your multimeter will display this directly. If you’re testing a standard wall outlet, you might expect to see a reading around 110 to 120 volts in the United States. Consider the range you’re testing. If you find a significantly lower or higher number than expected, it might signal a problem. Remember when I tested an outlet and saw 85 volts? It turned out the wiring was faulty. Such experiences remind you to verify your readings and consider the context.Troubleshooting Common Issues
Occasionally, your multimeter might display an unexpected reading, or no reading at all. First, ensure your multimeter is set to measure AC voltage. It’s a simple mistake but can lead to confusion. Double-check your connections; sometimes, a loose probe can lead to inconsistent readings. If your multimeter shows zero or a very low reading, there might be an issue with your outlet or device. On a personal note, I once found a low reading and assumed it was the multimeter’s fault. After testing another outlet, I realized the first one was the problem. Always test a second source to confirm your results. Have you ever wondered why these variances occur? Sometimes it’s due to local electrical issues or even problems within your home’s wiring system. Engage with your results critically, and don’t hesitate to retest or investigate further if something doesn’t seem right.Maintaining Your Multimeter
Testing AC voltage with a multimeter ensures safe and accurate measurements. First, set the multimeter to AC voltage mode. Then, place probes on the terminals, reading the display for voltage levels. Regular maintenance of your multimeter guarantees reliable readings.
Maintaining your multimeter is crucial for accurate measurements. Proper care ensures it remains reliable and extends its lifespan. Regular maintenance prevents malfunctions and keeps the device in good condition.Cleaning Tips
Dirt and debris can affect your multimeter’s performance. Clean it regularly with a soft, dry cloth. Avoid using liquids or sprays directly on the device. If needed, slightly dampen the cloth with water. Keep the multimeter’s display and buttons dust-free. Use a small brush to remove debris from crevices.Battery Care
A multimeter’s accuracy depends on its battery. Check the battery level before each use. Replace the battery when the power is low. Remove the battery if you won’t use the multimeter for a long time. Store the device in a cool, dry place to prevent battery leakage. Use the recommended battery type for best performance.Additional Tips
Ensure the multimeter’s leads are in good condition. Use a stable surface to prevent inaccurate readings. Double-check the multimeter settings before testing.
Testing AC voltage with a multimeter can seem daunting, but with the right approach, it’s quite straightforward. Once you grasp the basics, there are a few additional tips that can enhance your skills and ensure precision. These tips will help you avoid common pitfalls and improve accuracy in your readings.Avoiding Common Mistakes
Mistakes can happen easily, especially if you’re new to using a multimeter. One common error is setting the multimeter to the wrong function or range. Always double-check that your multimeter is set to AC voltage before starting. Another mistake is not using the proper probes. Ensure the probes are intact and securely connected. A loose connection can lead to inaccurate readings or damage to the multimeter. Remember to check the multimeter’s battery. A low battery can affect its performance, leading to erroneous results. Keep spare batteries handy to avoid this issue.Enhancing Accuracy
Accuracy is key when testing AC voltage. To get precise measurements, use a multimeter with a true RMS feature. This capability allows for more accurate readings, especially in complex circuits. Consider calibrating your multimeter regularly. Calibration ensures your device is providing correct data, which is crucial for reliable measurements. Keep your workspace organized. A cluttered area increases the chance of errors. Have a designated area for tools and ensure wires are clearly labeled to avoid confusion. Have you ever wondered why some measurements feel off? It might be the environment. External factors like humidity or temperature can influence readings. Always test in a stable environment for the best results. Use these tips to improve your testing skills. With practice, you’ll become more confident and efficient in measuring AC voltage. Can you think of other ways to enhance your accuracy?
Credit: www.fluke.com
Frequently Asked Questions
How Do You Check Ac Voltage With A Multimeter?
Set the multimeter to AC voltage mode. Insert the probes into the sockets. Connect the probes to the voltage source. Read the displayed voltage.
What Is The Ac Voltage Symbol On A Multimeter?
The AC voltage symbol on a multimeter is typically a “V” with a wavy line (~) above or next to it. This icon represents alternating current measurements, distinguishing it from DC voltage. Ensure your multimeter is set to AC mode for accurate readings of household outlets or AC-powered devices.
How Do You Test 120v With A Multimeter?
Set the multimeter to AC voltage. Insert the black probe into the COM port and the red probe into the VΩmA port. Place probes on the hot and neutral wires. Read the display for the voltage. Ensure safety precautions while testing.
How To Detect Ac Voltage?
Use a multimeter set to AC voltage mode to detect AC voltage. Place probes on the circuit points. The multimeter displays the voltage reading, confirming the presence of AC voltage. Ensure proper safety precautions while handling electrical equipment.
Conclusion
Testing AC voltage with a multimeter is simple and safe. First, ensure your multimeter is set correctly. Always follow safety precautions to avoid electrical shock. Remember, practice makes perfect. Each test builds confidence and skill. Multimeters are handy tools for home projects.
Knowing how to use them can save time and money. Keep your multimeter in good condition. Check batteries and leads regularly. With these tips, you can handle basic electrical tasks with ease. Happy testing!




