Is your garage door acting up, leaving you puzzled and frustrated? You might be dealing with faulty sensors.
These small components play a crucial role in the safety and functionality of your garage door system. When they malfunction, it can disrupt your daily routine and even pose safety risks. But don’t worry—testing your garage door sensors with a multimeter is simpler than it sounds.
You don’t need to be an electrician to get the job done. With a little guidance, you can easily troubleshoot and ensure your garage door is operating smoothly. Dive into this guide and discover how to accurately test your garage door sensors using a multimeter, restoring peace of mind and security to your home. Curious to learn how? Keep reading to uncover the step-by-step process that will empower you to take control of your garage door’s health.
Tools Needed
Testing garage door sensors requires a multimeter and basic tools. A screwdriver is essential to access sensor wiring. Ensure safety gloves for protection during the testing process.
Testing garage door sensors with a multimeter might sound daunting, but with the right tools, it’s surprisingly straightforward. Before you dive into testing, gathering the necessary equipment is crucial. Equipped with the correct tools, you can ensure a smooth process and accurate results. Let’s explore what you’ll need to get started.1. Multimeter
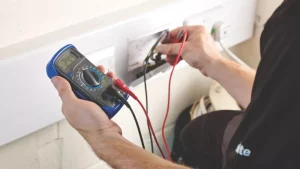
A multimeter is your primary tool for this task. It measures electrical properties like voltage, current, and resistance. Choose a digital multimeter with a clear display for easy reading. If you’re unfamiliar with using a multimeter, don’t worry. Most models come with user-friendly instructions.2. Screwdriver Set
Garage door sensors are typically housed within small, enclosed units. You’ll need a screwdriver to access these units. Ensure you have a set that includes both flathead and Phillips screwdrivers. These will help you remove screws without damaging the sensor casing.3. Safety Gloves
While testing electrical components, safety should be your priority. Use gloves to protect your hands from electrical shocks. They also help prevent accidental slips when handling small parts. Opt for gloves with a good grip to manage tools effectively.4. Cleaning Supplies
Before testing, it’s wise to clean the sensor area. Dust and debris can affect sensor performance. A soft cloth and some gentle cleaning solution will work wonders. Keeping the area clean helps ensure more accurate test results.5. Notebook And Pen
Recording your readings is crucial. Use a notebook and pen to jot down multimeter readings and observations. This helps keep track of any changes and makes troubleshooting easier. Plus, it’s a handy reference for future sensor checks. Having the right tools ready not only saves time but also boosts your confidence in tackling the task. Have you ever tried fixing something without the proper tools? It’s frustrating, isn’t it? With these essentials, testing garage door sensors will be a breeze. So, are you ready to gather your tools and take on the challenge?Safety Precautions
Testing garage door sensors requires careful handling. Safety is a top priority. Before you start, ensure you understand essential precautions. This process involves electrical components. Mishandling them can lead to accidents or damage. Follow these guidelines to keep yourself safe.
1. Turn Off The Power
Always disconnect power to the garage door. Locate the circuit breaker. Turn it off to prevent electrical shock. Ensure no power flows to the sensors during testing.
2. Use The Right Tools
Use a multimeter for accurate readings. Ensure it is in good condition. Verify its settings before use. Check that all connections are secure and stable.
3. Wear Protective Gear
Wear gloves to protect your hands. Safety goggles shield your eyes from debris. Proper clothing minimizes risks. Avoid loose garments that might catch on equipment.
4. Ensure Good Lighting
Work in a well-lit area. Proper lighting helps you see clearly. It reduces the risk of errors. Use additional lights if necessary.
5. Keep The Area Clear
Remove any obstacles around you. Keep tools and cables organized. A tidy workspace prevents trips and falls. It also makes the process smoother.
6. Avoid Wet Conditions
Do not test sensors in wet or damp areas. Water conducts electricity. It increases the risk of shock. Ensure the environment is dry before starting.
7. Understand The Multimeter
Read the multimeter manual. Understand its functions and settings. Familiarity prevents misuse. It ensures accurate results during testing.
Identifying Sensor Types
Garage door sensors are crucial for safety. They prevent accidents and damage. Testing these sensors ensures your door functions properly. Before testing, identify the sensor type. Different sensors require different testing methods. Understanding your sensor type helps in proper testing.
Understanding The Purpose Of Sensors
Sensors keep your garage door safe. They detect obstacles and stop the door. Knowing their purpose helps in identifying them. Garage doors often have photo-eye sensors. These are common in many systems.
Recognizing Photo-eye Sensors
Photo-eye sensors are easy to spot. They usually have small lights. These sensors are often found near the bottom of the door tracks. If the light beams are blocked, the door won’t close. Familiarizing yourself with their location helps in testing.
Identifying Other Sensor Types
Some doors have pressure sensors. These detect force on the door path. If the door hits an object, it reverses direction. Pressure sensors are embedded in the door edge. They look different from photo-eye sensors.
Checking Sensor Compatibility
Ensure your sensors are compatible with your multimeter. Not all sensors work with all tools. Read your sensor manual for compatibility details. This ensures accurate testing results.

Credit: www.youtube.com
Setting Up The Multimeter
Testing garage door sensors with a multimeter begins with setting up the device correctly. Adjust the multimeter to the appropriate setting, ensuring accurate measurement of voltage or continuity. Proper setup is crucial for obtaining reliable results during sensor testing.
Setting up your multimeter correctly is the first step in testing garage door sensors. It’s like prepping your toolkit before diving into a DIY project. A multimeter can be intimidating at first, but once you grasp the basics, it becomes a handy partner. Imagine the satisfaction of diagnosing issues precisely without the guesswork. Setting up the multimeter accurately can save you time and frustration. But how do you do it? Let’s break it down.Understanding Your Multimeter
First, familiarize yourself with the multimeter’s interface. Check the dial and buttons—each serves a unique function. Many multimeters have symbols that might seem cryptic. Grab a quick guide or online resource to decode them. It’s like learning a new language; once you master the basics, you’re ready to communicate effectively.Selecting The Correct Mode
Multimeters come with various modes like voltage, current, and resistance. For testing garage door sensors, you typically need the resistance mode. Set your multimeter to this mode using the dial. This selection is crucial—choosing the wrong mode can lead to inaccurate readings. Imagine trying to measure temperature with a speedometer—it won’t work!Connecting The Probes
Now, connect the probes to the multimeter. Insert the black probe into the common (COM) port and the red probe into the port marked for resistance. Proper connection ensures the device functions correctly. Picture this: you’re assembling a puzzle, and each piece must fit perfectly to complete the picture.Calibrating The Multimeter
Calibration is essential for accurate readings. To calibrate, touch the probes together and adjust the dial until the display reads zero. This step ensures your multimeter is ready for precise measurement. Think of it as setting your GPS before a road trip—you want the directions to be spot on.Testing The Multimeter
Before testing the sensors, check if your multimeter is working correctly. Test it on a known resistor to verify its accuracy. This step is like tuning a musical instrument before a concert—you want to ensure it’s in perfect pitch. Are you ready to test those garage door sensors confidently? With your multimeter set up, you’re equipped to tackle any challenges that come your way. Have you ever faced issues with your garage door? Share your experiences and let’s solve the mysteries together!Testing The Power Supply
Testing the power supply of garage door sensors is crucial. A multimeter helps you check if the sensors receive electricity. Without power, sensors cannot work correctly. This test ensures your garage door operates safely.
Check The Multimeter Settings
Set the multimeter to measure voltage. This setting checks the power supply. Ensure the multimeter is calibrated correctly. Proper calibration guarantees accurate readings.
Locate The Power Supply Wires
Find the wires connected to the sensors. These wires supply power. Ensure the wires are visible and accessible. This makes testing easier.
Measure The Voltage
Place the multimeter probes on the wires. The red probe touches the positive wire. The black probe touches the negative wire. Read the multimeter display for voltage levels.
Assess The Results
Check if the voltage matches the sensor’s requirements. Consult the sensor manual for correct voltage levels. Correct voltage means the power supply is sufficient.
Take Necessary Actions
If the voltage is incorrect, examine the power source. Consider replacing damaged wires. Ensure connections are secure and functioning.

Credit: www.youtube.com
Checking Sensor Alignment
Garage door sensors need accurate alignment to function properly. Use a multimeter to test their electrical connection. This ensures the sensors are working well and not causing issues.
When it comes to ensuring the safety and functionality of your garage door, checking the alignment of the sensors is a crucial step. Misaligned sensors can lead to a malfunctioning door, leaving your garage vulnerable. By using a multimeter, you can verify that the sensors are correctly aligned and functioning properly. This process not only safeguards your home but also saves you from unnecessary repair costs. Have you ever wondered if those small devices at the bottom of your garage door are working as they should?Understanding The Importance Of Sensor Alignment
The alignment of garage door sensors is key to the smooth operation of the door. These sensors act as the eyes of your garage door, ensuring it doesn’t close on anything in its path. When aligned correctly, they work seamlessly to protect your belongings and loved ones.Identifying Signs Of Misalignment
Do you notice your garage door reversing unexpectedly? Or perhaps it refuses to close entirely? These are signs that your sensors may be out of alignment. A quick visual inspection can often reveal if the sensors are off-kilter.Aligning The Sensors Manually
Start by inspecting the LED lights on the sensors. If one or both lights are off, alignment is likely the issue. Gently adjust each sensor until the lights are steady and solid. This simple fix can often resolve the problem.Using A Multimeter To Test Sensor Alignment
A multimeter is a handy tool for testing the electrical connection between the sensors. Begin by setting your multimeter to the voltage setting. Place the probes on the sensor’s terminals. Check for a consistent reading. If the multimeter shows fluctuating numbers, the sensors might still be misaligned or faulty.Ensuring Long-term Alignment
Once you’ve realigned and tested the sensors, it’s important to maintain their position. Regularly check the sensors for dust, debris, or any potential obstructions. Consider marking their position on the garage wall for easy reference in the future.When To Call A Professional
If your multimeter indicates a problem you can’t fix, or the door remains unresponsive, it may be time to contact a professional. Professional technicians have the tools and expertise to diagnose and repair complex issues. Have you aligned your garage door sensors before? What tips do you find helpful in ensuring they stay in place? Share your experiences in the comments below!Performing A Signal Test
Testing garage door sensors with a multimeter helps ensure safety. A signal test identifies any issues in sensor functionality. Properly functioning sensors prevent accidents and damage. Testing them regularly ensures peace of mind.
Check The Power Supply
First, ensure the sensors receive power. Locate the power supply wires. Use the multimeter to check voltage. Set the multimeter to the correct voltage setting. Connect the probes to the power terminals. The reading should show the expected voltage. If not, check the wiring or power source.
Inspect Sensor Connections
Examine the connections between the sensors and the garage door opener. Loose or corroded connections affect sensor performance. Ensure all wires are secure and clean. Use the multimeter to test continuity. Set the multimeter to the continuity setting. Touch the probes to the connection points. A beep or a reading indicates a good connection.
Test Signal Transmission
Verify the signal transmission between the sensors. Align the sensors properly. Use the multimeter to check signal strength. Set the multimeter to measure resistance. Place the probes on the signal wires. A consistent reading indicates proper signal transmission. Adjust the sensors if the reading fluctuates.
Evaluate Sensor Performance
Ensure the sensors react to obstructions. Place an object in the sensor path. Observe the garage door’s response. The door should stop or reverse. If not, recalibrate the sensors. Retest with the multimeter. Consistent performance ensures safety.
Interpreting Multimeter Readings
Interpreting multimeter readings can seem complex. Multimeters measure electrical values, helping diagnose garage door sensor issues. Understanding these readings is essential for effective troubleshooting.
Knowing the readings helps determine sensor health. A multimeter tells if sensors work correctly or need fixing.
Understanding Voltage Readings
Set the multimeter to measure voltage. Connect the probes to the sensor terminals. Note the voltage reading displayed. A healthy sensor shows specific voltage levels. Deviations might indicate problems.
Reading Resistance
Switch the multimeter to resistance mode. Place probes on the sensor terminals. Observe the resistance value. Proper functioning sensors have specific resistance ranges. An abnormal reading suggests a malfunction.
Checking Continuity
Select the continuity mode on the multimeter. Test the sensor circuit by connecting probes. Listen for a beep or look for a continuity indicator. Continuity confirms the sensor circuit is complete and functional.
Evaluating Sensor Output
Measure the output signals from the sensor. Set the multimeter accordingly. Connect it to the sensor output wires. The readings should match expected values for proper operation.
Identifying Faults
Abnormal readings often pinpoint sensor faults. Compare readings to standard values. Investigate further if readings show discrepancies. Faulty sensors may need replacement or repair.
Troubleshooting Common Issues
Testing garage door sensors with a multimeter can solve many issues. Start by setting the multimeter to measure resistance. Check the sensor wires for continuity to ensure proper function.
Testing garage door sensors with a multimeter can feel intimidating, especially when you’re faced with common problems. But don’t worry! Troubleshooting these issues is easier than you might think. With the right approach, you can diagnose and fix sensor problems, ensuring your garage door operates smoothly and safely.Understanding Sensor Malfunctions
Before diving into testing, let’s identify the types of issues you might encounter. Faulty sensors often lead to doors not closing properly. Sometimes, the door reverses unexpectedly. This can be frustrating and even dangerous.Checking Power Supply
First things first: ensure the sensors are powered. Use your multimeter to test if electricity is reaching the sensors. Set the multimeter to measure voltage. Connect it to the sensor’s power wires. You should see a reading. If not, there’s likely an issue with the power supply.Inspecting Sensor Alignment
Misalignment is a common culprit. Even a slight bump can knock sensors out of position. Check if both sensors are facing each other directly. Use a level if necessary. Adjust them until aligned. Proper alignment can resolve many sensor-related issues.Testing Sensor Functionality
Set your multimeter to the resistance setting. Check the sensor’s circuits. A working sensor will show a consistent reading. If the reading fluctuates or shows zero, the sensor might be faulty. Replace if necessary.Examining Wiring Connections
Loose or corroded wires can disrupt sensor function. Inspect all wiring connections. Tighten any loose ends. Clean corroded connectors with a wire brush. Ensuring stable connections can restore proper operation.Considering Environmental Factors
Sometimes, external factors affect sensor performance. Dirt, dust, or debris can block sensors. Regular cleaning can prevent this. Weather conditions like rain or snow might also interfere. Protect sensors with covers if needed.Reflecting On Personal Experience
I remember the first time my garage door refused to close. It turned out to be a simple alignment issue. A quick adjustment saved me time and frustration. What unexpected problems have you solved with a multimeter? Troubleshooting garage door sensors doesn’t have to be a daunting task. With these practical steps, you’re equipped to handle common issues confidently. Your garage door will thank you with smooth operation every time.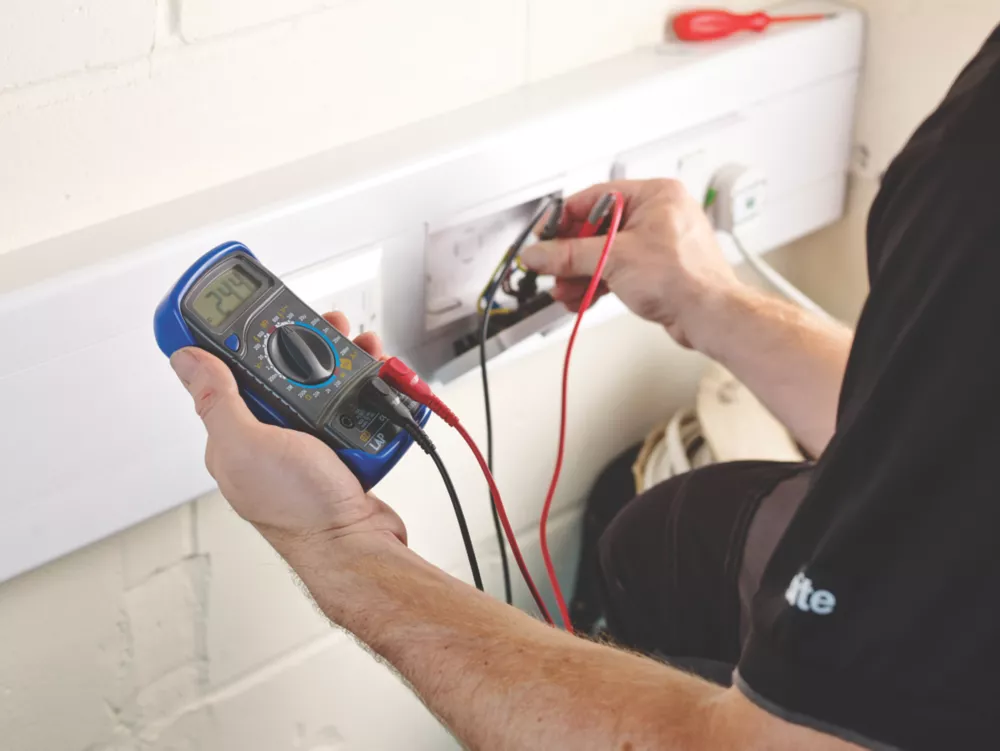
Credit: garage-door-ottawa.com
Maintaining Garage Door Sensors
Garage door sensors are crucial for safety. They prevent accidents by detecting obstacles. Regular maintenance ensures they function correctly. Dust and debris can affect their performance. Proper care extends their lifespan and reliability.
Testing with a multimeter helps identify sensor issues. This method checks electrical connectivity. It ensures sensors are operational. Regular tests prevent malfunctions. It keeps the garage door system safe and efficient.
Why Regular Maintenance Matters
Regular maintenance prevents sensor failures. Faulty sensors can cause accidents. They ensure the door reverses if obstructed. Without proper function, safety is compromised. Regular checks keep the system reliable.
Signs Your Sensors Need Attention
Look for blinking lights on the sensor. This indicates a problem. The door may not close properly. Strange noises can signal sensor issues. Routine inspections catch these signs early. Addressing them prevents further damage.
Cleaning Garage Door Sensors
Dust can block sensor signals. Clean sensors regularly with a soft cloth. Ensure no residue remains. Use gentle movements to avoid damage. A clean sensor works efficiently. It reduces false alerts and improves performance.
Testing Sensors With A Multimeter
A multimeter checks sensor voltage. It detects electrical flow issues. Connect the multimeter leads to sensor terminals. Measure the voltage to ensure functionality. Compare readings with recommended levels. This confirms sensor integrity.
Adjusting Sensor Alignment
Sensors must align for proper function. Misalignment disrupts signal transmission. Check sensor position regularly. Adjust them to face each other directly. Secure them tightly to prevent movement. Proper alignment ensures reliable detection.
Frequently Asked Questions
How To Test If Garage Door Sensors Are Bad?
Test garage door sensors by blocking their path. Ensure the door doesn’t close when obstructed. Check alignment and wiring. Clean lenses with a soft cloth. Listen for clicking sounds from sensors when aligned. If issues persist, consult a professional for further inspection.
How To Test Sensors With A Multimeter?
To test sensors with a multimeter, first set it to the correct measurement mode. Connect the probes to the sensor terminals. Measure voltage, resistance, or current as needed. Compare readings to manufacturer’s specifications to ensure the sensor functions correctly. Always ensure the multimeter is properly calibrated.
How Many Volts To Garage Door Sensors?
Garage door sensors typically use a low voltage of 12-24 volts. This ensures safe and efficient operation. It’s important to check your specific model for exact voltage requirements.
How Do I Reset My Garage Door Sensors?
Reset garage door sensors by cleaning them and ensuring they align properly. Check for obstructions. Unplug and reconnect them. Test functionality by closing the door. Ensure the sensors’ lights are steady. If issues persist, consult the manual or contact a professional.
Regular maintenance helps prevent sensor malfunctions.
Conclusion
Testing garage door sensors is simple with a multimeter. Follow the steps carefully. Ensure safety by disconnecting power first. Check sensor alignment for accurate readings. Verify the multimeter’s settings before use. Record any unusual readings for future reference. Regular testing keeps your garage door functioning safely.
It can prevent unexpected malfunctions. Understanding multimeter readings is essential. It helps identify sensor problems early. With practice, you’ll gain confidence in this process. Always prioritize safety and accuracy during tests. Regular maintenance ensures smooth operation and extends the life of your sensors.
Keep your garage door reliable with these tips.