
Imagine getting ready for a road trip, your bags packed, playlist curated, and snacks at the ready. You hop into your car, turn the key, and…nothing happens.
The culprit? A dead car battery. But here’s the secret weapon you didn’t know you needed: knowing how to test your car battery. This skill can save you from unexpected car troubles and keep your travel plans on track. In this guide, you’ll discover simple steps to check your battery’s health before it lets you down.
You don’t need to be a mechanic to do this—just a bit of curiosity and willingness to learn. By the end of this article, you’ll feel empowered and in control, knowing your car’s battery is reliable and ready for any adventure. Ready to ensure your car’s heart is beating strong? Let’s dive in.
Check Battery Terminals
Start by inspecting battery terminals for corrosion or dirt, which can affect performance. Clean them using a brush or cloth for better connection. Ensure terminals are tight to maintain reliable power flow during testing.
Checking your car battery terminals is a crucial step in ensuring your vehicle starts smoothly and runs efficiently. Many car troubles can be traced back to loose or corroded battery terminals. Taking a few minutes to inspect and clean these components can save you time and money in the long run. Let’s dive into how you can effectively check and maintain your battery terminals.Inspect The Terminal Connections
Start by popping the hood and locating the battery. Look for the terminal connections, which are typically capped with red (positive) and black (negative) covers. Ensure these connections are tight and secure. A loose terminal might cause intermittent starting problems, leaving you stranded unexpectedly.Look For Corrosion
Corrosion appears as a white, ashy substance around the battery terminals. This build-up can hinder the battery’s performance. Use a simple mixture of baking soda and water to clean it off. Apply the mixture with an old toothbrush, scrub gently, and wipe clean with a cloth. Remember to wear gloves to protect your hands.Tighten Loose Connections
After cleaning, check if the terminals are snug. Use a wrench to tighten any loose connections, but be careful not to overtighten. This step ensures a solid connection, preventing any loss of power. A friend once shared how a simple terminal tightening saved him from an expensive tow—don’t underestimate its importance!Apply Terminal Grease
Once everything is clean and tight, apply a thin layer of terminal grease. This grease helps prevent future corrosion and maintains a good electrical connection. It’s a small investment in time and resources that pays off by extending the life of your battery.Why Regular Checks Matter
You might wonder, is this really necessary? Regular checks can prevent unexpected breakdowns and increase the lifespan of your battery. Think of it as routine maintenance, much like changing your oil. You wouldn’t skip an oil change, so why neglect your battery terminals? Checking your car battery terminals isn’t just a task for mechanics. With a bit of attention and care, you can ensure your car runs smoothly. Next time you’re under the hood, give those terminals a quick check—you might just save yourself from a roadside headache.
Credit: www.youtube.com
Use A Multimeter
Testing your car battery with a multimeter ensures it’s in good shape. Set the multimeter to measure voltage, then connect the probes to the battery terminals. A reading between 12. 4 and 12. 7 volts indicates a healthy battery.
Testing your car battery with a multimeter is straightforward. This tool helps you check if your battery is healthy. It’s simple to use and gives accurate results. You don’t need to be a mechanic to understand it. Follow these steps to test your battery easily and quickly.Step 1: Gather Your Tools
First, get your multimeter. Make sure it works. You also need safety gloves. These protect your hands. A flashlight may help see in dark spots. This preparation ensures a smooth process.Step 2: Set Up The Multimeter
Set the multimeter to DC volts. Choose 20 volts if your multimeter has many options. This setting is ideal for car batteries. It allows accurate readings.Step 3: Connect The Multimeter
Locate your battery. Find the positive and negative terminals. Connect the red probe to the positive terminal. Connect the black probe to the negative terminal. This setup lets the multimeter measure voltage.Step 4: Read The Results
Look at the multimeter display. A healthy battery reads around 12.6 volts. Lower readings may mean your battery is weak. If it’s below 12 volts, consider charging or replacing it.Step 5: Interpret The Findings
Interpreting results helps plan the next steps. A voltage over 12.6 volts is great. If it’s between 12.4 and 12.6, your battery is okay. Below 12.4 volts indicates a problem. This may require further inspection.Perform Load Test
Testing your car battery involves a load test to check its health. This test measures how well the battery can hold a charge under heavy use. Ensure your vehicle is off and connect a load tester to the battery terminals.
Testing your car battery is crucial to ensure it’s in good working condition. A vital part of this process is performing a load test. This test helps you determine if your battery can maintain a charge under load, mimicking real-world conditions when your car is running. If you’ve ever turned the key in the ignition and heard nothing but a weak whir, you know how important it is to check your battery’s health regularly. Let’s dive into how you can do this with a load test.What Is A Load Test?
A load test measures your battery’s ability to deliver current while maintaining a stable voltage. It simulates the conditions when your car starts and runs all its electrical components. Think of it like a stress test for your battery to see if it can handle everyday demands.Tools You Need
To perform a load test, you’ll need a load tester, which you can purchase or rent from an auto parts store. You might also need safety gloves and goggles for protection. These tools are essential for handling your car battery safely and effectively.Step-by-step Guide To Perform A Load Test
First, ensure your car is off and parked in a safe, dry area. Safety should always come first. Next, connect the load tester to the battery terminals. The positive lead goes to the positive terminal and the negative to the negative. Secure the connections to avoid any mishaps. Then, apply the load by following the instructions on your tester. Usually, this involves turning a knob or pressing a button. The load should be about half the CCA (cold cranking amps) rating of your battery. Observe the voltage reading. If it drops below 9.6 volts, your battery may not be in good condition. A healthy battery should maintain a voltage above this threshold during the test.Interpreting The Results
If the voltage is above 9.6 volts, your battery is likely in good shape. However, if it’s lower, it may be time to consider a replacement. Have you ever thought about how a failing battery could leave you stranded? Checking these results can save you from unexpected hassles.Safety Tips
Always wear protective gear like gloves and goggles. Car batteries contain acid and can be dangerous if handled improperly. Avoid smoking or open flames near the battery. The gases released can be flammable, posing a risk of explosion. Testing your car battery with a load test not only gives you peace of mind but also extends the life of your vehicle. It’s a simple procedure that can prevent inconvenient breakdowns. So why not give your battery a quick check today?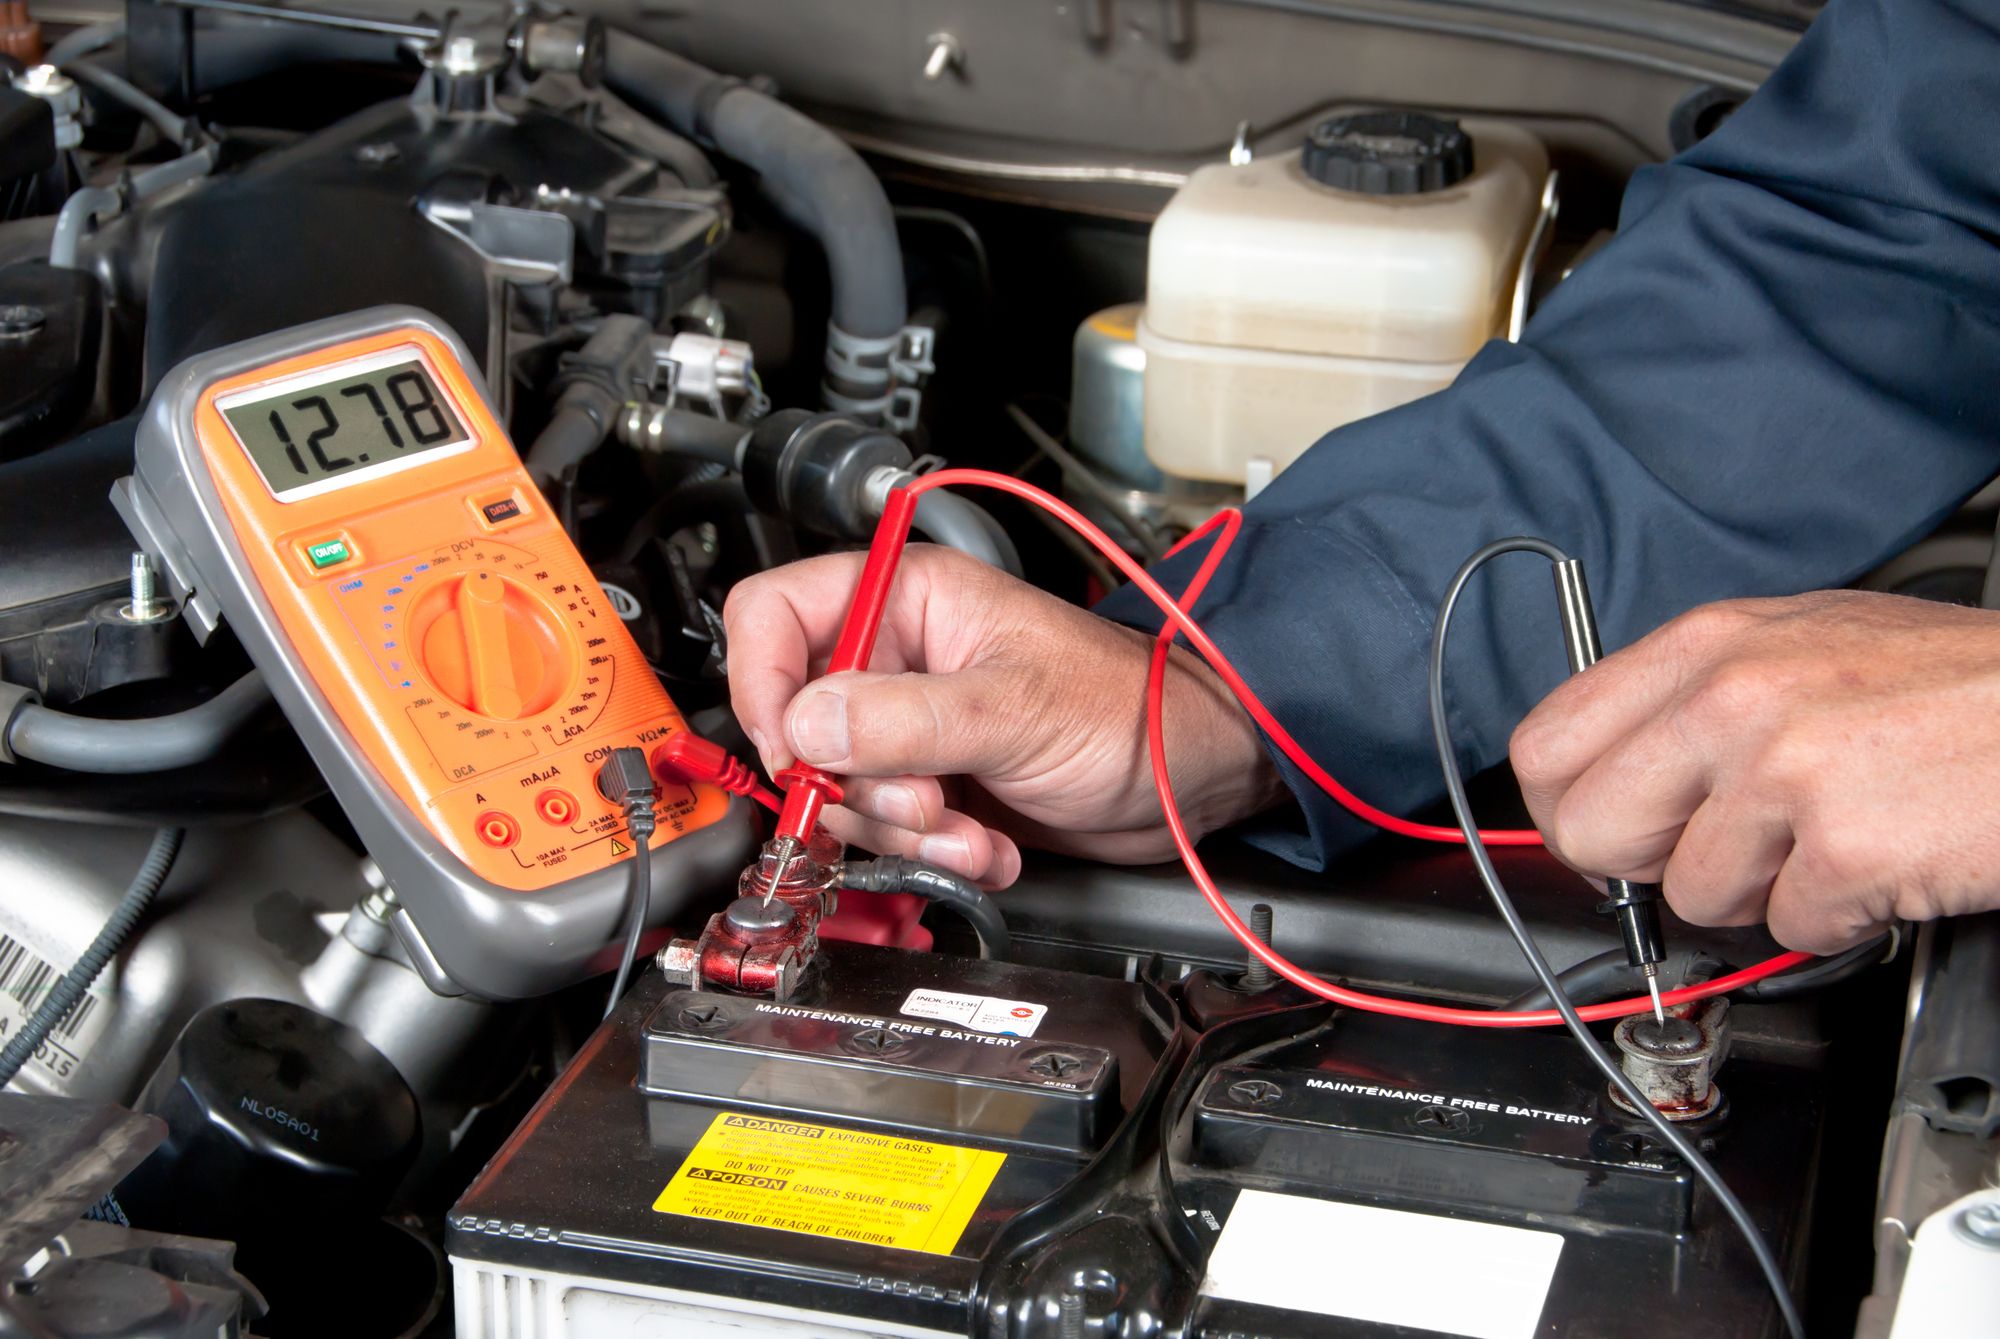
Credit: wrench.com

Credit: shop.advanceautoparts.com
Frequently Asked Questions
How Do I Check If A Car Battery Is Good?
Check the car battery with a multimeter. A healthy battery should read around 12. 6 volts or higher. Inspect for corrosion on terminals. Test under load by turning on headlights; dim lights may indicate a weak battery. Regular maintenance ensures optimal performance.
How Do I Tell If My Car Battery Needs Replacing?
Check for dim headlights or slow engine start. Listen for clicking sounds when turning the key. Inspect for corrosion around battery terminals. Notice if electronics malfunction or if the battery case is swollen. Test voltage; a reading below 12. 4 volts indicates replacement is needed.
How Can I Test My Car Battery Without A Tester?
Turn on the headlights and observe their brightness. Dim lights may indicate a weak battery. If lights are bright, the battery likely has a good charge. Check for corrosion on terminals, as it can affect performance. Ensure the battery is securely mounted and inspect for physical damage.
How To Test A Car Battery Yourself?
Use a multimeter to test your car battery. Set it to 20 DC volts. Connect the red probe to the positive terminal and the black probe to the negative terminal. A reading of 12. 4-12. 7 volts indicates a healthy battery.
Below 12. 4 volts suggests the need for charging or replacement.
Conclusion
Testing your car battery ensures smooth drives and avoids breakdowns. Regular checks can save you time and money. Follow the steps outlined for accurate results. Remember, a multimeter is your friend. Always prioritize safety by wearing gloves and goggles. If unsure, seek professional help.
A healthy battery powers your car efficiently. Keep it charged and clean. Replace it when necessary. This simple maintenance task can prevent many headaches. Stay proactive and enjoy a reliable vehicle. Your car and wallet will thank you.


