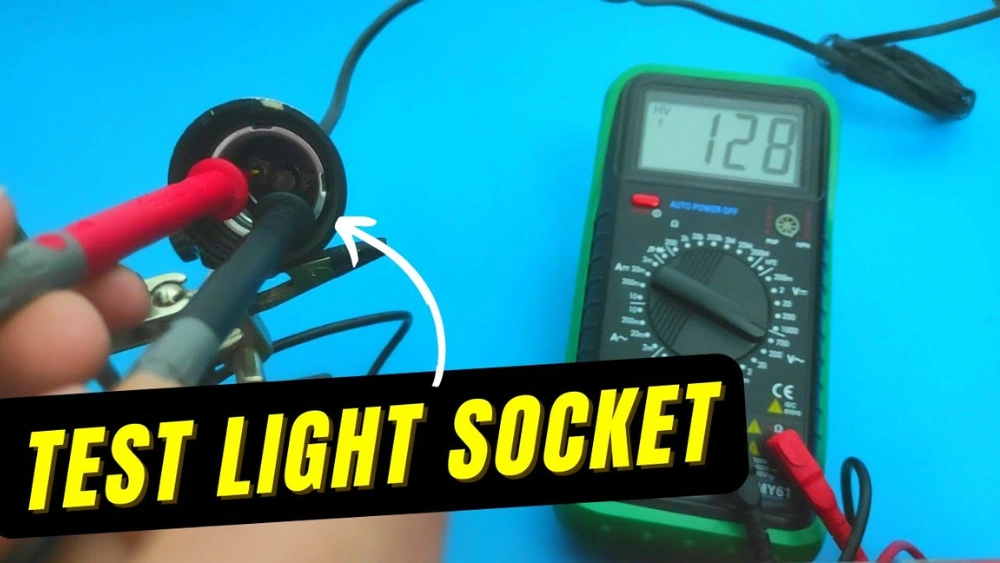
Have you ever flipped a switch, only to find the bulb doesn’t light up? It can be frustrating, especially when you’re unsure if the bulb or the socket is at fault.
But don’t worry, you don’t need to be an electrician to solve this mystery. With a multimeter, you can easily test a light socket and find out what’s going on. Imagine the confidence you’ll feel when you can troubleshoot electrical issues in your home without waiting for help.
In this guide, you’ll discover step-by-step instructions on how to test a light socket with a multimeter, empowering you to tackle those pesky lighting problems with ease and precision. Stay with us, and let’s shine a light on this simple but essential skill.
Credit: www.reddit.com
Tools Required
Testing a light socket with a multimeter is a straightforward task. You need the right tools to do it safely and effectively. Knowing what to have on hand makes the process smoother.
Multimeter
A multimeter is the primary tool required. It measures voltage, resistance, and continuity. Choose a digital multimeter for clear readings. Make sure it’s in working condition.
Safety Gear
Safety gear is crucial. Wear rubber gloves to avoid electrical shocks. Use goggles to protect your eyes from any sparks. Safety first, always.
Screwdriver
A screwdriver is necessary to remove the light socket cover. Choose one that matches the screw type. A Phillips or flat-head screwdriver will usually suffice.
Flashlight
A flashlight helps you see clearly in dim areas. It ensures you spot any issues in the socket. Keep it handy for better visibility.
Manual Or Guide
A manual or guide is useful. It offers step-by-step instructions. Make sure the guide matches your multimeter model.
Safety Precautions
Testing a light socket with a multimeter requires careful attention to safety. Electric currents can be dangerous. Always prioritize your safety during the process. Proper precautions help prevent accidents and ensure accurate results.
Wearing Protective Gear
Always wear protective gear when testing a light socket. Use rubber gloves to prevent electric shock. Safety glasses protect your eyes from sparks or debris. This gear is essential for your safety.
Turning Off Power
Switch off the power to the light socket. Locate the circuit breaker panel. Turn off the breaker linked to the socket. This step prevents electrical accidents.
Using Insulated Tools
Always use insulated tools when working with electricity. Insulated tools reduce the risk of electric shock. They provide an extra layer of protection.
Checking Multimeter Settings
Ensure your multimeter is set to the correct settings. Use the voltage setting for testing a light socket. This helps avoid inaccurate readings and potential damage.
Keeping The Work Area Dry
Ensure the work area is dry before testing. Water and electricity are a dangerous mix. A dry environment reduces the risk of electrical shock.
Setting Up The Multimeter
Properly setting up the multimeter is key to safely test a light socket. Begin by switching the multimeter to AC voltage. Connect the probes to the socket terminals. Carefully read the voltage displayed to ensure the socket is working correctly.
Setting up the multimeter is a crucial step. It ensures accurate readings when testing a light socket. Begin by understanding the multimeter’s various settings and functions. This will help you avoid errors.Choosing The Right Mode
First, identify the correct mode. Most multimeters have several modes. For testing a light socket, use the AC voltage mode. This mode measures alternating current, which is present in household sockets. Look for the symbol that resembles a wave. It signifies AC voltage. Selecting the right mode is essential for accurate results.Adjusting The Range
Next, adjust the range setting. Multimeters offer different voltage ranges. Choose a range higher than the expected socket voltage. In most homes, this is around 120 volts. Set the multimeter to a range above this. For example, select the 200 volts range. This prevents overloading the device and keeps readings precise. Always ensure your safety by setting the range appropriately.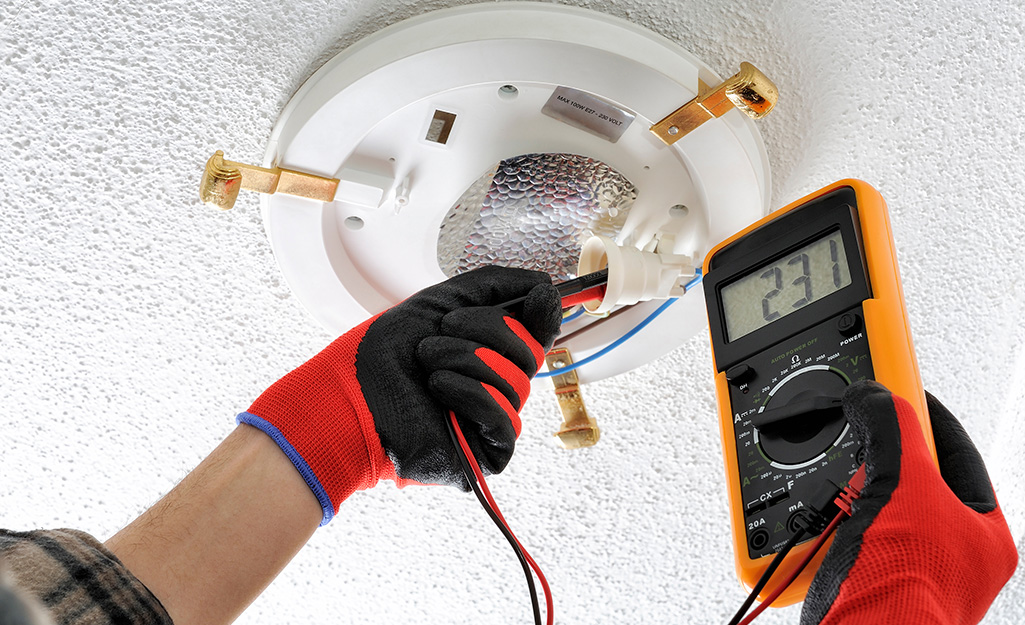
Credit: www.homedepot.com
Testing For Voltage
Testing a light socket with a multimeter ensures it delivers the right voltage. Set the multimeter to AC voltage. Insert probes into the socket’s terminals to read the voltage safely.
Testing a light socket for voltage is a straightforward task that ensures your electrical fixtures are working safely and efficiently. Using a multimeter, you can quickly check if your light socket is delivering the correct voltage. This can prevent potential hazards and save you the frustration of unnecessary repairs. By understanding how to test for voltage, you equip yourself with a practical skill that can be handy in maintaining your home. Let’s break down the steps and explore how you can confidently carry out this task.Connecting The Probes
Start by setting your multimeter to the AC voltage setting. This setting often shows a “V” with a wavy line. Ensure your light switch is turned on, and power is flowing to the socket. Hold the multimeter probes in your hands. Carefully insert the black probe into the neutral slot of the light socket, which is typically the wider slot. Next, place the red probe into the hot slot, the narrower one. Safety is paramount. Make sure your fingers are not touching the metal parts of the probes during this process. The multimeter will now display a voltage reading.Interpreting The Readings
A standard household light socket should read around 120 volts. If your multimeter shows this or a similar value, your socket is functioning correctly. Readings significantly lower than 120 volts may indicate a wiring issue. This could mean loose connections or faulty wiring, which requires professional attention. No reading or a zero value suggests a complete lack of power. Check if the circuit breaker has tripped or if there’s another power disruption. Ask yourself, is it time to call an electrician? By regularly checking your light sockets, you can catch issues early. This proactive approach can save you time and money, ensuring your home remains safe and well-lit.Testing For Continuity
Testing for continuity is vital for checking if a light socket works. It helps identify broken or incomplete circuits. A multimeter can easily perform this task. The process ensures that electricity flows properly. This step is essential for troubleshooting electrical problems.
Setting Continuity Mode
First, set your multimeter to continuity mode. Look for the soundwave symbol on the device. It often looks like a series of curved lines. Turn the dial to select this mode. This setting allows the multimeter to check electrical paths.
Ensure the multimeter is powered on. Check the display to confirm it’s in continuity mode. The screen may show a small icon. Once set, you’re ready to test the socket.
Steps To Test Continuity
Begin by unplugging the light socket from power. Safety is crucial during testing. Identify the socket’s terminals. These are metal parts where wires connect.
Next, connect the multimeter’s probes to the terminals. Place one probe on each terminal. Listen for a beep from the multimeter. A beep means the circuit is complete. No beep indicates a broken circuit.
Inspect the socket for damage if the circuit is incomplete. Check for loose wires or corrosion. Repair any faults before testing again. This ensures a safe and functional light socket.
Credit: www.homedepot.com
Troubleshooting Common Issues
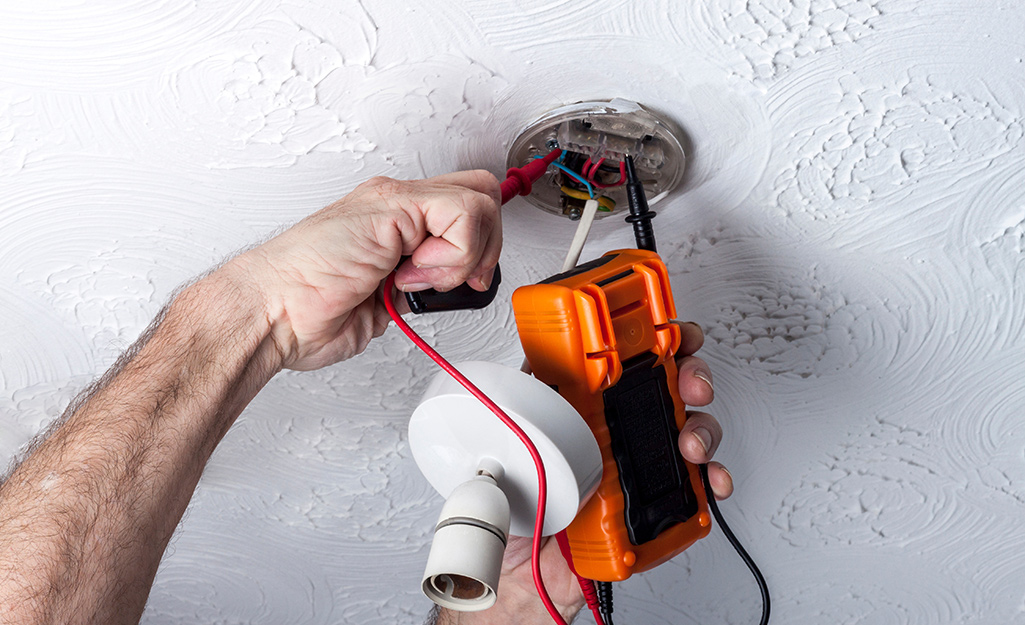
Testing a light socket with a multimeter involves checking for voltage and continuity. First, ensure the multimeter is set to AC voltage. Then, insert the probes into the socket slots to measure voltage. For continuity, turn off power and test across socket terminals.
Troubleshooting common issues with a light socket using a multimeter can save you time, money, and frustration. Sometimes, what seems like a complicated problem can be a simple fix. Understanding how to diagnose these issues can make all the difference in getting your lighting back on track. Let’s dive into some of the most frequent problems you might face.No Voltage Detected
If your multimeter shows no voltage when testing the light socket, don’t panic. First, ensure that the power to the light fixture is turned on. It might sound obvious, but sometimes circuit breakers trip, or switches are accidentally turned off. Check the connections in the fixture. Loose wires can prevent electricity from reaching the socket. Tighten any loose connections and test again. If there’s still no voltage, the issue might be further down the line, such as a faulty switch or a problem in the circuit itself.No Continuity Found
Finding no continuity can be puzzling, but it’s not the end of the road. Start by inspecting the socket for visible damage or corrosion. Corroded contacts can block the flow of electricity, stopping continuity. Clean the contacts gently with a small brush or a bit of sandpaper. If the socket is damaged, replacing it might be the best option. Have you ever thought about when you last replaced it? Sometimes, older sockets simply wear out and need a refresh. By addressing these issues step by step, you can solve many common light socket problems without needing professional help. Remember, patience and a methodical approach often lead to the best results.Maintenance Tips
Keeping your light socket in good condition is crucial. Regular maintenance ensures safety and prolongs the socket’s life. Testing a light socket with a multimeter can prevent potential hazards. Let’s explore some essential maintenance tips to keep your light socket functioning well.
Inspect For Physical Damage
Check the light socket for visible damage. Look for cracks, burns, or corrosion. Damaged sockets can cause electrical problems. Replace any socket showing significant wear to avoid risks.
Keep The Socket Clean
Dirt and dust can affect socket performance. Use a dry cloth to clean the socket. Avoid using water or liquids. Regular cleaning ensures a good electrical connection.
Check The Wiring
Inspect the wiring connected to the socket. Loose or frayed wires can be dangerous. Tighten any loose connections. Replace damaged wires promptly to ensure safety.
Use The Right Bulbs
Always use bulbs with the correct wattage. Exceeding the recommended wattage can damage the socket. It can also pose a fire risk. Follow the manufacturer’s guidelines for safe usage.
Test The Socket Regularly
Use a multimeter to test the socket’s voltage. Regular testing can detect issues early. It helps in maintaining the efficiency of the socket.
Schedule Professional Inspections
Consider having an electrician inspect your sockets periodically. Professionals can spot problems you might miss. This ensures your electrical system remains safe and reliable.
Frequently Asked Questions
How Do You Test A Light Socket With A Multimeter?
To test a light socket, set the multimeter to AC voltage. Insert probes into the socket’s slots. A reading between 110-120V indicates the socket works. Always ensure the power is on and handle with care.
How To Tell If A Light Socket Is Bad?
Check for flickering or non-working bulbs. Inspect for burn marks or corrosion on the socket. Ensure tight connections. Consider using a multimeter to test voltage. If issues persist, replace the socket.
Can You Test A Socket With A Multimeter?
Yes, you can test a socket with a multimeter. Set it to AC voltage mode. Insert the probes into the socket slots to measure voltage. Ensure the multimeter reads the expected voltage level. Always take necessary safety precautions while testing electrical sockets.
How Much Voltage Should A Light Socket Have?
A standard light socket typically uses 120 volts in the US. In many other countries, it uses 220-240 volts. Always check your local electrical standards and ensure compatibility to prevent hazards.
Conclusion
Testing a light socket with a multimeter is simple. Follow the steps carefully for safety. Ensure the multimeter is set correctly. Check for power and continuity. This confirms if the socket works. A faulty socket needs repair. Regular checks prevent electrical issues.
Stay safe while handling electricity. Remember, practice makes it easier. With time, confidence grows. Always prioritize safety first. Proper tools make the job simpler. Share this knowledge with others. It helps everyone stay safe. Testing sockets improves home safety. Now you’re ready for the task.




