Are you struggling to make the perfect hole in stainless steel without ruining your tools or the material itself? You’re not alone.
Drilling through stainless steel can feel like a daunting task, especially if you’re worried about damaging your drill bits or ending up with a less-than-perfect result. But don’t worry; you’ve come to the right place. In this guide, you’ll discover simple, step-by-step techniques to drill a hole in stainless steel with ease.
Whether you’re a DIY enthusiast or a professional looking to refine your skills, this article will provide you with all the tips and tricks you need to achieve precision and efficiency. Keep reading to learn how to tackle this challenge like a pro and transform your projects from frustrating to flawless.
Choosing The Right Drill Bit
Drilling stainless steel requires choosing the right drill bit. Cobalt or carbide-tipped bits work best. These bits resist heat and maintain sharpness. Use slow speed and steady pressure for effective results.
Choosing the right drill bit for stainless steel can make all the difference between a smooth, efficient drilling process and a frustrating, tool-destroying experience. Stainless steel is renowned for its durability and resistance to corrosion, but these properties also make it tough to drill. Without the right tools, you might find yourself stuck, or worse, with a broken drill bit. So, how do you ensure your drilling task is a success? It starts with selecting the correct drill bit.Types Of Drill Bits For Stainless Steel
Not all drill bits are created equal, especially when it comes to tackling tough materials like stainless steel. Cobalt drill bits are a popular choice due to their ability to withstand high temperatures and retain sharpness. They are made of high-speed steel with a cobalt alloy, which gives them a longer lifespan compared to standard bits. Carbide-tipped drill bits are another excellent option. They offer exceptional cutting speed and are perfect for repetitive drilling tasks. However, they can be brittle, so you’ll need to handle them with care. On the other hand, titanium-coated drill bits provide a good balance between durability and cost-effectiveness, making them suitable for occasional use.Coating And Material Considerations
The material and coating of your drill bit play a crucial role in its performance. Cobalt drill bits are not coated; they are made entirely of a cobalt alloy, which makes them excellent for stainless steel. They can cut through the metal effortlessly, reducing the risk of overheating. Titanium-coated drill bits are made from high-speed steel and then coated with titanium. This coating reduces friction and heat buildup, extending the bit’s life. However, once the coating wears off, the bit’s effectiveness diminishes. Have you ever found yourself frustrated with a broken drill bit? It’s often because the wrong bit was used. Understanding the material and coating of your drill bit can prevent such mishaps and save you time and money. Are you ready to tackle your stainless steel project with confidence? Choosing the right drill bit is your first step to success.Preparing The Work Area
Ensure your work area is clean and organized before drilling into stainless steel. Keep tools within reach. Secure the steel firmly to prevent slipping, using clamps or a vise for safety.
Drilling a hole in stainless steel can seem daunting, but with the right preparation, it becomes a manageable task. Before you start, focus on setting up your work area properly. A well-organized workspace is your first step to ensuring precision and safety. Let me share a personal tip: once, I rushed into drilling without preparing my space, and I ended up damaging both the drill bit and the steel. Trust me, taking the time to prepare makes all the difference.Ensuring A Safe Environment
Safety should be your top priority. Start by clearing your workbench of any clutter. You need space to maneuver without obstacles. Use protective gear like safety glasses and gloves. Stainless steel shards can be sharp. Ensure good lighting. You want to see clearly what you’re doing. Double-check your equipment, ensuring they are in good working condition. A faulty drill can lead to accidents. Consider ventilation. Drilling can produce metal dust and fumes. Is your workspace well-ventilated? A fan or open window can help.Securing The Stainless Steel
Next, focus on securing the stainless steel. A stable piece is easier to drill accurately. Use clamps to hold the steel firmly in place. Clamps prevent movement and ensure precision. Check the positioning. Is your steel positioned correctly for the intended hole? Misalignment can lead to errors. Consider using a scrap piece of wood beneath the steel. This provides additional support and protects your workbench from damage.Preparing your work area with these steps sets the stage for a successful drilling experience. What do you think is the most challenging part of drilling stainless steel?
Marking The Drilling Spot
Drilling a hole in stainless steel might seem daunting, but it becomes much simpler when you know exactly where to start. The key is precise marking of the drilling spot. This step ensures accuracy and prevents any costly mistakes. You wouldn’t want to ruin that shiny, expensive sheet of stainless steel, right? So, let’s dive into the essential techniques for marking that perfect spot.
Using A Center Punch
Imagine trying to drill into a slippery surface. Frustrating, isn’t it? Using a center punch can solve this problem. It creates a small indentation on the stainless steel, preventing the drill bit from wandering.
Grab your center punch and position it exactly where you want the hole. A quick tap with a hammer should leave a noticeable dent. This small step can save you from a lot of headaches later.
Ask yourself, have you ever felt the drill bit slipping around before it catches? This simple tool ensures your drill starts right where you intend. It’s a game-changer for precision.
Measuring And Marking Techniques
Accuracy is crucial, especially when working with stainless steel. Start by measuring the exact spot using a ruler or a tape measure. Double-check your measurements, it’s always better to be safe than sorry.
Once you’ve measured, mark the spot using a permanent marker or a scribe. The mark needs to be visible and clear. This ensures you’re drilling exactly where you intended.
Consider marking spots with a numbering system if you’re drilling multiple holes. It helps keep things organized and prevents confusion. Ever faced a mix-up in measurements? This technique could be your lifesaver.
Remember, precision is your best friend when it comes to drilling in stainless steel. A little effort in marking can save you from big troubles down the road.

Credit: www.familyhandyman.com
Setting Up The Drill
Drilling into stainless steel requires precision and patience. Start by securing the material firmly to prevent movement. Use a cobalt drill bit and apply steady pressure, ensuring constant lubrication to reduce friction and heat.
Drilling a hole in stainless steel might seem daunting, but with the right setup, it can be a straightforward task. Setting up your drill correctly is crucial to ensure precision and avoid damage to your tools. Whether you’re a DIY enthusiast or tackling a professional project, understanding how to prepare your drill for stainless steel can save you both time and frustration.Adjusting Drill Speed
The speed of your drill is a vital factor. Stainless steel is tough, and drilling through it requires a slower speed. High-speed drilling can generate excess heat, which can dull the drill bit. So, how slow should you go? A good rule of thumb is to keep the speed between 300 and 1000 RPM, depending on the size of the drill bit. Larger bits require slower speeds. Always start slow and increase the speed gradually to find the sweet spot.Choosing The Right Lubricant
Lubrication is your best friend when drilling stainless steel. It reduces friction, minimizes heat, and prolongs the life of your drill bits. You might wonder, what lubricant should you use? Common options include cutting fluid or even simple options like motor oil. Apply it generously to the drill bit and the surface of the steel. This prevents overheating and ensures a smoother drilling process. Have you ever experienced a drill bit breaking mid-task? This often happens due to inadequate lubrication. So, keep your drill bits well-oiled to avoid such mishaps. Setting up your drill correctly not only makes the process efficient but also protects your tools. Are you ready to take on the challenge of drilling through stainless steel? With the right preparation, you’re more than capable.Drilling Process
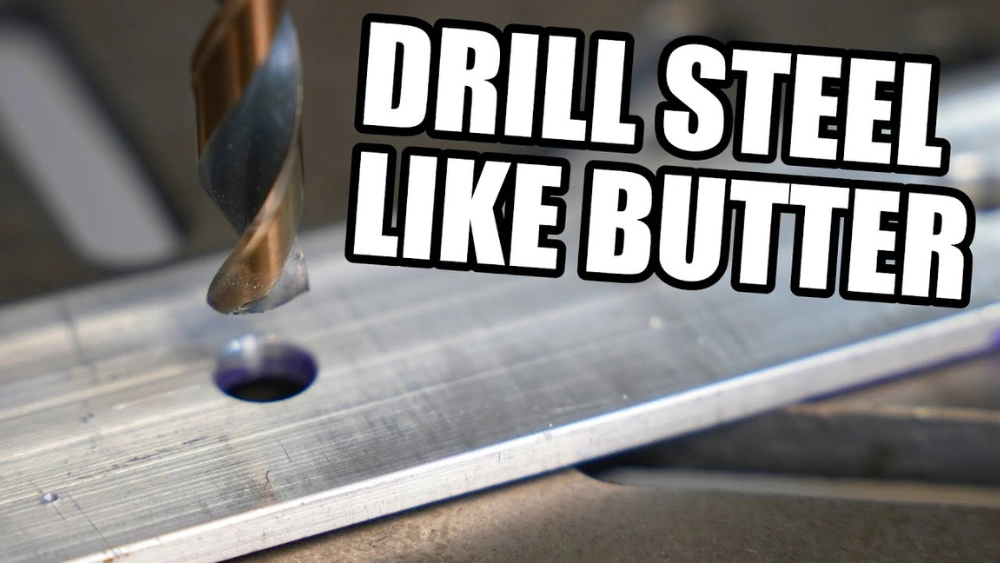
Drilling a hole in stainless steel might sound daunting, but with the right approach, it becomes manageable. The key to success is understanding the drilling process. This involves precise techniques and patience. Let’s dive into the specifics to make your next drilling task smoother and more efficient.
Starting With A Pilot Hole
Before you grab the largest drill bit, consider starting with a pilot hole. A pilot hole is a small, preliminary hole that guides the larger bit. This technique reduces the risk of the drill bit slipping and scratching your stainless steel.
I once tried to drill directly with a large bit and ended up with a messy, imprecise hole. Creating a pilot hole saved time and reduced frustration. A smaller bit, typically around 1/8 inch, works well for this initial step.
Have you thought about how much easier it is to control a smaller drill bit? It’s like drawing a sketch before painting—careful preparation leads to a better outcome.
Applying Steady Pressure
Once you have your pilot hole, the next step is crucial: applying steady pressure. Stainless steel is tough, so patience and consistency are your allies. Pressing too hard can overheat the drill bit, while too light a touch might not cut effectively.
Remember the time I rushed and ended up overheating the bit, damaging both the drill and the metal? Slow and steady wins the race here. Aim to maintain a consistent speed and pressure to keep the drill bit cool and efficient.
Have you ever felt the satisfaction of metal shaving curling away from a clean cut? That’s the result of balanced pressure and speed.
By following these steps—starting with a pilot hole and applying steady pressure—you can achieve clean, precise holes in stainless steel. What will you drill next?
Cooling And Lubrication
Drilling stainless steel requires cooling and lubrication to prevent overheating and tool damage. Use cutting oil to keep the drill bit cool. This helps in maintaining the sharpness and efficiency of the drill.
Drilling a hole in stainless steel requires skill. Cooling and lubrication play a crucial role. They protect the drill bit and ensure a smooth process. Without proper cooling, the drill bit can overheat. Lubrication minimizes friction and wear.Importance Of Cooling
Cooling is essential in drilling stainless steel. It helps prevent the drill bit from overheating. Overheating can cause the bit to dull or break. Cooling also extends the life of the drill bit. It ensures a cleaner and more precise hole.Types Of Lubricants
Different lubricants suit various drilling needs. Oil-based lubricants are common. They provide excellent heat dissipation. Water-based lubricants are also effective. They offer cooling and are easy to clean. Paste lubricants are another option. They stick well to the drill bit. Each type serves a specific purpose. Choose the right one for your task.Avoiding Common Mistakes
Drilling into stainless steel requires patience and precision. Use a sharp drill bit designed for metal. Apply steady pressure and coolant to prevent overheating.
Drilling a hole in stainless steel can be a daunting task, especially if you’re not familiar with the material’s unique properties. As someone who once found themselves frustrated with broken drill bits and scorched metal, I can assure you that avoiding common mistakes is key. Let’s dive into some practical steps to help you tackle this task effectively and efficiently.Preventing Overheating
Overheating is a frequent issue when drilling into stainless steel. It can lead to damaged drill bits and a poor finish on your workpiece. To avoid this, you should maintain a slow and steady drilling pace. High speeds generate excessive heat which can quickly damage your equipment. Use a cutting fluid to keep the bit cool. You can purchase cutting oil or simply use a bit of household oil if you’re in a pinch. Regularly apply it to the drill bit and the surface to minimize friction. If you notice smoke or a burning smell, stop immediately. Let the metal cool down before continuing. This not only saves your drill bit but also ensures a cleaner hole.Avoiding Bit Slippage
Bit slippage is another common problem that can lead to frustrating results. It often happens when the drill bit lacks grip on the surface. Start by using a center punch to create a small dent at the drilling spot. This gives the bit a guide to follow. Ensure your drill is equipped with the appropriate bit for stainless steel. High-speed steel (HSS) or cobalt bits are ideal for this material. They provide better grip and durability. If you’ve ever felt the drill bit wander across the surface, you know how annoying it can be. Apply firm pressure to keep the bit steady and aligned with your guide mark. Have you tried any of these methods before, or do you have other tips to share? Your experiences could be just what another reader needs to succeed.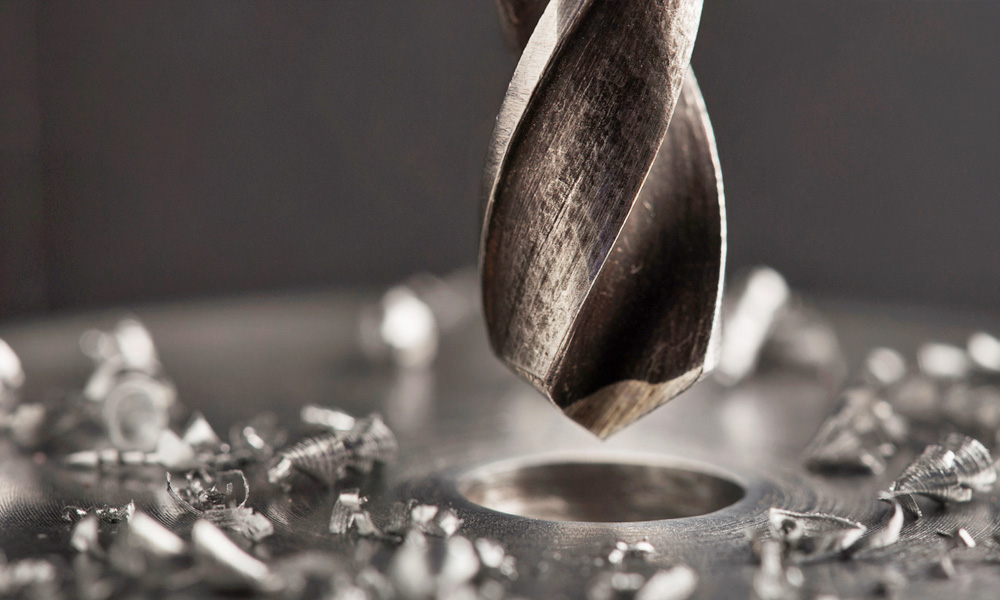
Credit: anchorlube.com
Post-drilling Steps
Clean the stainless steel surface after drilling to remove metal shavings. Apply rust-preventive oil to the drilled area. Ensure the hole is smooth by gently sanding any rough edges.
Drilling a hole in stainless steel is just the beginning. Post-drilling steps are vital to ensure your project is clean, accurate, and safe. After you’ve successfully drilled, it’s important to pay attention to the details that come next. These steps can significantly affect the outcome of your work. Think of them as the finishing touches that make all the difference.Cleaning The Drilled Hole
Once the drilling is complete, it’s crucial to clean the hole thoroughly. Stainless steel can accumulate debris and metal shavings during the drilling process. Use a soft brush or a can of compressed air to remove these particles. This step prevents any interference with the bolt or screw you plan to use. Don’t you hate it when a project doesn’t fit just right because of leftover debris? A clean hole ensures a snug fit and smooth operation.Inspecting For Burrs And Debris
After cleaning, inspect the hole for burrs and residual debris. Burrs are tiny metal fragments that cling to the edges. They can cause issues during assembly or even injury if left unchecked. Use a deburring tool to smooth out these rough edges. This tool helps ensure the hole is safe to handle and ready for its intended use. Imagine the satisfaction of a perfectly drilled and deburred hole; it’s a small detail that completes your task with finesse. Doesn’t it feel great when you tackle the nitty-gritty and know your project is flawless? Addressing these post-drilling steps can save you time and frustration down the line. They transform a simple drilled hole into a clean and polished part of your work.Safety Precautions
Drilling into stainless steel requires extra care. It’s tougher than regular metal. Safety precautions are vital. They prevent accidents and ensure a smooth process. Without them, you might face injuries. Or damage your tools. Always prepare before you start. Safety is the first step to success.
Protective Gear
Wearing the right protective gear is crucial. Start with safety goggles. They shield your eyes from flying particles. Use gloves to protect your hands from sharp edges. A dust mask keeps harmful particles out of your lungs. Ear protection is necessary too. Drilling can be noisy. Protecting your ears is important for your hearing.
Handling Tools Safely
Handle your tools with care. Secure the stainless steel firmly before drilling. This prevents slipping. Use a steady hand. Keep your drill bit sharp and clean. A dull bit can cause accidents. Ensure your workspace is tidy. Clutter can lead to mishaps. Always check your tools before use. Ensure they are in good condition. Faulty tools are dangerous. Proper handling reduces risk.

Credit: www.youtube.com
Frequently Asked Questions
What Type Of Drill Bit Is Best For Stainless Steel?
Cobalt drill bits are ideal for stainless steel. They offer durability and heat resistance. High-speed steel (HSS) drill bits with a titanium coating also work well. Always ensure proper lubrication and low speed to prevent overheating.
What Is The Easiest Way To Drill A Hole In Stainless Steel?
Use a cobalt drill bit for stainless steel. Apply cutting oil to reduce friction and heat. Drill at a slow speed with steady pressure. Secure the stainless steel sheet to prevent movement. Maintain consistent drilling pressure to achieve a clean hole without damaging the material.
Do You Need A Special Drill Bit To Drill Into Stainless Steel?
Yes, a special drill bit is needed for stainless steel. Use cobalt or titanium-coated bits for best results. These bits resist heat and maintain sharpness, ensuring precise drilling. Lubricate the bit to reduce friction and prevent damage. Always drill at low speeds for optimal performance.
Why Won’t My Drill Bit Go Through Stainless Steel?
Your drill bit may not penetrate stainless steel due to insufficient hardness or incorrect type. Use a cobalt or titanium drill bit, as they are designed for harder materials. Ensure proper speed and pressure to avoid overheating. Lubricate the bit to reduce friction and enhance performance.
Conclusion
Drilling stainless steel takes care and the right tools. Start with a sharp drill bit. Use a low speed to avoid overheating. Apply consistent pressure for a clean hole. Lubricate often to reduce friction and heat. Always wear safety gear while drilling.
Stainless steel is tough, but patience helps. Practice makes perfect. With these tips, you can drill like a pro. Keep your drill bit sharp and cool. Stay safe and get the job done. Happy drilling!


